
Safari Van AWD V6-262 4.3L VIN W CPI (1992)
Distributor: Service and Repair
Removal & Installation
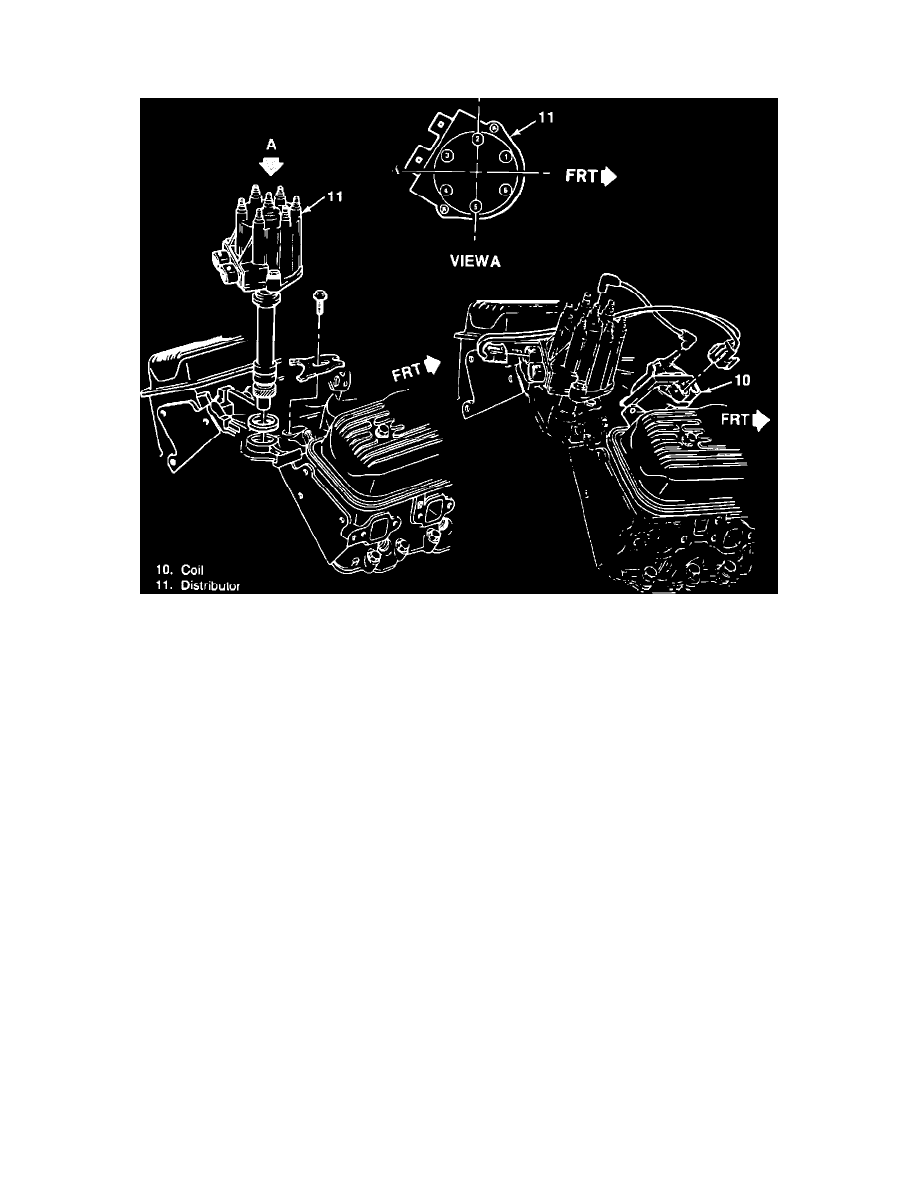
Distributor And Coil 4.3L Engine
REMOVE/DISCONNECT
NOTE Verify ignition switch is "OFF".
1. Wiring harness connectors at side of distributor.
2. Coil wire and sparkplug wires on either left or right side of distributor.
3. Distributor cap by two screws and set to side:
- Bring engine to TDC on the compression stroke for #1 cylinder and align timing marks to 0~ .
- Scribe a mark on distributor housing in line with rotor.
- Scribe a mark on engine in line with rotor.
- Note position of distributor housing in relation to engine.
4. Remove distributor bolt hold-down clamp, raise distributor noting rotor rotation, then remove distributor and gasket (if applicable). Do not rotate
crankshaft with distributor removed from engine.
INSTALL/CONNECT
NOTE To ensure correct timing of distributor it must be installed with rotor correctly positioned as noted in Step 3 of the removal procedure. Line up
rotor, mark on distributor housing, and mark on engine.
If distributor shaft won't drop into engine, insert a screwdriver into cavity for distributor and turn oil pump driveshaft.
1. Distributor and gasket (if applicable).
2. Hold-down clamp and tighten bolt to 34 Nm (25 lb. ft.).
3. Distributor cap.
4. Wiring harness connectors at side of distributor.
5. Sparkplug wires and coil wires.
6. Check engine timing.