
Safari Van AWD V6-262 4.3L VIN W CPI (1992)
Control Arm Bushing: Service and Repair
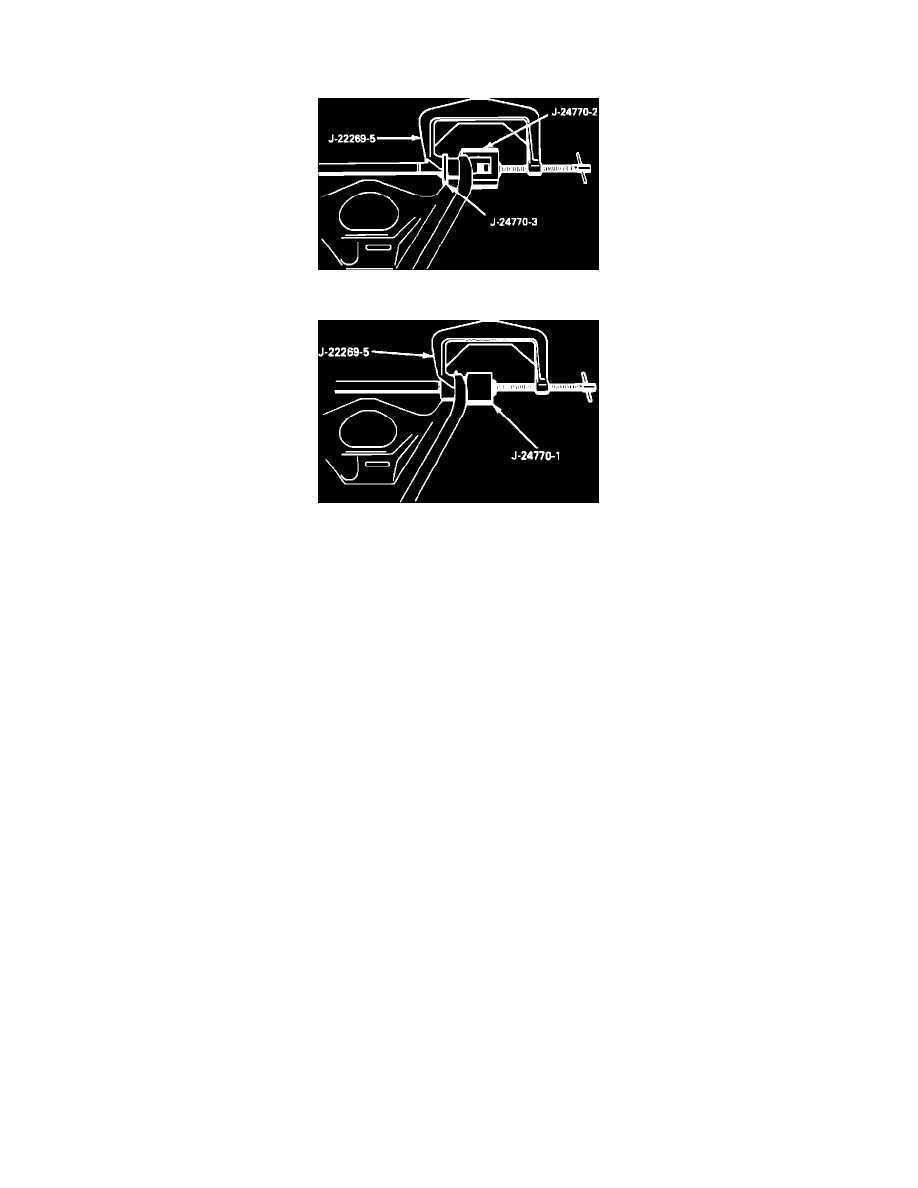
Upper Control Arm Bushing
Fig. 2 Upper Control Arm Bushing Removal
Fig. 3 Upper Control Arm Bushing Installation
2WD MODELS
1.
Remove upper control arm as previously described in UPPER CONTROL ARM.
2.
Place upper control arm in a vise, then remove nuts from end of pivot shaft.
3.
Press bushings out of control arm, using control arm bushing installer J-22269, Fig. 2.
4.
Remove the bushing from the pivot shaft.
5.
Position pivot shaft in control arm and press new bushings into control arm and over pivot shaft, Fig. 3. Both bushings must be installed .48-.52
inch from face of control arm to bushing outer sleeve.
6.
Install pivot shaft retaining nuts and tighten to specifications.
AWD MODELS
1.
Disconnect battery ground cable.
2.
Raise and support vehicle, then remove wheel.
3.
Remove caliper and position aside.
4.
Remove cotter pin and ball joint nut.
5.
Remove upper control arm from knuckle.
6.
Remove control arm retaining nuts and bolts, then upper control arm and bushings.
7.
Reverse procedure to install, noting the following:
a.
Install new control arm nuts and tighten to specifications, nuts must be tightened with control arm in "Z" height as described under
ADJUSTMENT PROCEDURES/VEHICLE RIDE HEIGHT.
b.
Install new cotter pin.