
Safari Van AWD V6-4.3L VIN W (1996)
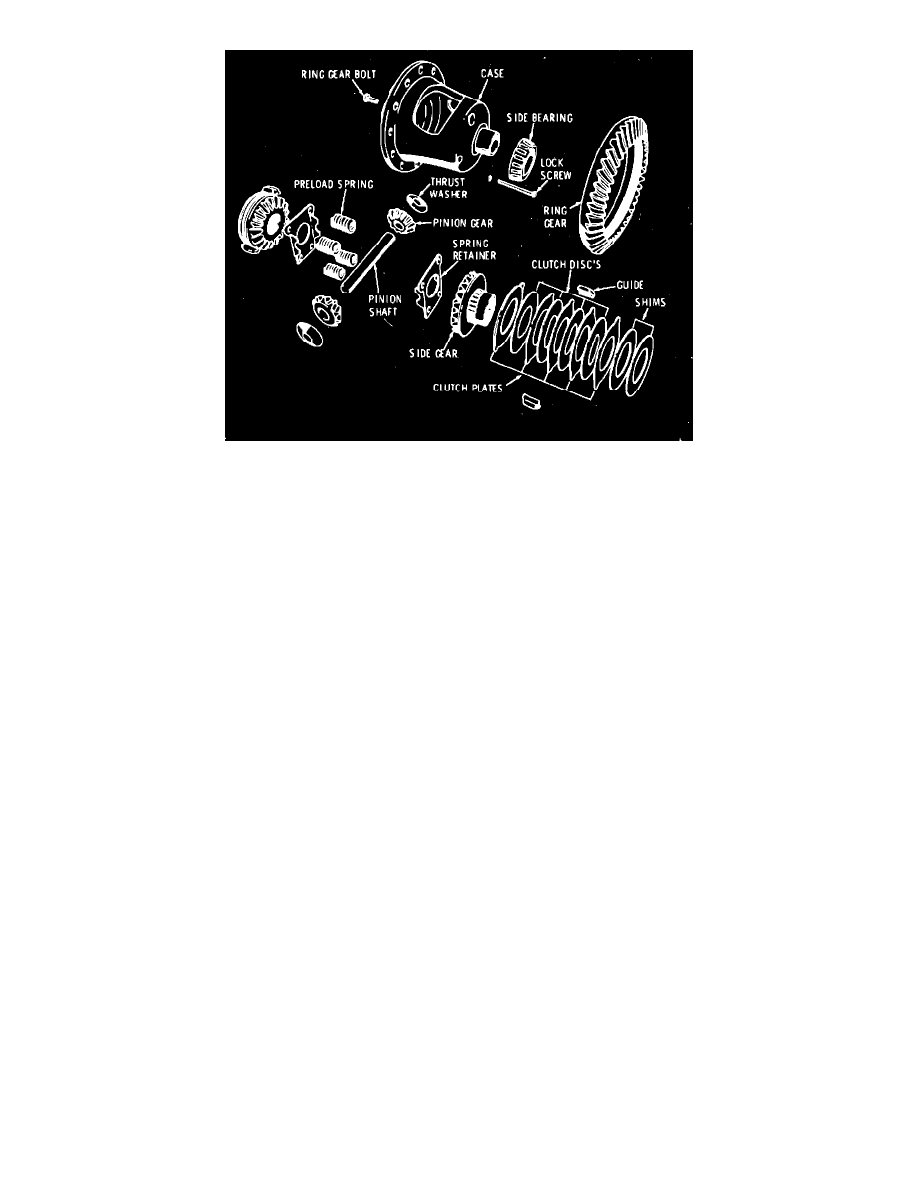
Fig. 6 Eaton limited slip differential exploded view
1.
Remove pinion shaft lock screw and pull pinion shaft from case,
Fig. 6.
2.
Remove preload spring retainer and springs.
3.
Rotate side gears until pinions are in open area of case and pick out pinions and thrust washers.
4.
Remove a side gear, clutch pack and shims, noting shim location in case to aid in reassembly. Remove side gear clutch pack and shims from
opposite side. If side gear or clutch pack cannot be removed readily, drive it out with a brass drift.
5.
Remove clutch plate guides and separate shims and clutch plates from side gears.
Keep clutch plates in their original location in clutch pack.
6.
If pinion shaft, pinions or side gears are excessively scored, pitted or worn, replace parts affected.
7.
Inspect clutch plates for scored, worn, cracked or distorted condition. If any of these conditions exist, new clutch plates must be installed.
8.
Alternately position nine clutch plates on side gear, starting and ending with a plate with external lugs,
Fig. 6.
9.
Install two clutch guides over clutch plate lugs.
10.
Install same shims which were removed or an equal amount on clutch plate.
11.
Repeat above steps on other clutch pack.
12.
Install one side gear with clutch pack and shims in case.
13.
Position two pinion gears and thrust washers on side gear and install pinion shaft.
14.
Compress clutch pack by inserting a screwdriver or wedge between side gear and pinion shaft.
15.
Install a suitable dial indicator with contact button against pinion gear.
16.
Rotate pinion gear. Clearance should be .001 inch to .006 inch.
17.
If clearance is more than .006 inch, add shims between clutch pack and case. If clearance is less than .001 inch, remove shims. A .002 inch shim
will change clearance about .001 inch. Recheck clearance after adding or subtracting shims.
18.
Remove side gear and repeat procedure with remaining clutch pack on opposite side of case.
19.
Remove pinion shaft, pinions and thrust washers.
20.
Install remaining side gear and clutch pack with correct shims in case.
21.
Place pinion gears on side gears and rotate into correct position.
22.
Compress preload springs and drive preload retainer and springs between side gears.
23.
Insert thrust washers behind pinion gears.
24.
Install pinion shaft and retain with lock bolt, tightening lock bolt to 15-25 ft. lbs.
25.
Check side gear splined hole to be certain it is in line with hole in preload spring retainer. Spring retainer can be moved slightly to correct
alignment.
Case Disassembly
1. Note position of governor and latching bracket for assembling, then remove side bearings and ring gear as outlined for standard differentials.