
Safari Van M V6-262 4.3L VIN W CPI (1992)
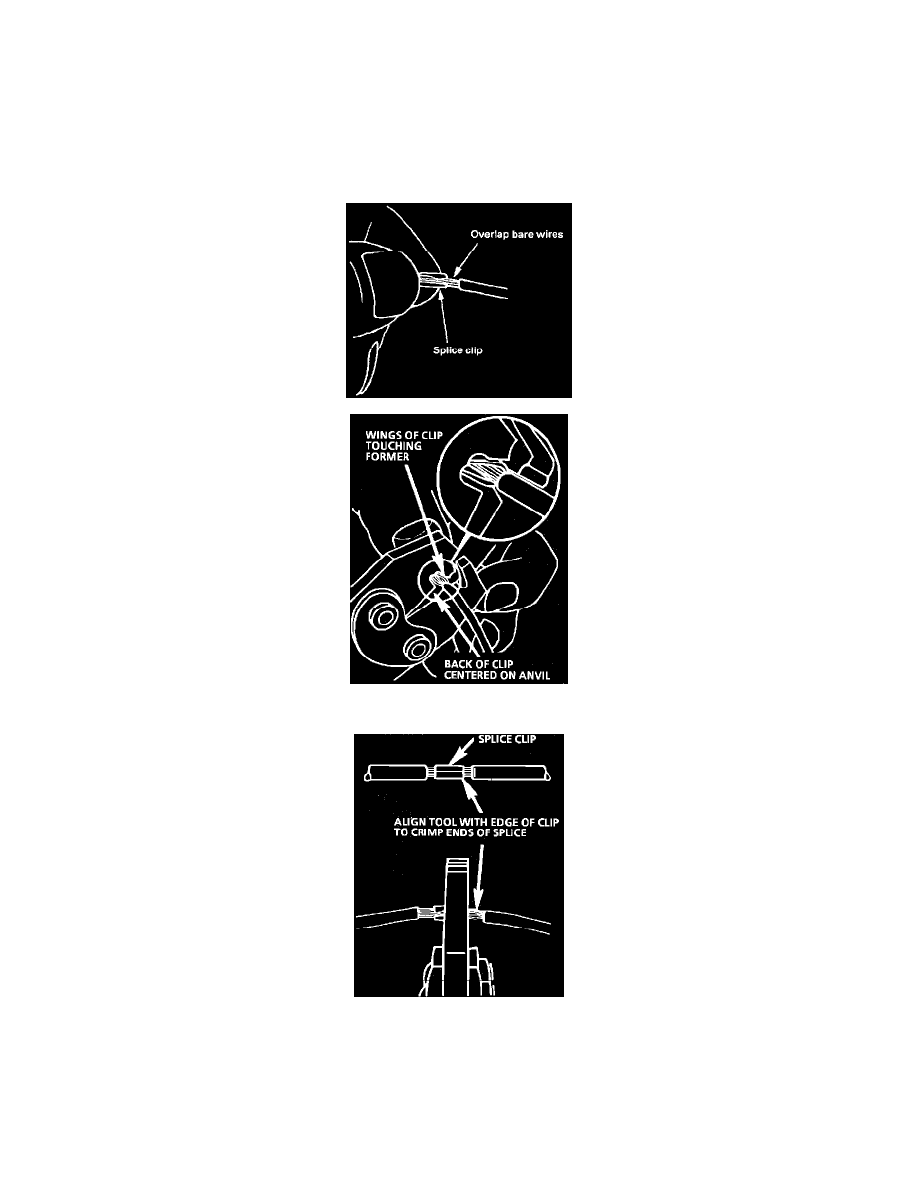
Fig. 6 Wire Size Conversion Table
When replacing a wire, use a wire of the same size as the original wire or larger. The schematics list wire size in metric units. See table, Fig. 6, for
the commercial (AWG) wire sizes that can be used to replace each metric wire size. Each AWG size is either equal to or larger than the equivalent
metric size. To find the correct wire size either find the wire on the schematic and convert the metric size to the AWG size, or use an AWG wire
gage. If you aren't sure of the wire size, start with the largest opening in the wire stripper and work down until a clean strip of the insulation is
removed. Be careful to avoid nicking or cutting any of the wires.
Step 4: Crimp the Wires
Fig. 8 Crimping the Splice Clip
Fig. 9 Completing the Crimp
Select the proper clip to secure the splice. To determine the proper clip size for the wire being spliced, follow the directions included in the J
38125-A Terminal Repair Kit. Select the correct anvil on the crimper. On most crimpers your choice is limited to either a small or large anvil.
Overlap the stripped wire ends and hold them between your thumb and forefinger as shown in Fig. 7. Then, center the splice clip under the
stripped wires and hold it in place.
-
Open the crimping tool to its full width and rest one handle on a firm flat surface.
-
Center the back of the splice clip on the proper anvil and close the crimping tool to the point where the former touches the wings of the clip.