
Safari Van M V6-262 4.3L VIN Z TBI (1990)
Brake Master Cylinder: Service and Repair
Bendix Type Master Cylinder
Removal/Installation
1.
On vehicles w/manual brakes, disconnect master cylinder pushrod from brake pedal.
2.
On all models, disconnect all wire connectors from master cylinder components.
3.
Disconnect brake lines from master cylinder.
4.
Remove master cylinder mounting nuts, then the master cylinder.
5.
Reverse procedure to install.
Disassembly/Assembly
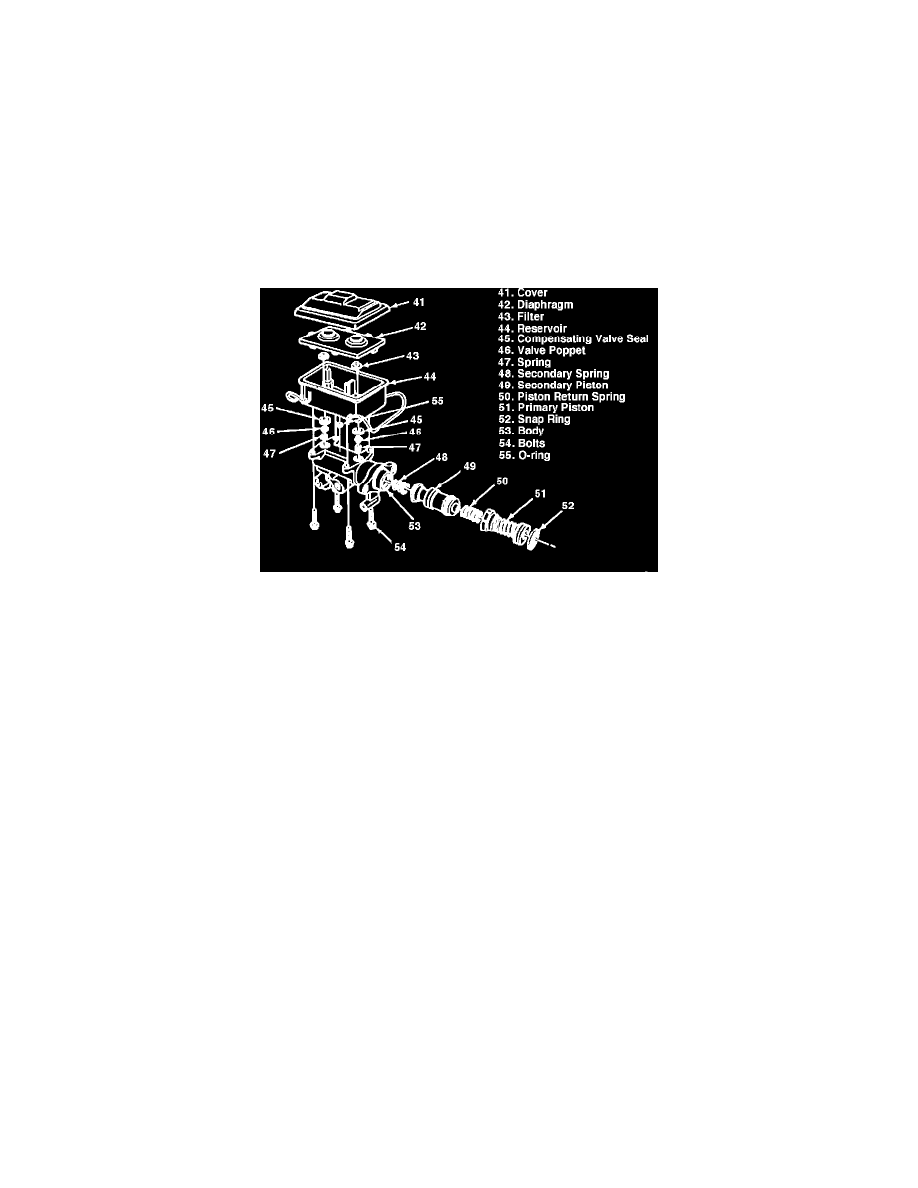
Fig. 6 Exploded View Of Master Cylinder.
Refer to Fig. 6 while performing the following procedures.
1.
Remove master cylinder from vehicle.
2.
Clean outside of master cylinder, then remove reservoir cover and diaphragm.
3.
Drain brake fluid from reservoir, then remove reservoir attaching bolts and reservoir.
4.
Remove O-ring, compensating valve seals, valve poppets and springs.
5.
Depress primary piston, then remove snap ring.
6.
Remove primary piston assembly and piston return spring.
7.
Remove secondary piston assembly by applying small amount of air pressure to front compensating valve port. Ensure front port is plugged.
8.
Remove secondary spring.
9.
Reverse procedure to assemble, noting the following:
a.
Inspect cylinder bore for scoring and corrosion. Replace master cylinder if necessary.
b.
Clean all metal parts in denatured alcohol.
c.
Clean all rubber parts in clean brake fluid.
d.
Polish discolored or stained cylinder with crocus cloth, then rinse in clean brake fluid. Ensure compensating port is clean.