Savana 1/2 Ton Van V8-5.7L VIN R (2001)

Intake Manifold: Service and Repair
Lower Intake Manifold Installation
INTAKE MANIFOLD INSTALLATION PROCEDURE
NOTICE: Applying excessive amounts of sealant may prohibit the intake gasket from sealing properly.
IMPORTANT: The lower intake manifold must be installed and the fasteners tightened while the adhesive is still wet to the touch.
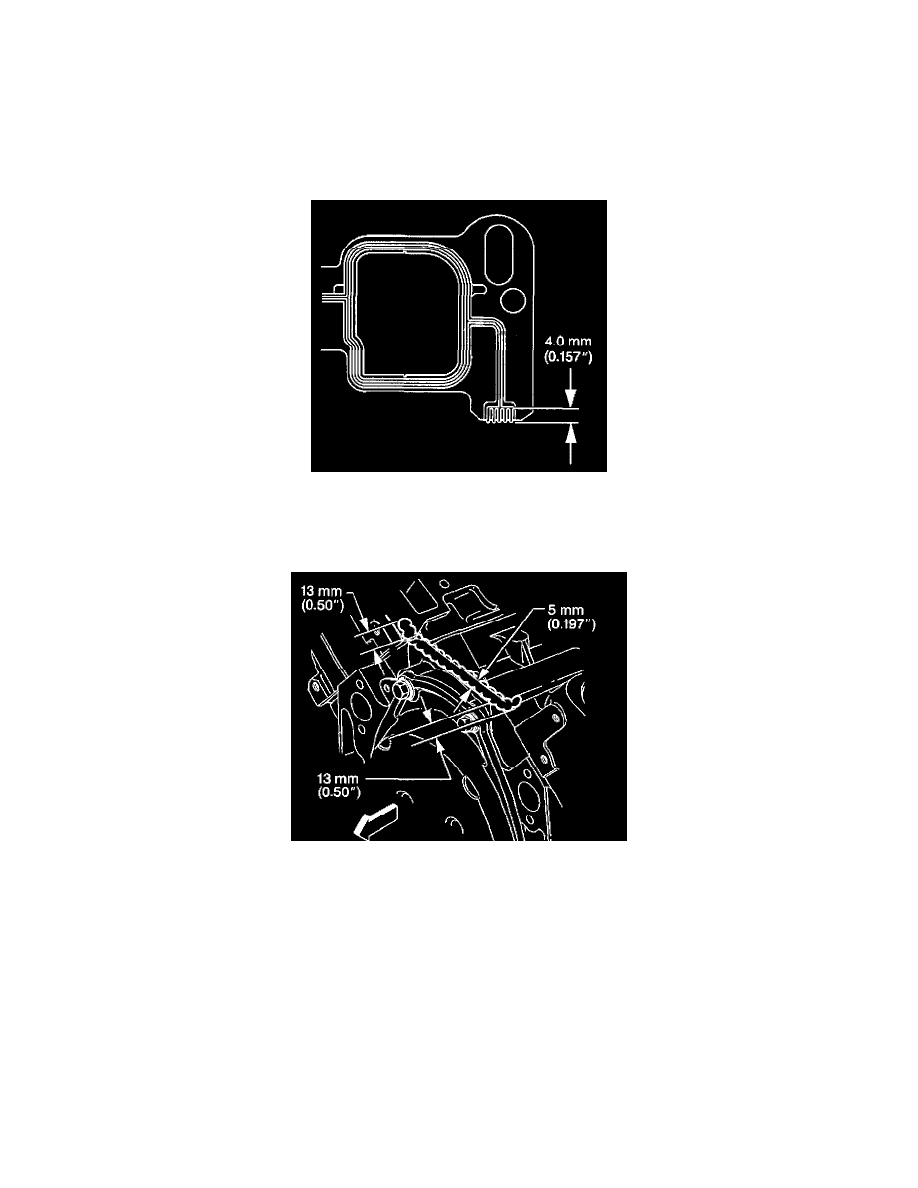
1. Apply a 4.0 mm (0.157 inch) patch of adhesive GM P/N 12346141 or equivalent to the cylinder head side of the lower intake manifold gasket at
each end.
2. Install the lower intake manifold gasket onto the cylinder head.
Use the gasket locator pins in order to properly seat the lower intake manifold gasket onto the cylinder head.
NOTICE: Care must be used to apply the correct amount of sealant onto the gaskets. Applying excessive amounts of sealant may prohibit the
intake gaskets from sealing properly.
IMPORTANT: All sealing surfaces must be clean, free of oil, dirt, or any other foreign material.
3. Apply a 5 mm (0.197 inch) bead of adhesive GM P/N 12346141 or equivalent to the front top of the engine block.
4. Extend the adhesive bead 13 mm (0.50 inch) onto the each lower intake manifold gasket.
