
Savana 1500 RWD V6-4.3L (2007)
Body Emblem: Service and Repair
Rear Door Emblem and Nameplate Replacement
Rear Door Emblem and Nameplate Replacement
Tools Required
J 25070 Heat Gun
Removal Procedure
Important: Be careful not to damage the paint.
1. Heat the emblem/nameplate using a J 25070. Hold the heat gun approximately 152 mm (6 inches) from the surface.
2. Apply the heat using a circular motion for about 30 seconds.
3. Peel the emblem/nameplate from the panel using a flat-bladed plastic tool.
4. Remove all adhesive from the body panel and the back of the emblem/nameplate using 3M(R) P/N 07501 or equivalent.
5. Wash the affected panel with soap and water.
Wipe the panel dry with a lint-free cloth.
6. Remove all traces of adhesive from the body panel and the back of the molding. Use 3M(R) General Purpose Adhesive Cleaner 08984 or an
equivalent.
7. Wipe the panel with a clean lint-free cloth and a (50/50 mixture) by volume of isopropyl alcohol and water.
Installation Procedure
Important: The rear doors must be in a secured position prior to the emblem/nameplate adhesion.
1. Secure the rear doors.
2. Use a length of masking tape or magnetic strip in order to mark the location.
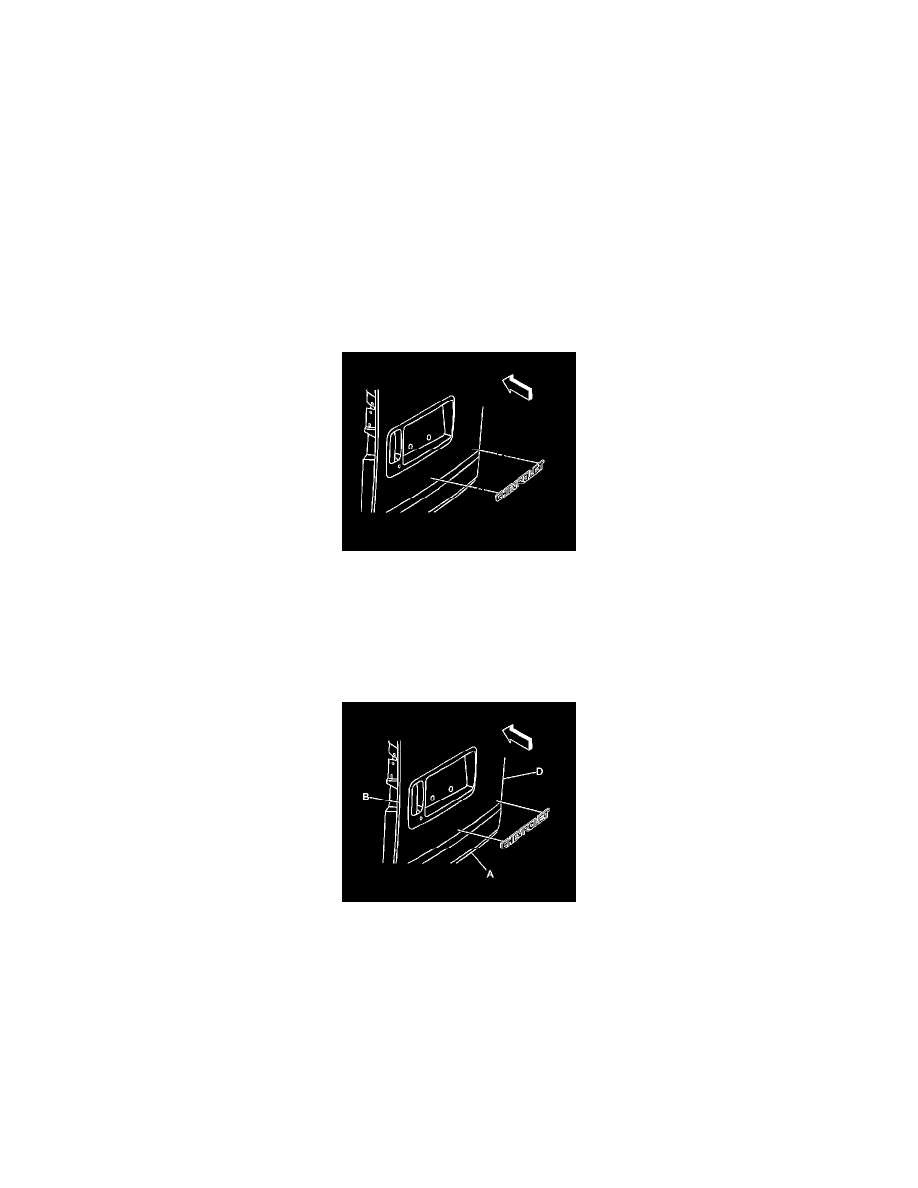
3. Use the following dimensions in order to mark the proper position of the emblem/nameplate on the right rear door:
*
47.5 mm +/- 2 mm (1.9 in +/- 0.1 in) (D) from the vertical edge
*
200.5 mm +/- 2 mm (7.9 in +/- 0.1 in) (A) from the horizontal edge