
Savana 2500 V6-4.3L VIN X (2005)
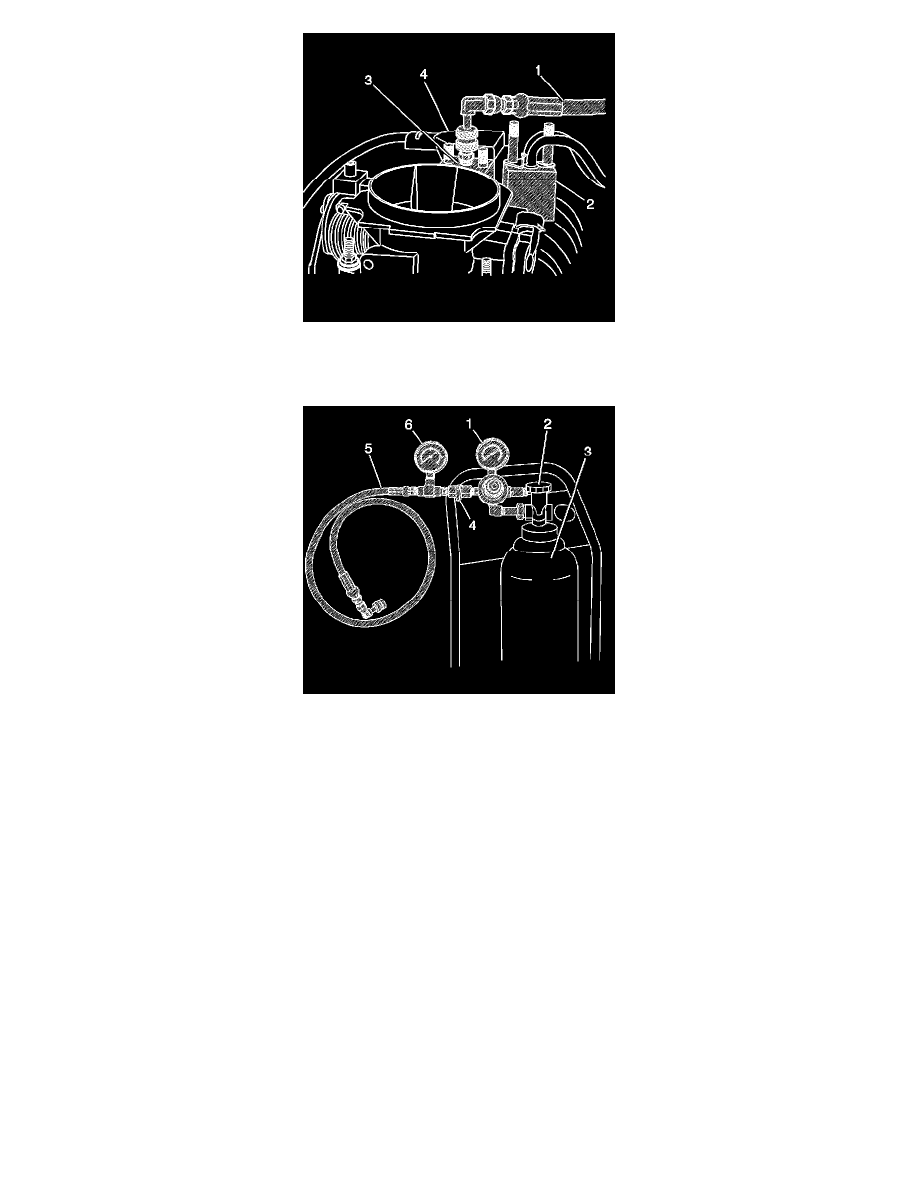
15. Connect the J 44466-10 hose (1) to the J 44466-12 (3).
16. Install the J 39021, the J 39021-210 and J 39021-301 (4) to the metering body electrical connector.
17. Adjust the amperage selector switch on J 39021 to 0.5 amps.
18. Open the valve (2) on the tank (3).
19. Open the valve (4) on the J 44466-10 to pressurize the fuel system. Then close valve (4) before firing injectors.
IMPORTANT: The minimum pressure required on the gage (6) is 150 psi. If 150 psi is not obtained, the tank (3) must be refilled prior to
performing this procedure.
20. Fire one injector using the J 39021. Observe a pressure drop on the gage (6) and verify the injector/poppet valve operation. An injector/poppet that
is stuck and not operational will have no pressure drop on the gage. If an injector remains stuck, repeat the procedure multiple times (as required)
until the injector is operational.
21. Repeat steps 19 and 20 for each individual injector to verify that all injector/poppet valve assemblies are unstake and functional.
22. Shut off the pressure valve (2) on the tank (3) of the J 41413.
23. Bleed off the pressure at the J 44466-10.
24. Install the PCV fresh air tube to the air inlet duct.