Savana 2500 V8-6.0L VIN U (2006)

Trim Panel Replacement - Side Rear Door - 60/40 Left (E26, 60 Door)
Tools Required
J 38778 Door Trim Pad and Garnish Clip Remover
Removal Procedure
1. Remove the front door trim plate. Refer to Door Trim Plate Replacement - Rear ().
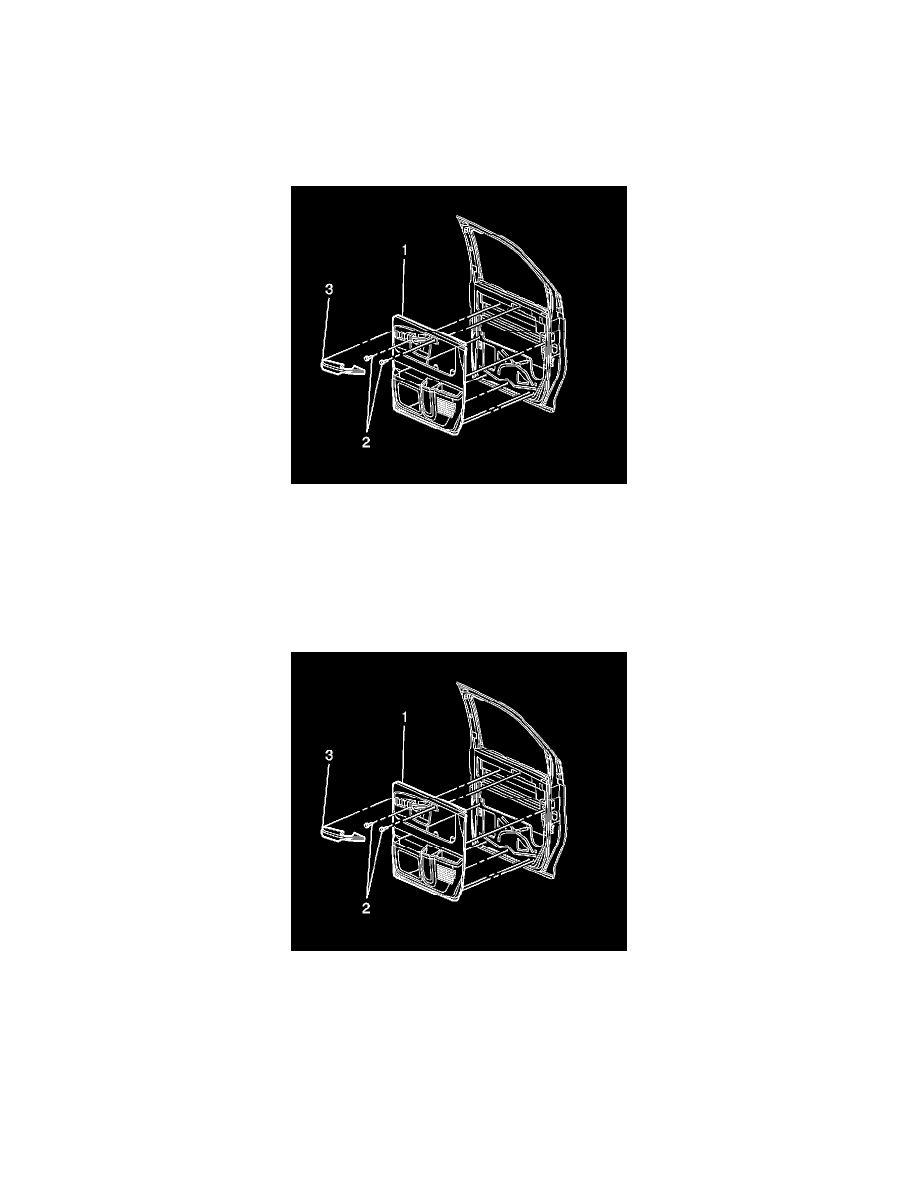
2. Remove the armrest (3). Refer to Armrest Replacement (See: Front Door/Front Door Panel/Service and Repair).
3. Remove the door trim panel screws (2), located behind the armrest.
4. Use the J 38778 to disengage the retainers around the outside edges of the door trim panel (1).
5. Slide the door trim panel (1) upwards to release the door panel from the door.
6. Remove the front door panel (1) from the vehicle.
Installation Procedure
1. Install the door trim panel (1), by hooking the top of the door trim panel (1) to the door belt line.
2. Align the door trim panel retainers to the door.
3. Push towards the door to engage the retainers to the sheet metal.
Notice: Refer to Fastener Notice in Service Precautions.
4. Install the door trim panel screws (2).
Tighten the screw (2) to 2.0 N.m (18 lb in).
