
Savana 3500 V8-4.8L (2009)
Removal Procedure
1. Raise the vehicle. Refer to Lifting and Jacking the Vehicle (See: Maintenance/Vehicle Lifting/Service and Repair).
2. Place a drain pan under the vehicle.
3. Remove the propeller shaft. Refer to One-Piece Propeller Shaft Replacement (See: Drive/Propeller Shafts, Bearings and Joints/Drive/Propeller
Shaft/Service and Repair/One-Piece Propeller Shaft Replacement) or Two-Piece Propeller Shaft Replacement (See: Drive/Propeller Shafts,
Bearings and Joints/Drive/Propeller Shaft/Service and Repair/Two-Piece Propeller Shaft Replacement).
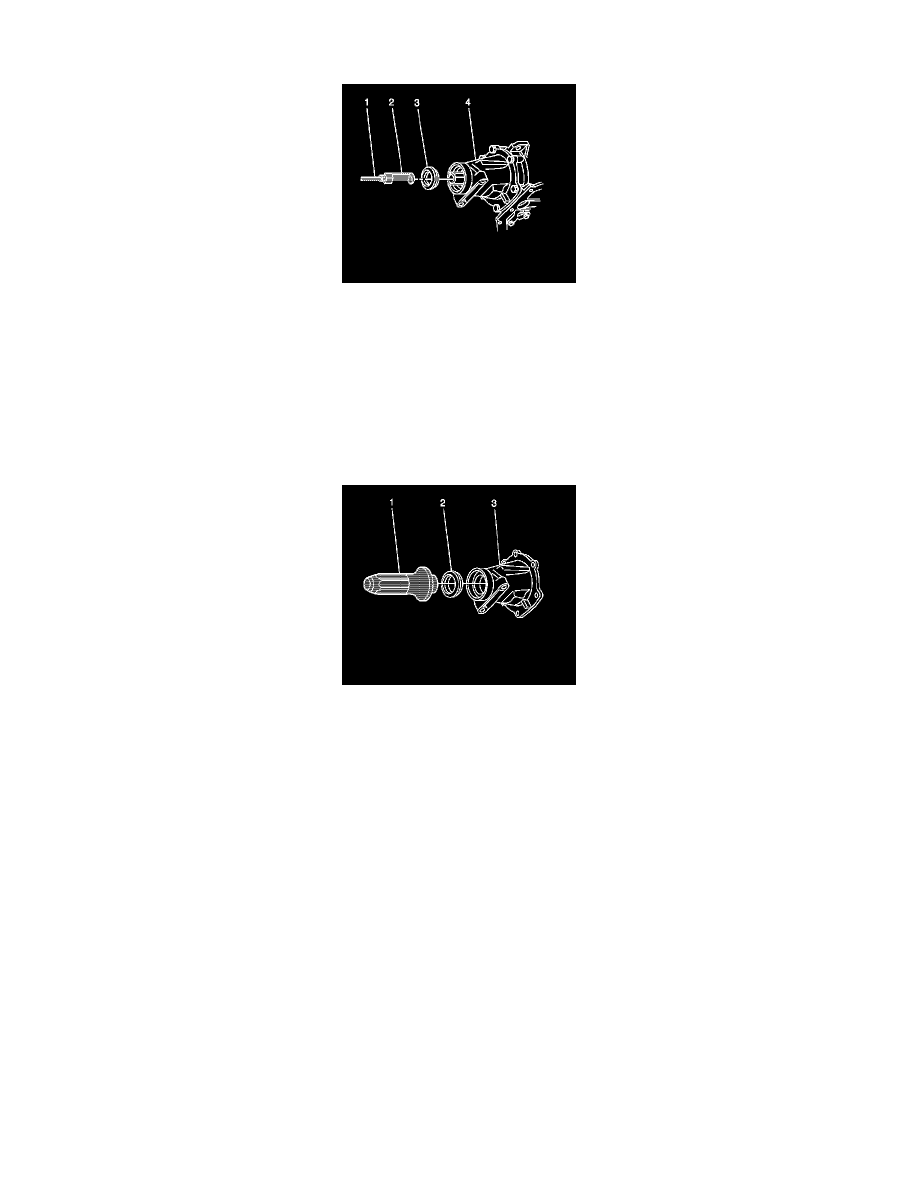
4. Using the J 6125-1B (1) and the J 23129 (2), remove the output shaft seal (3) from the extension housing (4).
5. Inspect the case extension housing for damage. Replace the extension housing if necessary. Refer to Case Extension Assembly Replacement (See:
Extension Housing/Service and Repair/4L80-E/4L85-E - Automatic Transmission).
Installation Procedure
1. Lubricate the inside diameter of the new seal with J 36850 .
2. Use the J 38869 (1) with a soft faced mallet to install the seal (2).
3. Install the seal (2) to the extension housing (3).
4. Install the propeller shaft. Refer to One-Piece Propeller Shaft Replacement (See: Drive/Propeller Shafts, Bearings and Joints/Drive/Propeller
Shaft/Service and Repair/One-Piece Propeller Shaft Replacement) or Two-Piece Propeller Shaft Replacement (See: Drive/Propeller Shafts,
Bearings and Joints/Drive/Propeller Shaft/Service and Repair/Two-Piece Propeller Shaft Replacement).
5. Remove the drain pan and lower the vehicle.
6. Fill the transmission to the proper level with approved fluid.