
Savana 3500 V8-4.8L (2009)
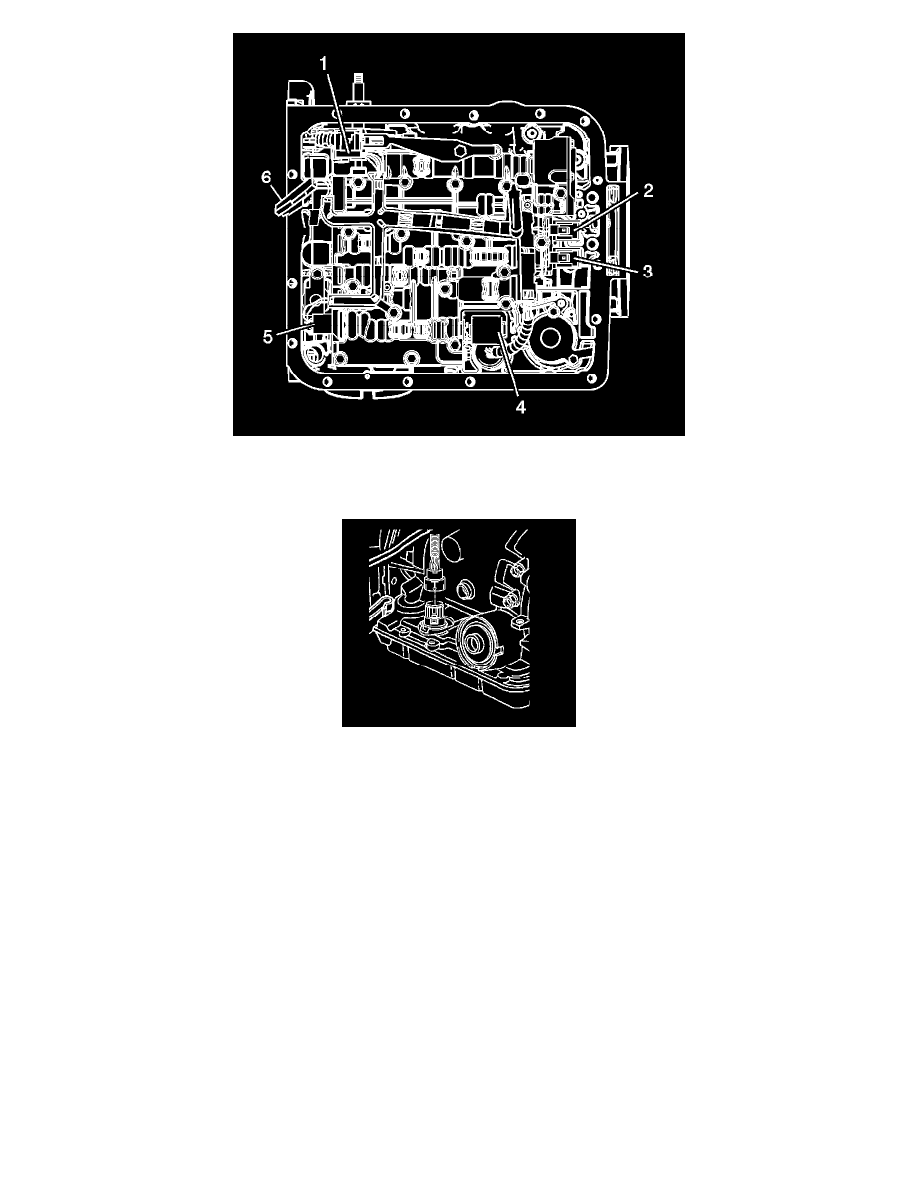
7. Connect all the internal wiring harness electrical connectors to the electrical components (1-6).
8. Install the 1-2 accumulator. Refer to Accumulator Assembly, Spacer Plate, and Gaskets (See: Accumulator/Service and
Repair/4L60-E/4L65-E/4L70-E - Automatic Transmission).
9. Connect the transmission harness 20 way connector to the transmission pass-through connector.
Align the arrows on each half of the connector and insert straight down.
10. Install the transmission oil pan and filter. Refer to Automatic Transmission Fluid and Filter Replacement (See: Service and Repair/Removal and
Replacement).
11. Lower the vehicle.
12. Fill the transmission to the proper level with DEXRON(R) VI transmission fluid. Refer to Transmission Fluid Check (See: Testing and
Inspection/Component Tests and General Diagnostics/4L60-E/4L65-E/4L70-E - Automatic Transmission/Transmission Fluid Check).
Note: It is recommended that transmission adaptive pressure (TAP) information be reset.
Resetting the TAP values using a scan tool will erase all learned values in all cells. As a result, the engine control module (ECM), powertrain
control module (PCM) or transmission control module (TCM) will need to relearn TAP values. Transmission performance may be affected as new
TAP values are learned.
13. Reset the TAP values. Refer to Transmission Adaptive Functions (See: Description and Operation/4L60-E/4L65-E/4L70-E - Automatic
Transmission/Transmission Adaptive Functions).