
Savana 3500 V8-4.8L (2009)
-
Select "Z"
-
Select "Aura"
-
Select "Powertrain"
-
Select "3.6L LY7"
-
Select "Transmission"
-
Select "Transmission Data"
5. From the application menu, select F3: Snapshot.
-
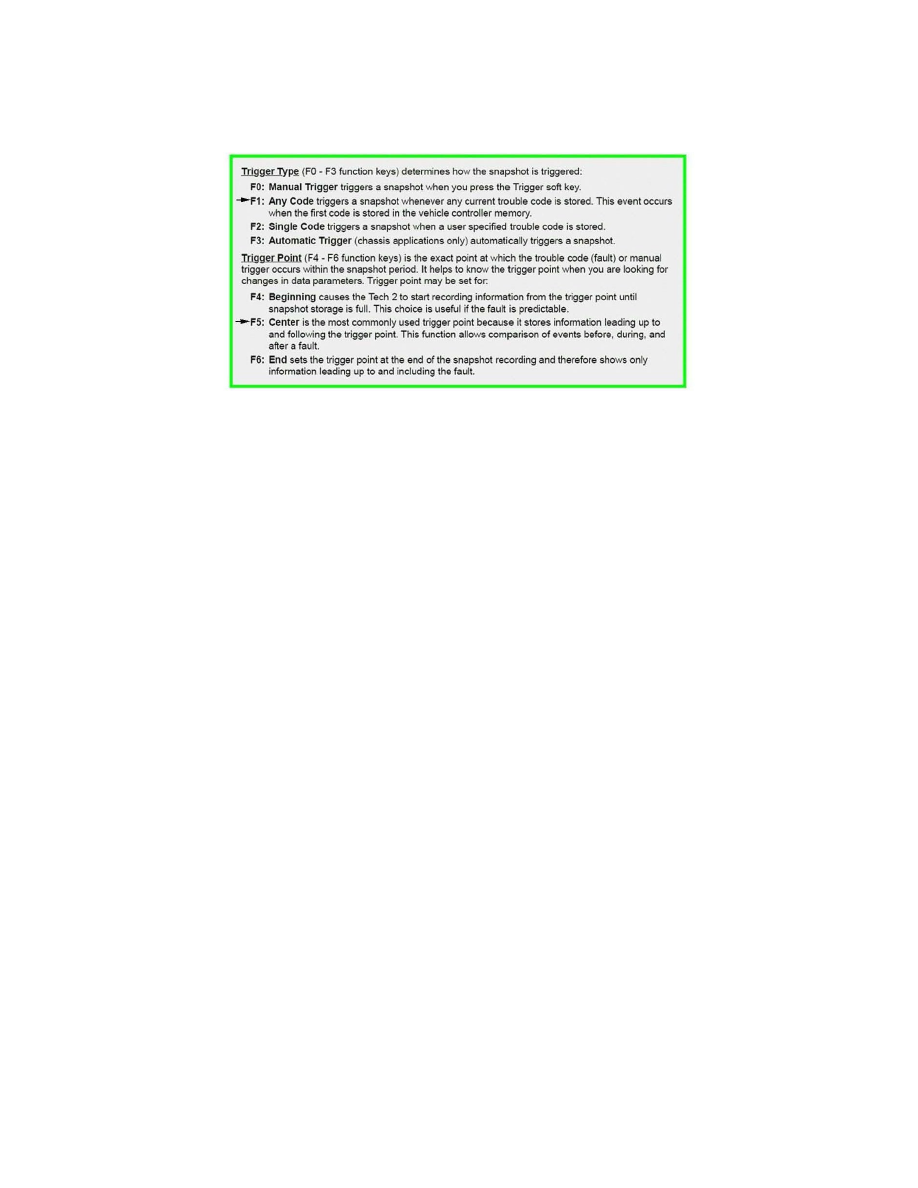
Choose trigger type and trigger point, as described above.
-
It is preferred to trigger on "Any Code" (F1)
-
If multiple codes are setting, select "Single Code" and enter the code you are trying to capture on the next screen.
-
Select "Center (F5)" for the trigger point. This allows the requester/viewer of the data to see the events before and after the code sets.
6. Press the Record Snapshot soft key. The Tech 2(R) screen will display the parameters it is going to record for live viewing.
-
When the fault occurs, the Tech 2(R) will automatically start recording if the preferred settings (F1 and F5) are selected.
-
If manual trigger is selected during the setup procedure, you will have to hit the "Trigger" soft key to actually record data. Otherwise, it will
automatically start recording when a DTC is set.
-
Allow the Tech 2(R) to record the data.
Please note that a Tech 2(R) can record a maximum of 1 minute of data (30 seconds before and 30 seconds after the trigger point if center
trigger is selected).
Important
The Tech(R)2 can only record two snapshots prior to uploading to a computer. If a third snapshot is requested, the first snapshot will be
overwritten.
7. When the snap shot data has been recorded, exit to the Main Menu, then power down and disconnect the Tech 2(R) from the vehicle.
Uploading and Sending a Snapshot via TIS2WEB
Figure 8