
Savana 3500 V8-4.8L VIN V (2005)
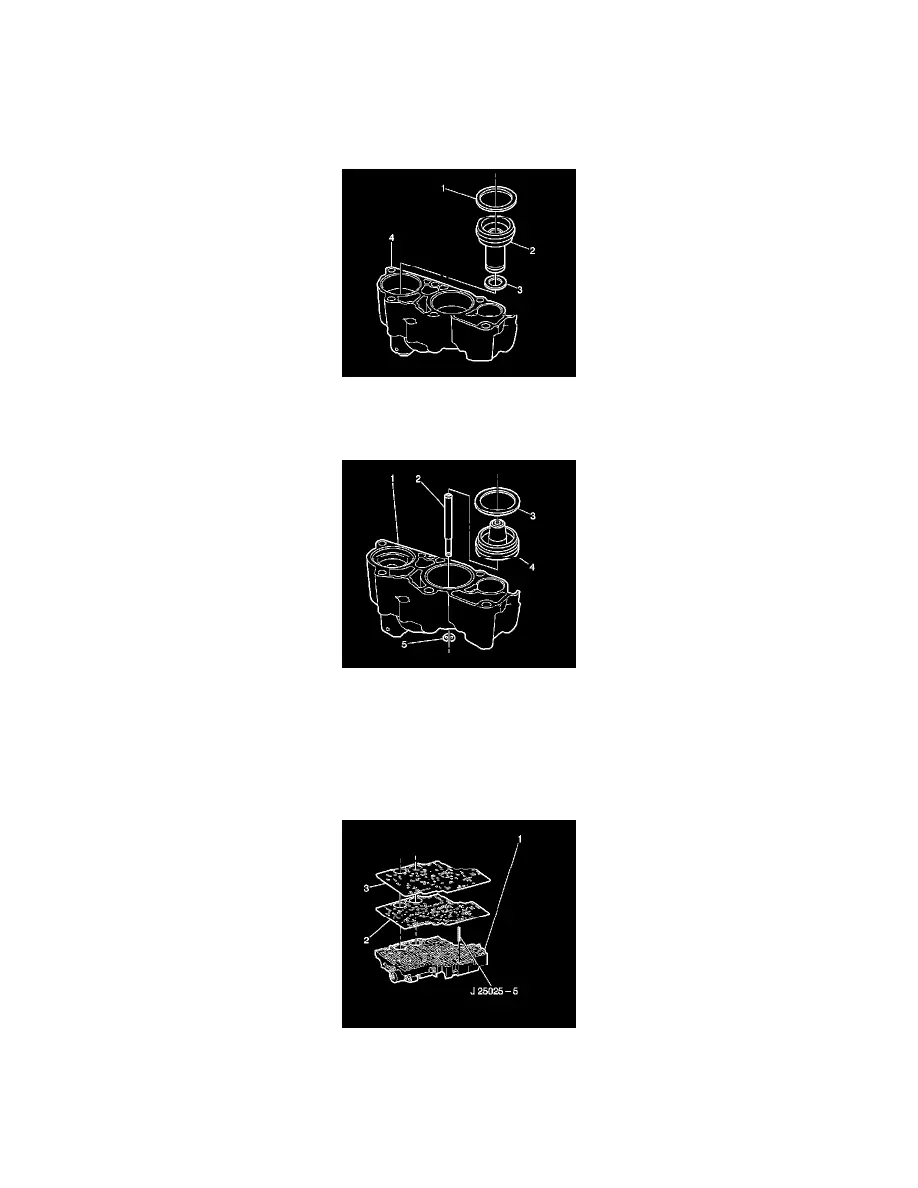
3. Remove the 4th clutch accumulator piston pin retainer ring (5).
4. Remove the 4th clutch accumulator piston (4) and pin (2) from the accumulator housing (1).
5. Remove the 4th clutch accumulator piston pin (2) from the accumulator housing (1).
6. Remove the 4th clutch accumulator piston seal (3) from the accumulator housing (1).
Third and Fourth Clutch Accumulator Assembly
1. Install the 3rd clutch accumulator piston inner (3) and outer (1) seals. Lubricate the 3rd clutch accumulator piston seals (1, 3) with DEXRON® III
automatic transmission fluid.
2. Install the 3rd clutch accumulator piston (2).
3. Install the 4th clutch accumulator piston seal (3). Lubricate the 4th clutch accumulator piston seal (3) with DEXRON® III automatic transmission
fluid.
4. Assemble the 4th clutch accumulator piston pin (2) with the 4th clutch accumulator piston (4).
5. Install the 4th clutch accumulator piston assembly into the accumulator housing (1).
6. Install the 4th clutch accumulator piston pin retainer ring (5) onto the 4th clutch accumulator piston pin (2).
Installation Procedure
1. Install the J 25025 into the control valve body bolt hole where the manual shaft detent roller and spring assembly is mounted.
2. Install the control valve body gasket (2) onto the accumulator housing (1).
3. Install the control valve body spacer plate (3) onto the valve body gasket (2).