
Savana 4500 V8-6.6L DSL Turbo (2009)
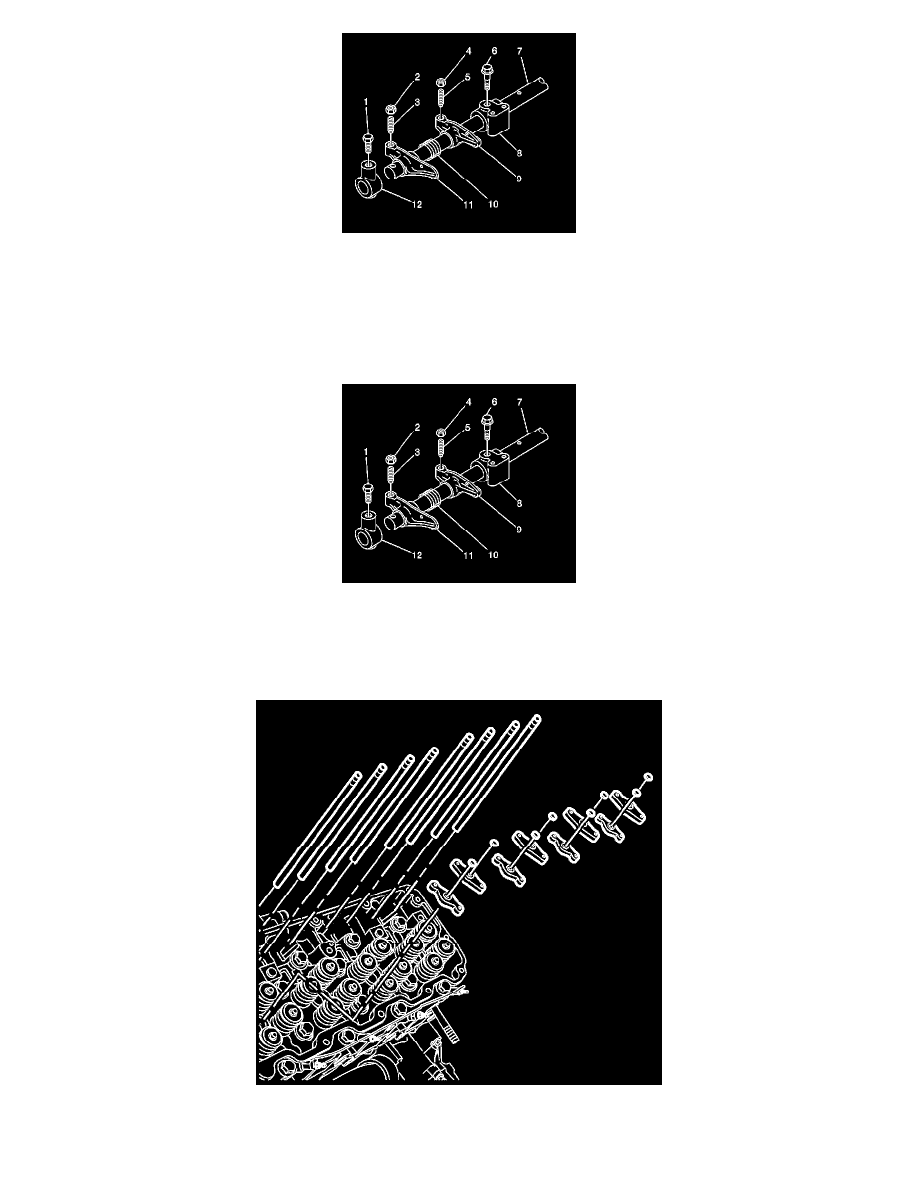
9. Remove the rocker arm shaft bracket bolts (1), if necessary.
10. Remove the bracket (12), rocker arm (11), and spring (10), if necessary.
11. Remove the remaining rocker arms, springs, and brackets, if necessary.
12. If required, clean and inspect the valve rocker arm and shaft. Refer to Valve Rocker Arm and Shaft Cleaning and Inspection (See: Service and
Repair/Overhaul).
Installation Procedure
1. Lubricate the rocker arm shaft (7) and the inside of the rocker arms with clean engine oil, if necessary.
2. Install the rocker arm bracket (12) and bolt (1) on one end of the rocker arm shaft, if necessary.
3. Install the intake rocker arm (9), spring (10), exhaust rocker arm (11), and bracket (12) with bolt (1). Continue in the same sequence to the last
bracket, if necessary.
4. Push the bracket (12) to compress the springs and then install the bolt (1), if necessary.
5. Lubricate the top of the valves, the valve bridge stem, the valve lifter bridge, and the valve spring caps with clean engine oil.
6. Install the valve bridge.