
Sierra 1500 2WD V6-4.3L (2008)
16. Lower the vehicle.
17. Connect the negative battery cable. Refer to Battery Negative Cable Disconnection and Connection in SI.
18. Clear any DTCs that may be present with a scan tool and verify the proper operation of the vehicle.
Inspection of Fuse Block
Inspection of Fuse Block - I/P (Left Side) for Loose Connector X1
1. Turn OFF the ignition and all accessories.
2. Disconnect the negative battery cable. Refer to Battery Disconnect Caution and Battery Negative Cable Disconnection and Connection in SI.
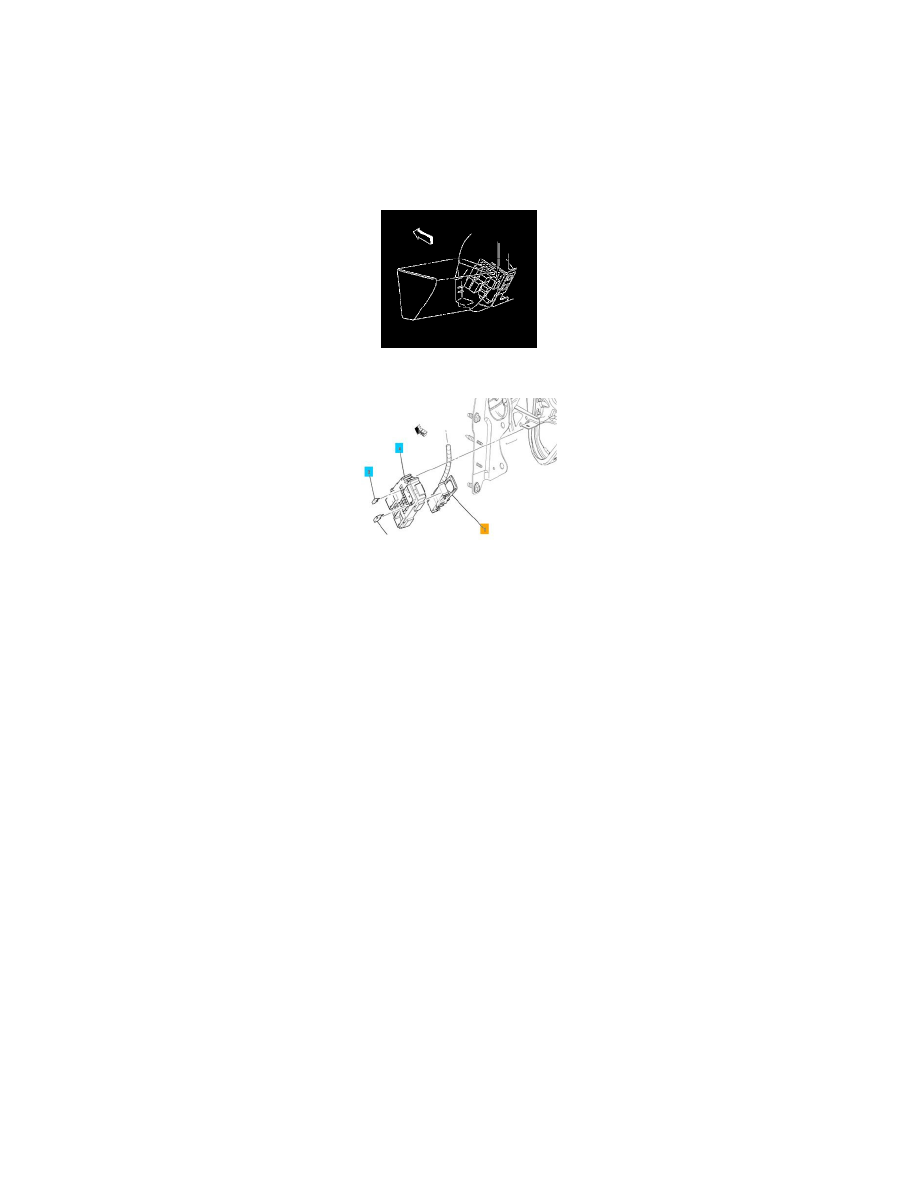
3. Remove the left side fuse block as shown.
4. Inspect connector X1 (1) on the back of the fuse block for a loose connection as shown. Secure the connector as needed.
5. Install the left side fuse block.
6. Connect the negative battery cable. Refer to Battery Negative Cable Disconnection and Connection in SI.
7. Clear any DTCs that may be present with a scan tool and verify the proper operation of the vehicle.
Chafed IP Wiring Harness Near Park Brake Pedal Assembly
Chafed IP Wiring Harness Near Park Brake Pedal Assembly
The above condition may cause one or more of the following fuses to open:
-
60A - MBEC1 (#72) (Underhood)
-
30A - AMP (#40) (Underhood)
-
15A - RDO (#41) (Underhood)
-
10A - IPC (#46) (Underhood)
-
15A - AIRBAG BATT (#51) (Underhood)
-
10A - DSM (Left side of IP)
Five Areas of Potential Contact Have Been Identified
Five areas of potential contact have been identified: