
Sierra 1500 2WD V6-4.3L (2008)
4. Release the wiring harness conduit from the retainers that secure it to the rear of the engine and at the top of the transmission bell housing.
Note
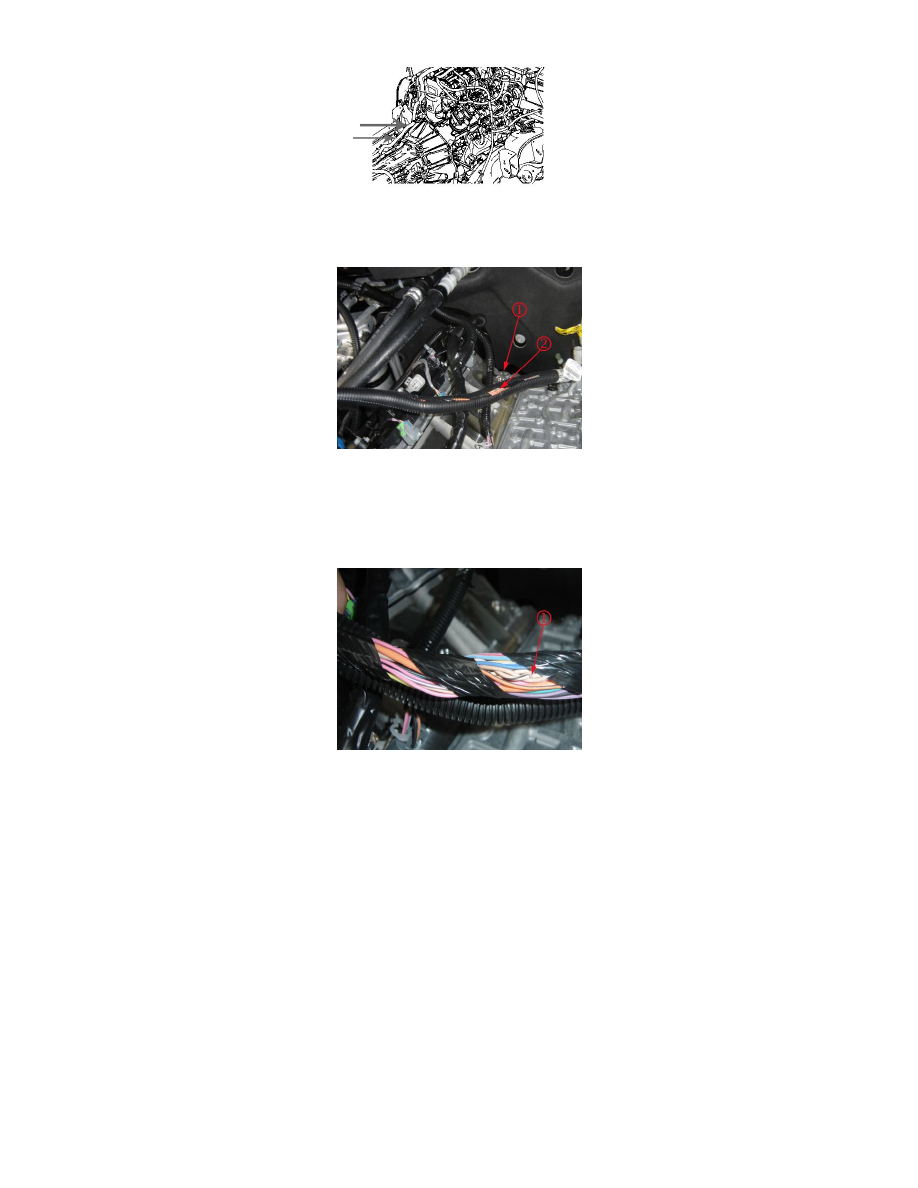
The engine intake manifold is shown removed to provide clarity.
5. Pull the wiring harness up gently at the rear of the engine (1) and inspect the wiring harness for chafed/shorted wiring (2). If chafing is not
observed on exposed wiring then extract the wiring from the protective conduit and inspect ALL areas for chafing.
‹› If chafing (1) or damage is found, repair the wiring. Refer to Wiring Systems and Power Management > Diagnostic Information and
Procedures > Wiring Repairs in SI.
6. Protect the wiring harness by covering the sharp edge with butyl tape or a suitable material. Secure the wiring harness conduit as needed.
7. Install the upper intake manifold sight shield. Refer to Upper Intake Manifold Sight Shield Replacement in SI.
8. Connect the negative battery cable. Refer to Battery Negative Cable Disconnection and Connection in SI.
9. Clear any DTCs that may be present with a scan tool and verify the proper operation of the vehicle.
Chafed Wiring Harness at Chassis Body Mounts Left Side Frame Rail
1. Turn OFF the ignition and all accessories.
2. Disconnect the negative battery cable. Refer to Battery Negative Cable Disconnection and Connection in SI.
3. Raise and support the vehicle. Refer to Lifting and Jacking the Vehicle in SI.