
Sierra 1500 4WD V8-5.3L VIN B (2005)
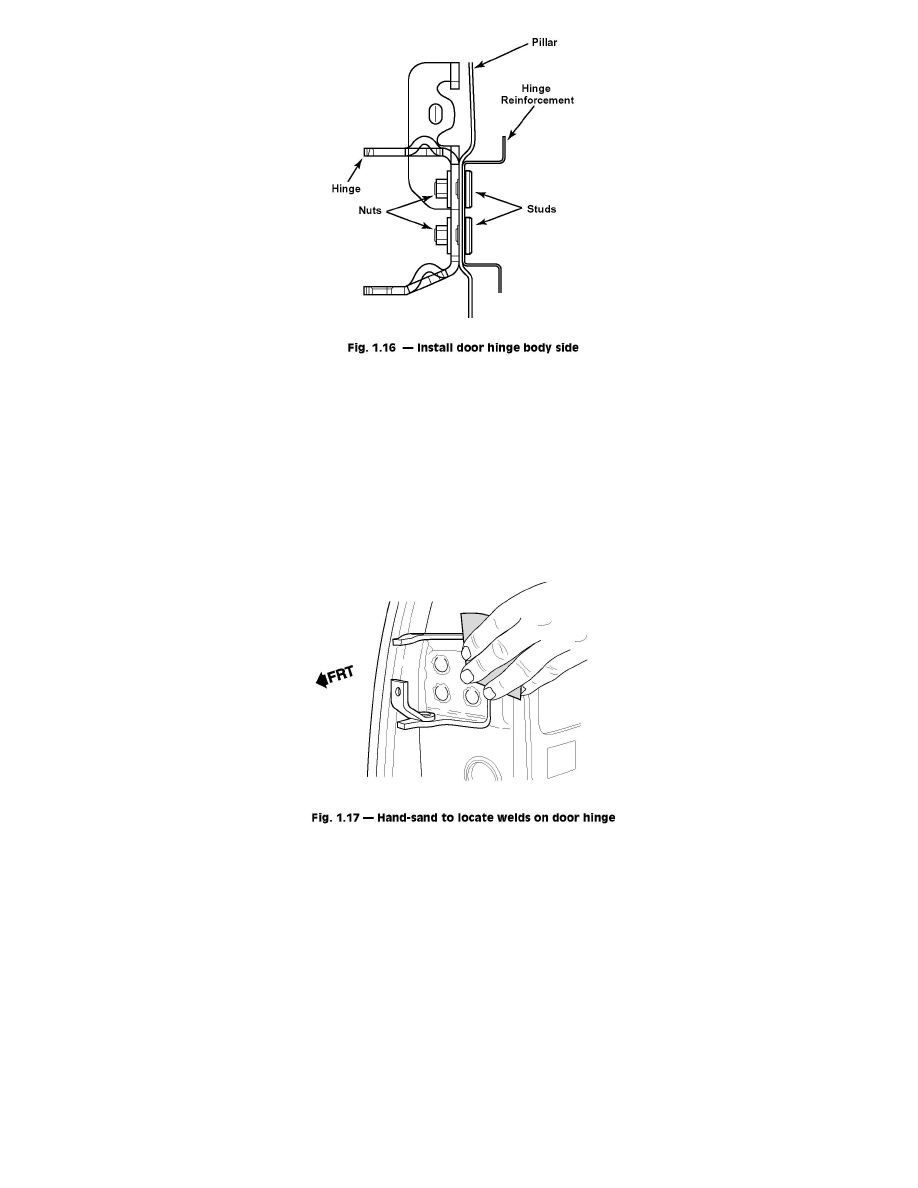
11. Install hinge using nuts supplied, torque to 25 N.m (20 FT. LB.) (Fig.1.16).
12. Clean and prepare all surfaces as necessary for refinish.
13. Apply sealers and refinish as necessary. Do not combine paint systems. Refer to paint manufacturer's recommendations.
14. Install and align all related panels and components.
Door Side
REMOVE OR DISCONNECT
1. Remove door from body. (Refer to appropriate service manual.)
2. Visually inspect and restore as much of the damage as possible to factory specifications.
3. Lightly hand-sand existing body hinge with 100 grit or finer sandpaper to locate the four welds attaching hinge to door (Fig. 1.17).
4. Center punch each of the four weld marks on the original hinge base. It is critical to punch the center of the weld so that as much of the weld is
removed during drilling as possible.