
Sierra 1500 4WD V8-6.0L (2007)
10.
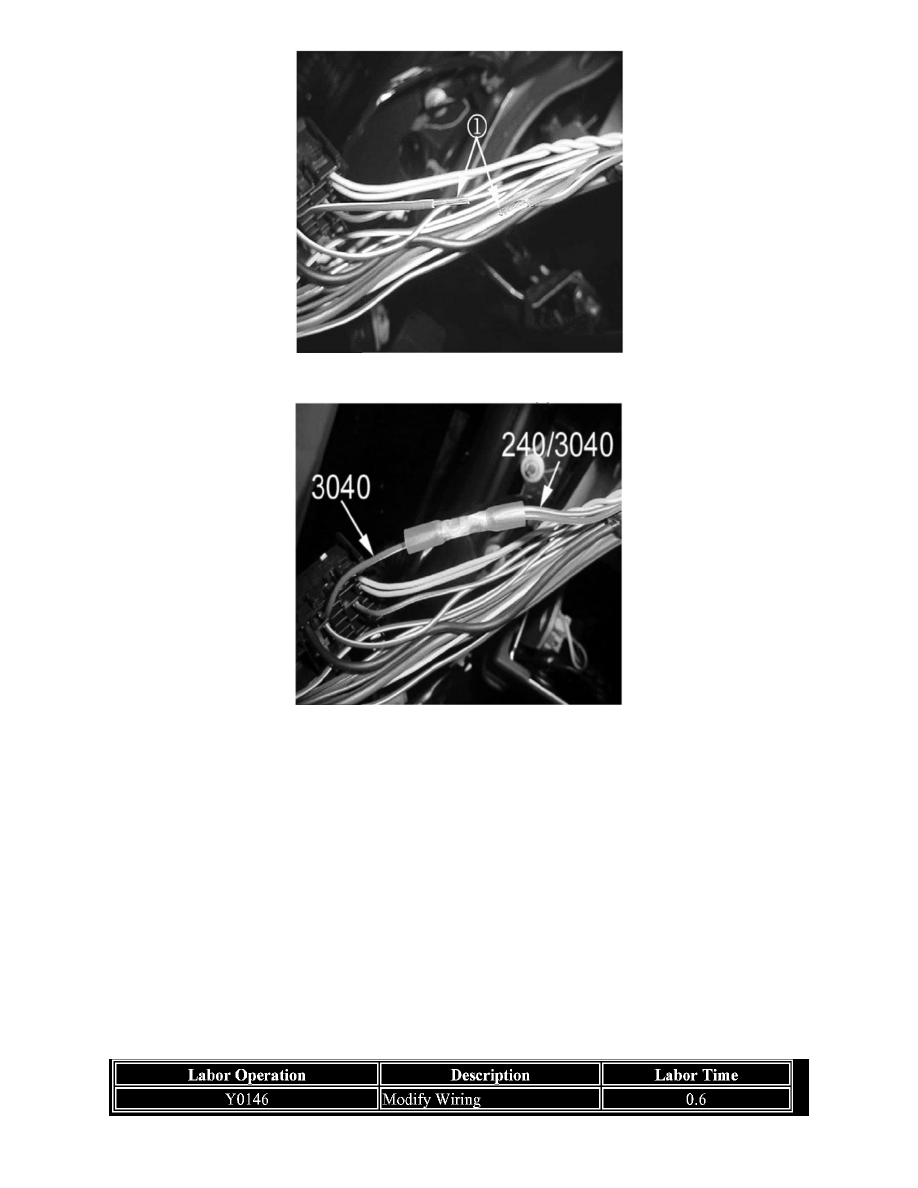
Twist the end of circuit 3040 together with circuit 240. Connect the circuits from the side of the circuit that does not have a terminal.
Important:
Apply heat to sleeve using a hot air gun or Ultratorch. Apply heat to the center of the sleeve and continue heating for a minimum of 30
seconds. Once the glue starts to melt, slowly rotate the sleeve while applying heat evenly until hot glue is visible outside the sleeve.
11.
Using a BLUE colored crimp and seal splice sleeve PN 12089190, crimp the 240/3040 end to the 3040 end. Refer to Splicing Copper Wire Using
Splice sleeves in SI, if required.
12.
Re-apply tape (1) to the harness.
13.
Plug the 40-way connector X1 back into the backside of the LBEC.
14.
Verify that there is power to the beacon switch by activating the switch. If the beacon switch light indicator illuminates when the switch is in the
ON position and turns off when the switch is in the OFF position, the repair has been performed correctly.
15.
Install the instrument panel (I/P) knee bolster. Refer to Knee Bolster Replacement in SI.
16.
Install the park brake release handle. Refer to Park Brake Release Handle Assembly Replacement in SI.
Claim Information
For vehicles repaired under this service update, use the table.