
Sierra 1500 4WD V8-6.0L (2007)
Note
Do Not attempt to drill out the jounce bumper while attached to the strut top mount assembly. The bumper must be removed from the top mount
assembly.
Note
Do Not attempt to drill out the jounce bumper from the lower end toward the upper end, as this could affect characteristics of the jounce bumper.
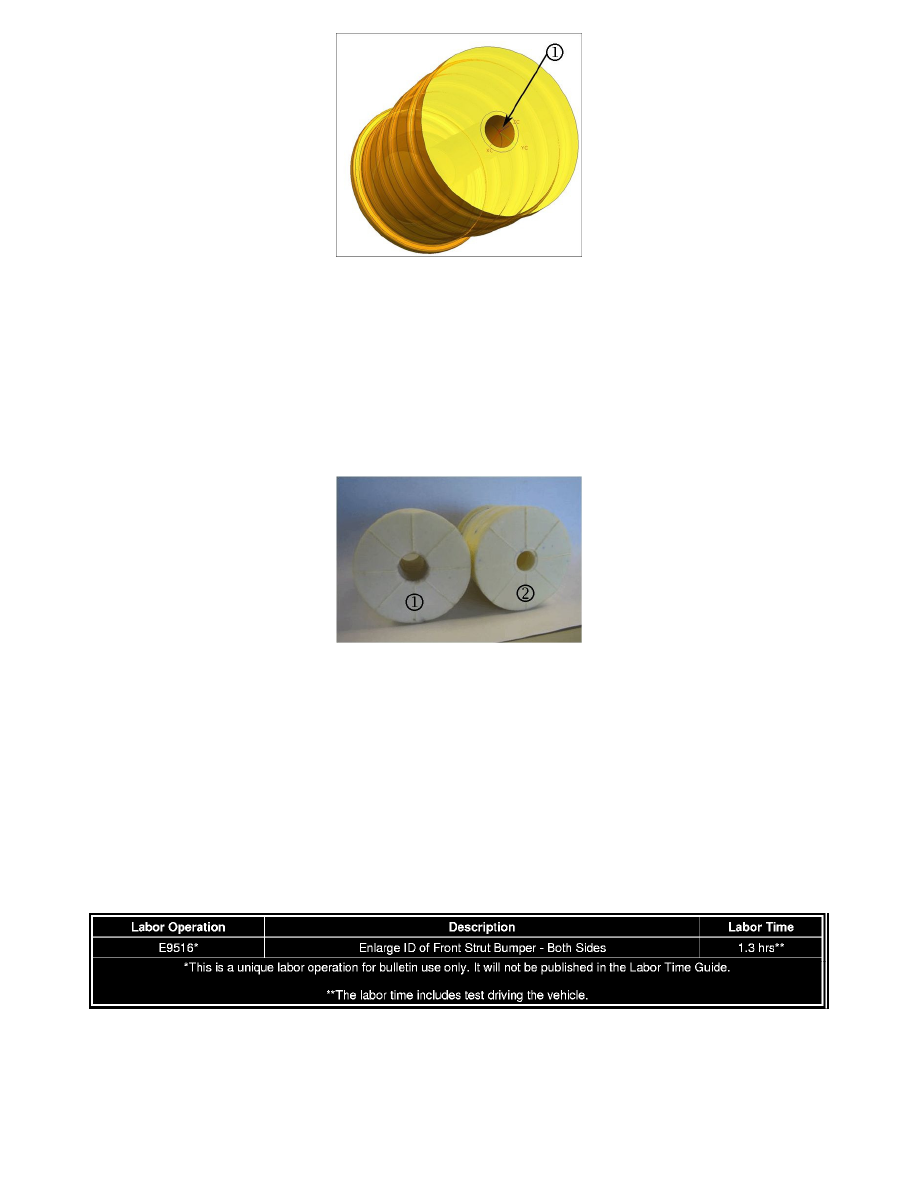
10. Enlarge the Upper ID (1) from the top side of the jounce bumper to the following dimensions:
-
Diameter of enlarged ID: 16 mm
-
Depth of enlarged ID: 15 mm
11. Ensure that the ID of the jounce bumper is as smooth as possible and free of loose material. If necessary, an Exacto knife, or equivalent, can be
used to carefully trim the edge and remove any loose material. The photo above shows a jounce bumper with the enlarged upper ID (1) as
compared to the original ID (2).
Note
Ensure that the jounce bumper is fully seated to the top mount assembly.
12. Install the jounce bumper to the top mount assembly. Ensure that the jounce bumper is secure to the top mount.
13. Assemble the coil spring and top mount to each strut. Refer to Shock, Shock Component, and/or Spring Replacement in SI.
14. Install the LH and RH strut assemblies to the vehicle. Refer to Shock Absorber and Spring Assembly Replacement in SI.
15. Move the vehicle outdoors to allow it to return to ambient temperature.
16. Test drive the vehicle under the same conditions to verify the repair.
Warranty Information
For vehicles repaired under warranty, use the table.