
Sierra 1500 4WD V8-6.0L (2007)
from the bores. Be sure to catch the accumulators and springs so as to prevent damage to these parts.
*
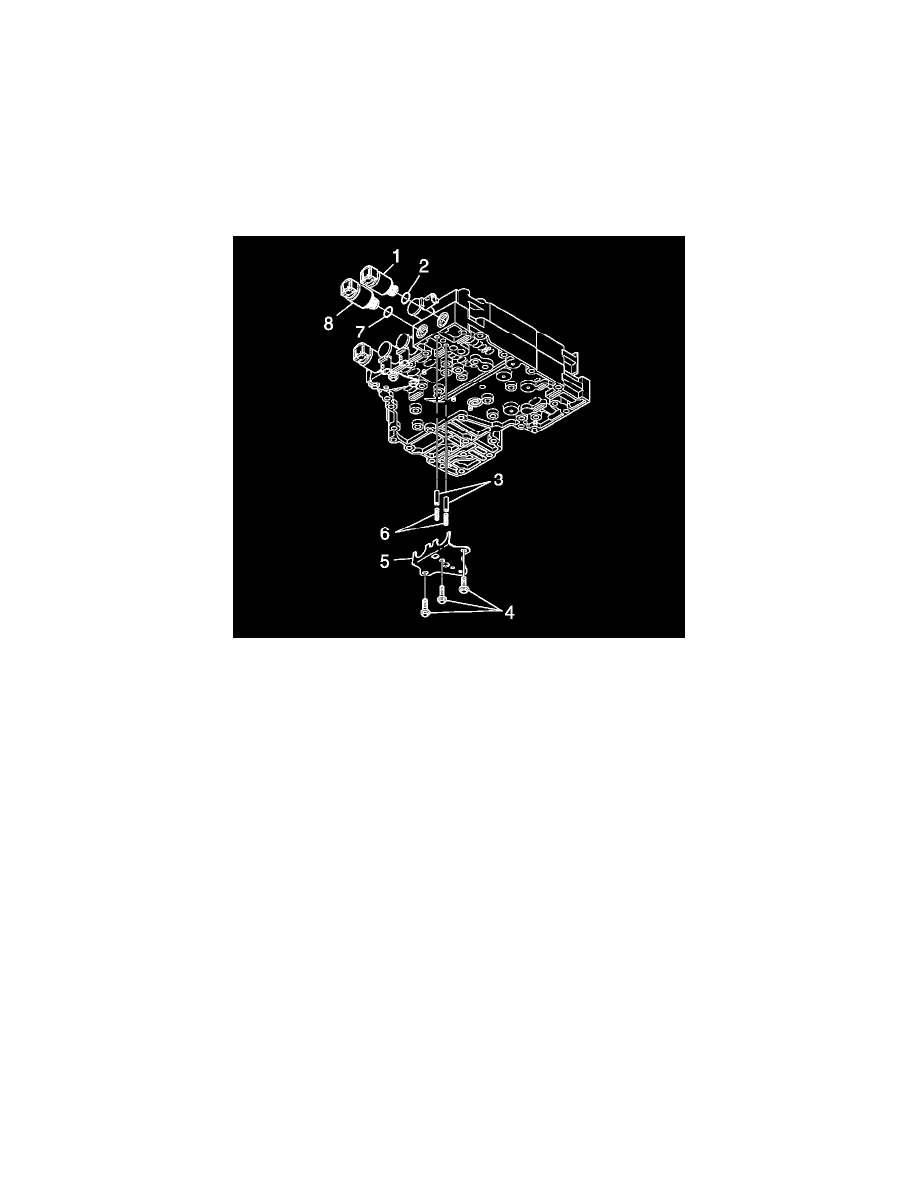
The pressure control valve retaining bracket (5) must not be modified. Note that the angle between the 2 bracket surfaces is less than
90 degrees. Replace the bracket if the angle is 90 degrees or more.
To remove the pressure control solenoid 1 (PCS1) or PCS2, remove three bolts (4) and the pressure control valve retaining bracket (5). Remove
accumulators (3) and springs (6) if they do not fall out when the bracket (5) is removed.
4. Note the position of the solenoid connector and pull the solenoid (1) or (8) out of the bore in the control valve assembly. The O-ring on the
solenoid provides the resistance felt during removal.
Installation Procedure
1. Obtain the new solenoid (1) or (8). Lubricate new O-ring (2) or (7) with clean transmission fluid. Install the O-ring and push the new solenoid into
the control valve body bore with the wiring harness connector in the correct position.
2. Install the 2 accumulators (3) and springs (6) before installing the pressure control valve retaining bracket (5). The valve (3) goes in the bore first
with the hollow end facing outward, followed by the spring (6) which goes inside the hollow portion of the valve.
Notice: Refer to Fastener Notice.
3. Install the pressure control valve retaining bracket (5), and install the 3 bolts (4).
Tighten the bolts to 12 N.m (108 lb in).