
Sierra 2500 Denali 2WD V8-6.0L (2011)
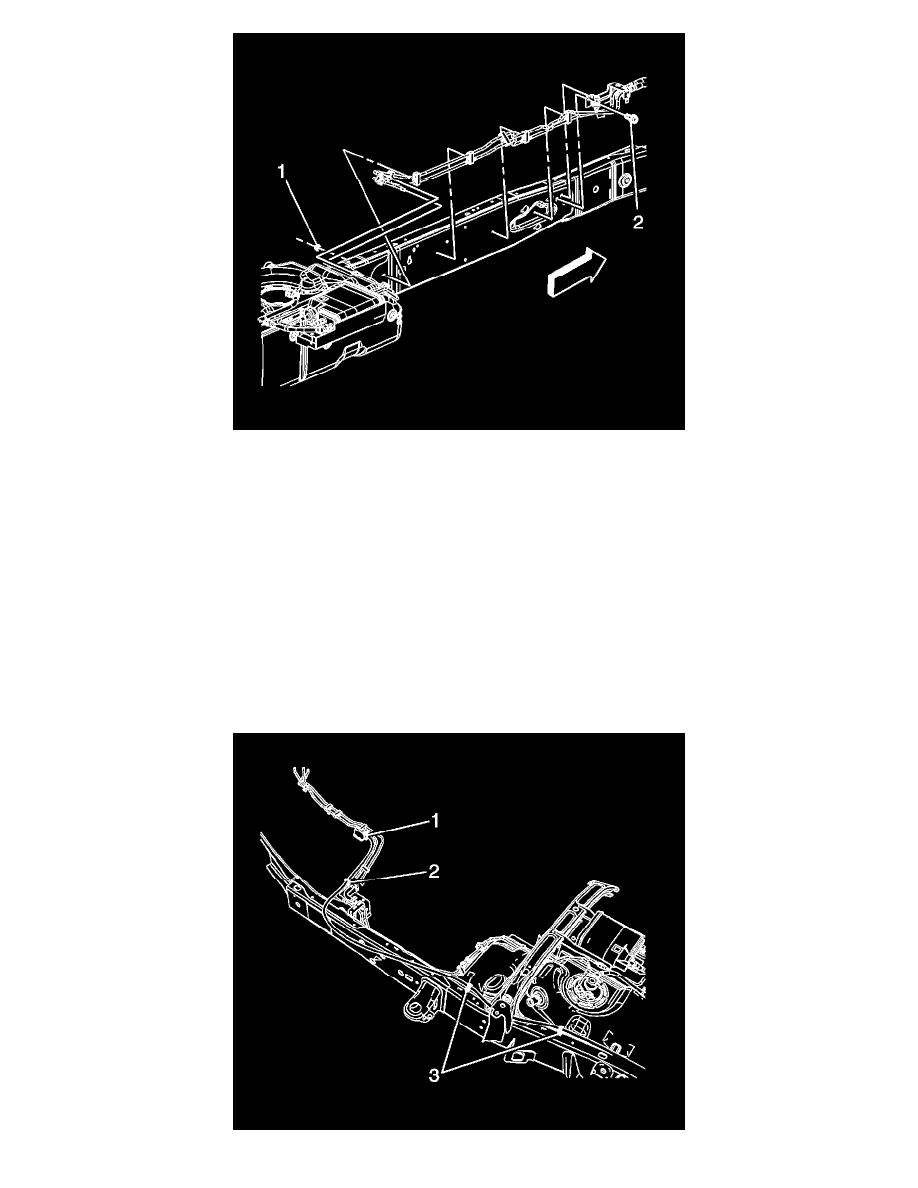
9. If equipped with 2WD perfrom the following steps, position and install the fuel/EVAP line assembly to the vehicle.
10. Install the fuel/EVAP line bracket locator tab to the frame.
11. Install the fuel/EVAP line clips to the frame and crossmember.
12. Install the fuel/EVAP line bracket bolt (2).
Tighten the bolt to 9 Nm (80 lb in).
13. Install the fuel/EVAP line clip nut (1).
Tighten the bolt to 20 Nm (15 lb ft).
14. Remove the caps from the fuel and EVAP lines.
15. Connect the fuel tank EVAP line quick connect fitting to the chassis line. Refer to Plastic Collar Quick Connect Fitting Service (See: Fuel
Delivery and Air Induction/Fuel Line Coupler/Service and Repair/Plastic Collar Quick Connect Fitting Service).
16. Connect the fuel tank fuel feed line quick connect fitting to the chassis line. Refer to Plastic Collar Quick Connect Fitting Service (See: Fuel
Delivery and Air Induction/Fuel Line Coupler/Service and Repair/Plastic Collar Quick Connect Fitting Service).