
Sierra 2500 Denali 2WD V8-6.0L (2011)
Center Link: Service and Repair
Relay Rod Replacement (Except SRW, or With Crew Cab)
Relay Rod Replacement (Except SRW, or With Crew Cab)
Special Tools
J 24319-B - Steering Linkage and Tie Rod Puller
For equivalent regional tools, refer to Special Tools (See: Tools and Equipment/Steering Linkage).
Removal Procedure
1. Remove the engine shield, if equipped. Refer to Engine Shield Replacement (See: Body and Frame/Frame/Skid Plate/Service and Repair/Engine
Shield Replacement).
2. Remove the steering linkage shock absorber from the relay rod, if equipped. Refer to Steering Linkage Shock Absorber Replacement (See:
Steering Damper/Service and Repair).
3. Remove the steering linkage outer tie rods. Refer to Steering Linkage Outer Tie Rod Replacement (See: Tie Rod/Service and Repair/Steering
Linkage Outer Tie Rod Replacement).
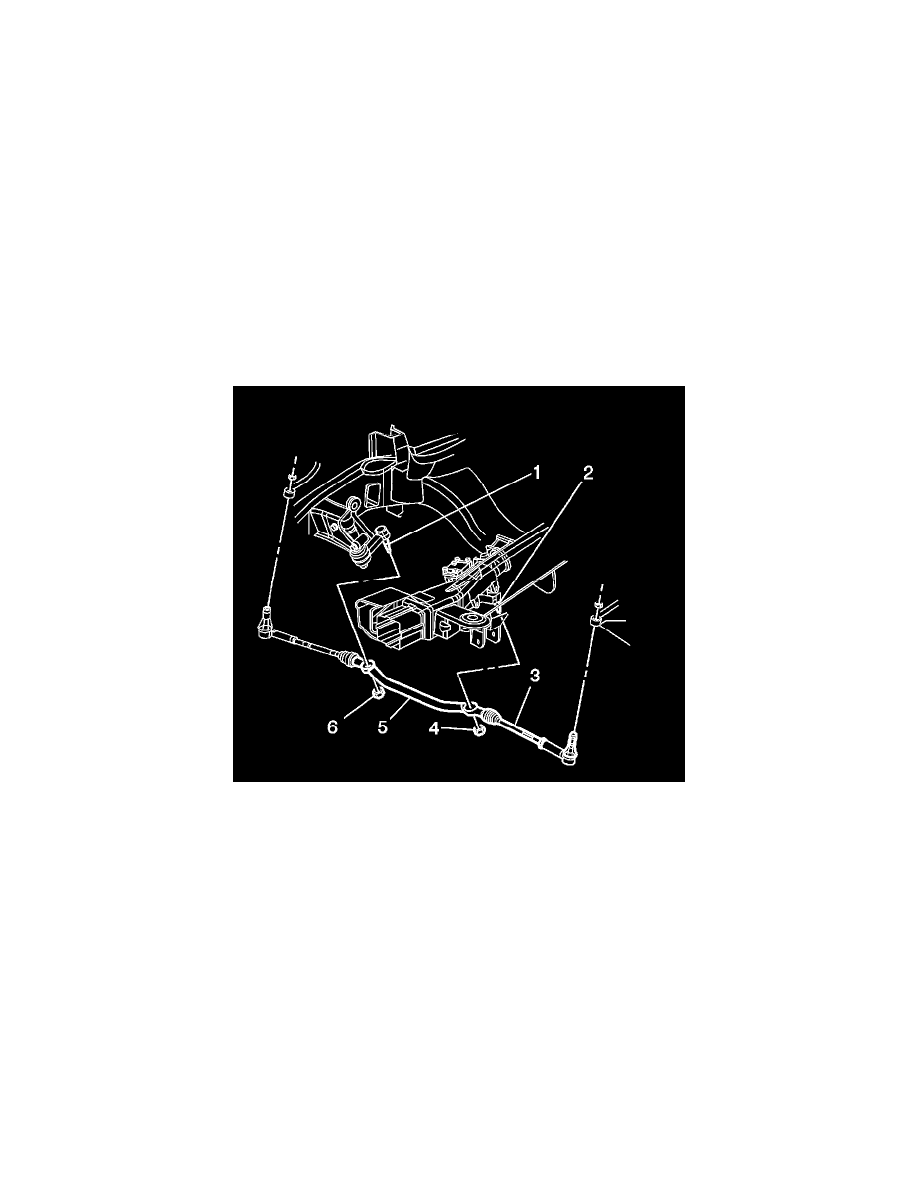
4. Remove the idler arm nut (6).
Discard the nut.
5. Separate the idler arm (1) from the relay rod (5) using the J 24319-B - puller.
6. Remove the pitman arm nut (4).
Discard the nut.
7. Separate the pitman arm (2) from the relay rod using the J 24319-B - puller.
8. Remove the relay rod assembly from the vehicle.
9. Remove the inner tie rods from the relay rod. Refer to Steering Linkage Inner Tie Rod Replacement (See: Tie Rod/Service and Repair/Steering
Linkage (Non-Rack & Pinion)).
10. Inspect the threads and seals on all steering related components. Repair or replace the components as necessary.
Installation Procedure
1. Install the inner tie rods to the relay rod. Refer to Steering Linkage Inner Tie Rod Replacement (See: Tie Rod/Service and Repair/Steering
Linkage (Non-Rack & Pinion)).