
Sierra 3500 Denali 2WD V8-6.0L (2011)
Note: Ensure that the reference marks are aligned before installing the propeller shaft.
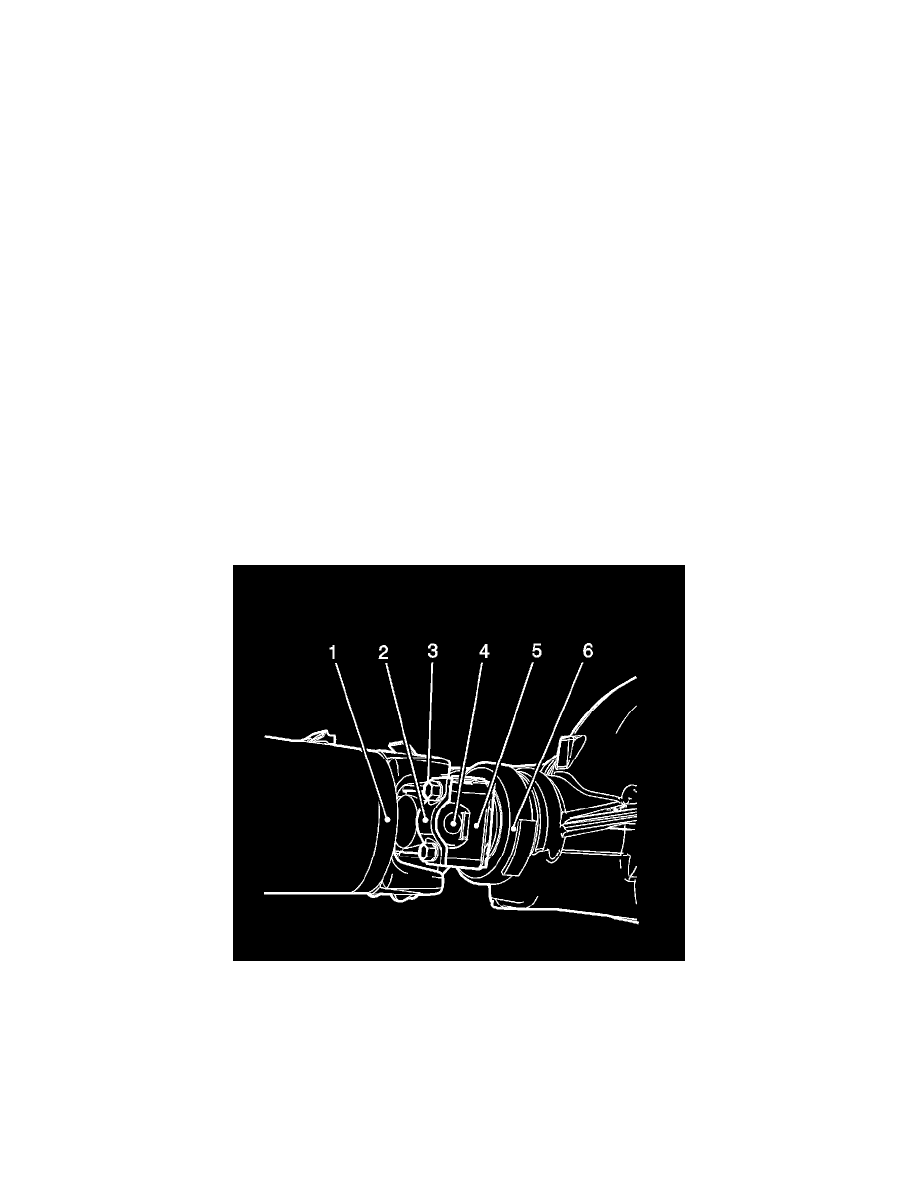
4. Align the reference marks on the propeller shaft (1), universal bearing cap (4), pinion flange (5), and the rear axle housing (6).
5. With the reference marks aligned, install the propeller shaft (1) on the rear axle (6).
Caution: Refer to Fastener Caution (See: Service Precautions/Vehicle Damage Warnings/Fastener Caution).
6. Install the rear propeller shaft bolts (3) and the strap (2).
Tighten the yoke retainer bolts to 25 Nm (18 lb ft).
7. Remove the support and lower the vehicle.
Two-Piece Propeller Shaft Replacement
Two-Piece Propeller Shaft Replacement
Special Tools
J 43218 Clamp Pliers - Narrow Jaw
Removal Procedure
Note: Observe and accurately reference mark all driveline components relative to the propeller shaft and axles before disassembly. These components
include the propeller shafts, the drive axles, the pinion flanges, the output shafts, etc. All components must be reassembled in the exact relationship to
each other as they were when removed. In addition, published specifications and torque values, as well as any measurements made prior to disassembly
must be followed.
1. Raise and support the vehicle. Refer to Lifting and Jacking the Vehicle (See: Maintenance/Vehicle Lifting/Service and Repair).
2. Reference mark the propeller shaft (1), the universal joint strap (2), the universal bearing cap (4), the drive pinion yoke (5), and the rear axle
housing (6).
3. Remove the rear propeller shaft bolts (3) and the universal joint strap (2).