
Sierra 3500 Denali 4WD V8-6.0L (2011)
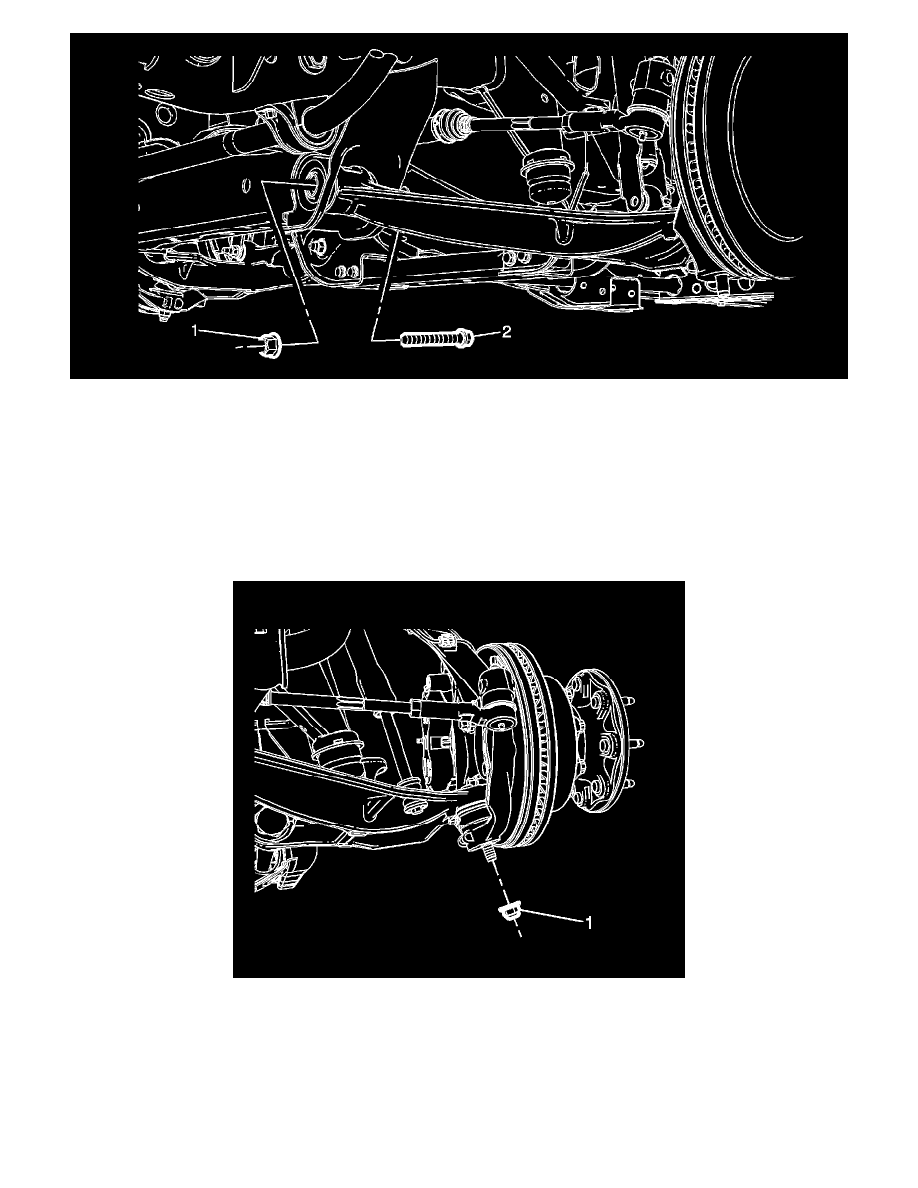
3. Install the lower control arm front bolt (2) and nut (1) and hand tighten.
4. Before tighten the lower control nuts to the specified torque, perform the following to ensure the proper trim height settings:
1. Support the lower control arm.
2. Using an appropriate hydraulic jack, raise the lower control arm until just contacts both jumper bumpers.
5. Tighten the front and rear lower control arm mounting nuts:
1. First Pass 180 Nm (133 lb ft).
2. Final Pass additional 60 degrees.
6. Install the lower ball joint in the steering knuckle.
7. Install the NEW lower ball joint nut (1) and tighten to:
1. First Pass 50 Nm (37 lb ft).
2. Final Pass additional 95 degrees.
8. Install the front shock absorber to the lower control arm. Refer to Shock Absorber Replacement (2500, 3500) (See: Suspension Strut / Shock
Absorber/Service and Repair/Front Suspension/Shock Absorber Replacement).
9. Install the wheel drive shaft, if removed. Refer to Wheel Drive Shaft Replacement (1500) (See: Transmission and Drivetrain/Drive Axles,