Sierra Classic 1500 4WD V8-5.3L (2007)

4. Inspect the rear output shaft bushing for scoring or wear.
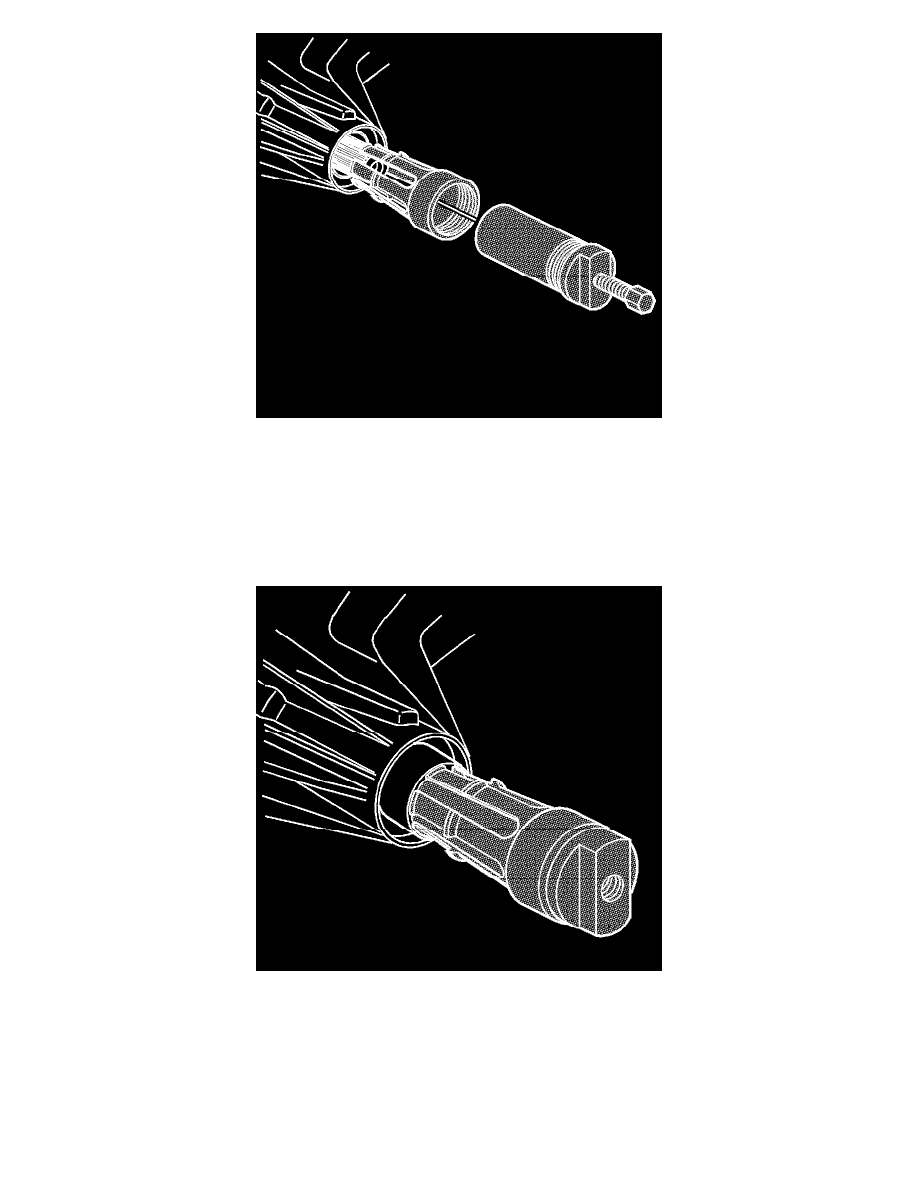
5. If the vehicle is equipped with a light duty transfer case, remove the rear output shaft bushing if required, using the J 45380.
^
Install the finger section of the J 45380 in front of the bushing.
^
Install the tube and forcing screw to the finger section. Ensure the forcing screw is backed out.
^
Using a wrench on the forcing screw, remove the rear output shaft bushing.
6. If the vehicle is equipped with a super heavy duty transfer case, refer to Transfer Case Assembly Replacement.
Installation Procedure
1. If the vehicle is equipped with a light duty transfer case, install a NEW rear output shaft bushing, if required using the J 45380
^
Install the bushing or the finger section of the J 45380.
^
Install the finger section to the main body of the J 45380.
^
Position the bushing and tool to the case.
^
Using a hammer and the J 45380, install the bushing.
2. If the vehicle is equipped with a super heavy duty transfer case, remove the transfer case. Refer to Transfer Case Assembly Replacement.
