
Sierra Classic 2500 4WD V8-6.0L (2007)
Installation Procedure
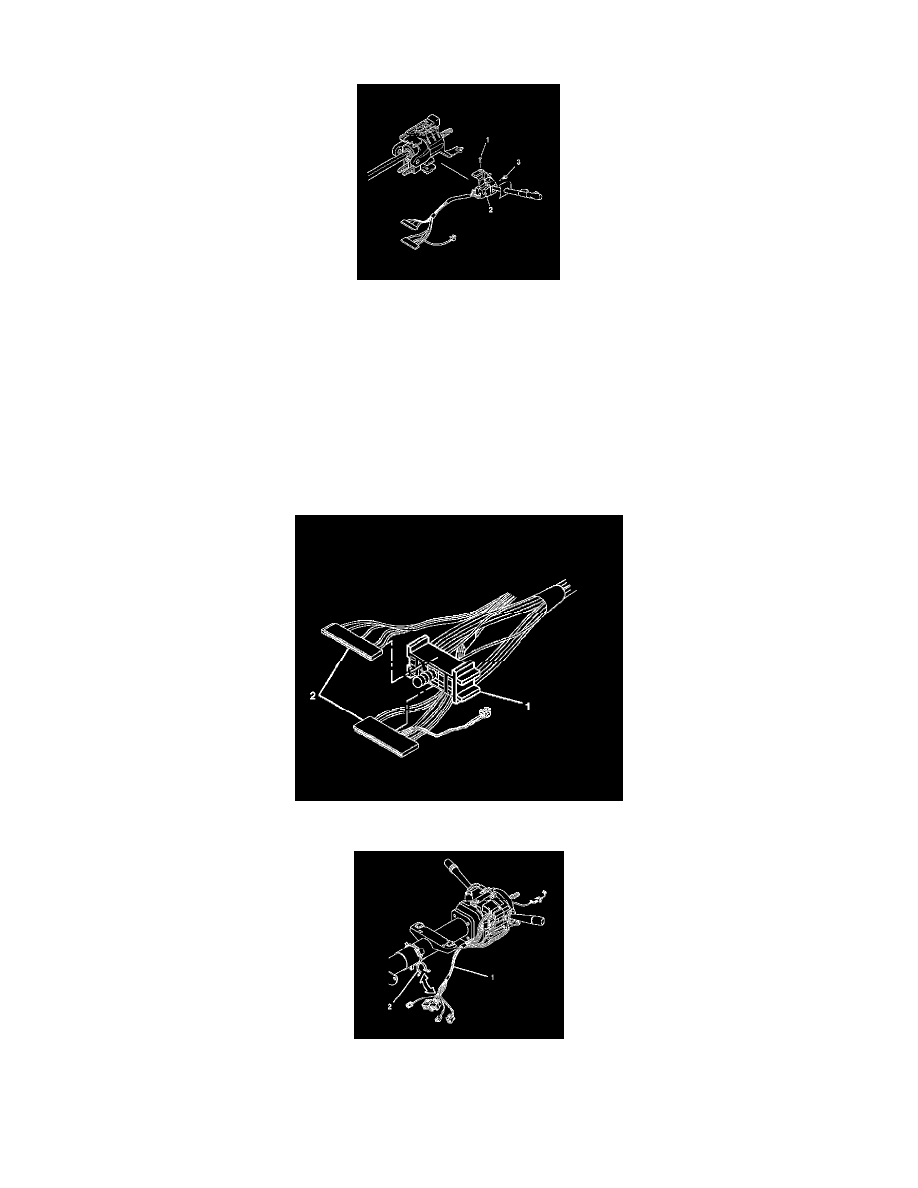
1. Install the turn signal and multifunction switch assembly (2) onto the steering column tilt head assembly.
2. Notice:
Refer to Fastener Notice.
Important:
Be sure that the electrical contact of the turn signal and multifunction switch assembly (2) rests on the turn signal cancel cam assembly.
Screw the 2 pan head tapping screws (1) and (3) into the turn signal and multifunction assembly (2).
^
Tighten the top pan head tapping screw (1) to 3 Nm (27 inch lbs.) for Domestic Column Shift.
^
Tighten the top pan head tapping screw (1) to 7 Nm (62 inch lbs.) for Domestic Floor Shift and Export Column Shift.
^
Tighten the side pan head tapping screw (3) to 7 Nm (62 inch lbs.) for all.
3. Slide the 2 connectors (2) of the turn signal and multifunction switch assembly into the bulkhead connector (1).
4. Connect the turn signal and multifunction switch assembly connector to the SIR coil connector.
5. Important:
The abrasion sleeve must be installed back onto the steering column wire harness assembly. The ignition lock cylinder case wires and connector
must be hanging out of the middle of the abrasion sleeve.