Sierra Classic 2500 4WD V8-6.0L (2007)

Stabilizer Link: Service and Repair
Stabilizer Shaft Link Replacement (2500)
Removal Procedure
1. Raise and support the vehicle. Refer to Vehicle Lifting.
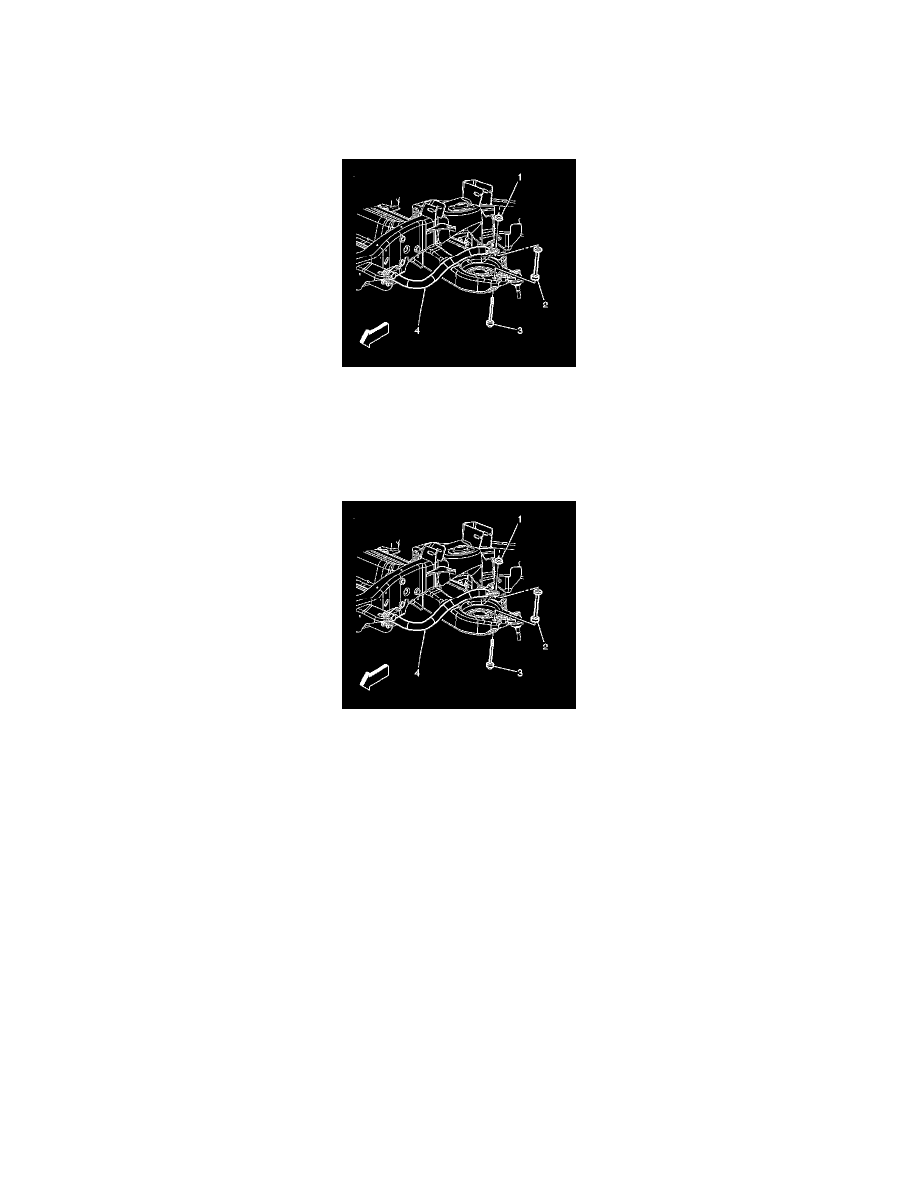
2. Remove the stabilizer shaft nut (1) from the link bolt.
3. Remove the stabilizer shaft link bolt (3).
4. Remove the stabilizer shaft link insulators and spacers (2).
5. Inspect all of the parts for wear and damage.
Installation Procedure
1. Install the stabilizer shaft link insulators and spacers (2).
2. Perform the following procedure before installing the stabilizer link bolts.
^
Remove all traces of the original adhesive patch.
^
Apply Threadlocker GM P/N 12345382 (Canadian P/N 10953489) BLUE LOCTITE #242 on the threads of the bolts.
3. Install the stabilizer shaft link bolts (3).
4. Notice:
Refer to Fastener Notice.
Notice:
To avoid stabilizer shaft damage due to loss of clamp load, the threads of the link bolt must protrude 2 to 4 threads above the link nut after the
specified torque is achieved.
Install the stabilizer shaft nut (1) to the link bolt.
Tighten the nut to 10 Nm (89 inch lbs.). Continue to tighten the nut until 2-4 threads protrude above the nut.
5. Remove the safety stands
6. Lower the vehicle.
