
Sierra Classic 2500 4WD V8-6.0L (2007)
Shift Solenoid: Service and Repair
Allison - Automatic Transmission
Control Valve Solenoid Replacement (SS1, SS2, SS3, TCC, and MAIN MOD)
Removal Procedure
1. Remove the oil pan and the transmission internal oil filter. Refer to Oil Pan Replacement.
2. Disconnect the internal wiring harness from the solenoid being changed.
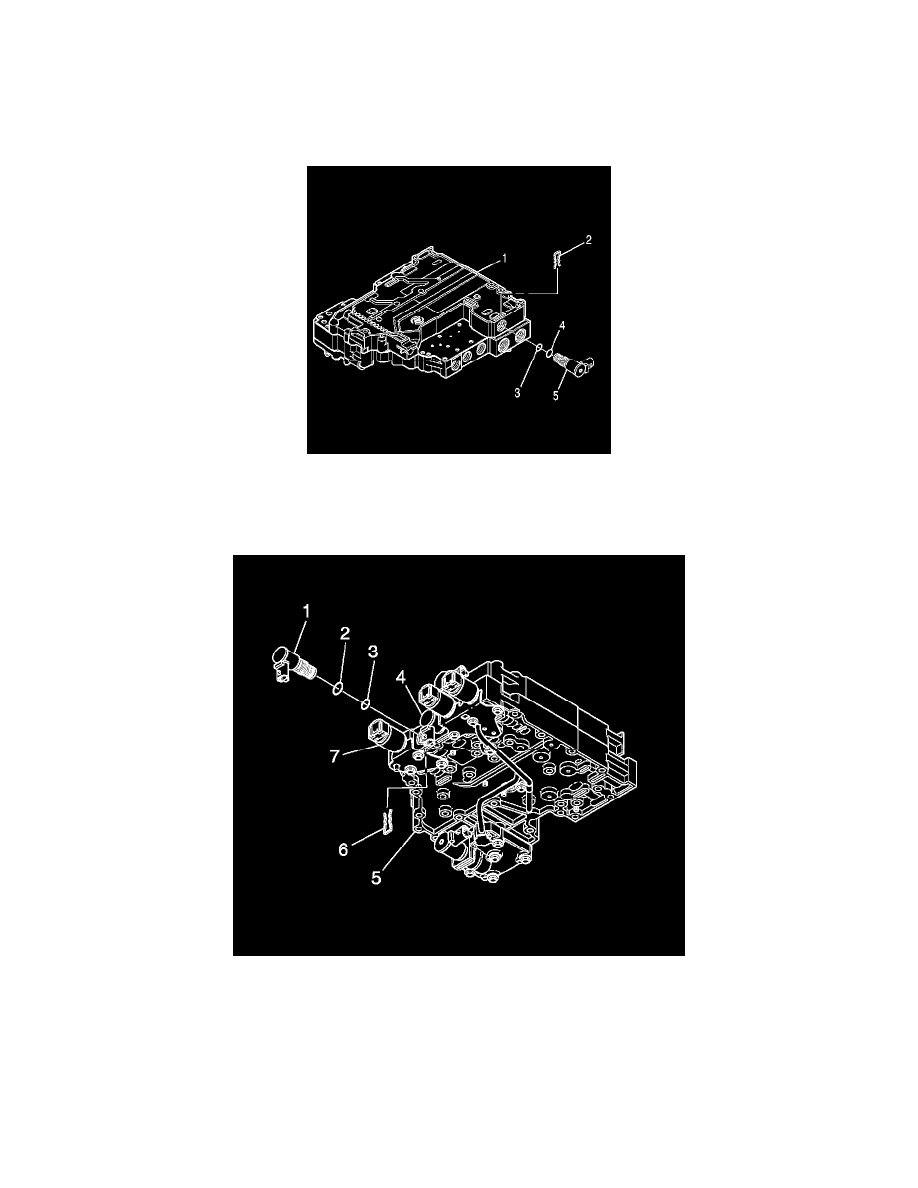
3. Remove the solenoid retainer (2) for shift solenoid 1 (SS1) (5). Note the position of the solenoid connector and pull the solenoid (5) out of the
bore in the control valve assembly (1). The O-rings (3 and 4) provide the resistance felt during removal.
4. Remove the solenoid retainer (6) for shift solenoid 2 (SS2) (1) or shift solenoid 3 (SS3) (4), whichever is being replaced.
5. Note the position of the solenoid connector and pull the solenoid out of the bore in the control valve assembly. The O-rings (2 and 3) provide the
resistance felt during removal.
6. Important:
The TCC pressure control solenoid (PCS) retaining bracket must not be modified. Note that the angle between the 2 bracket surfaces is less than
90°. Replace the bracket if the angle is 90° or more.
Remove the TCC PCS retaining bolt and retaining bracket.
7. Remove the TCC PCS (7).