
Sierra Classic 2500 4WD V8-8.1L (2007)
Installation Procedure
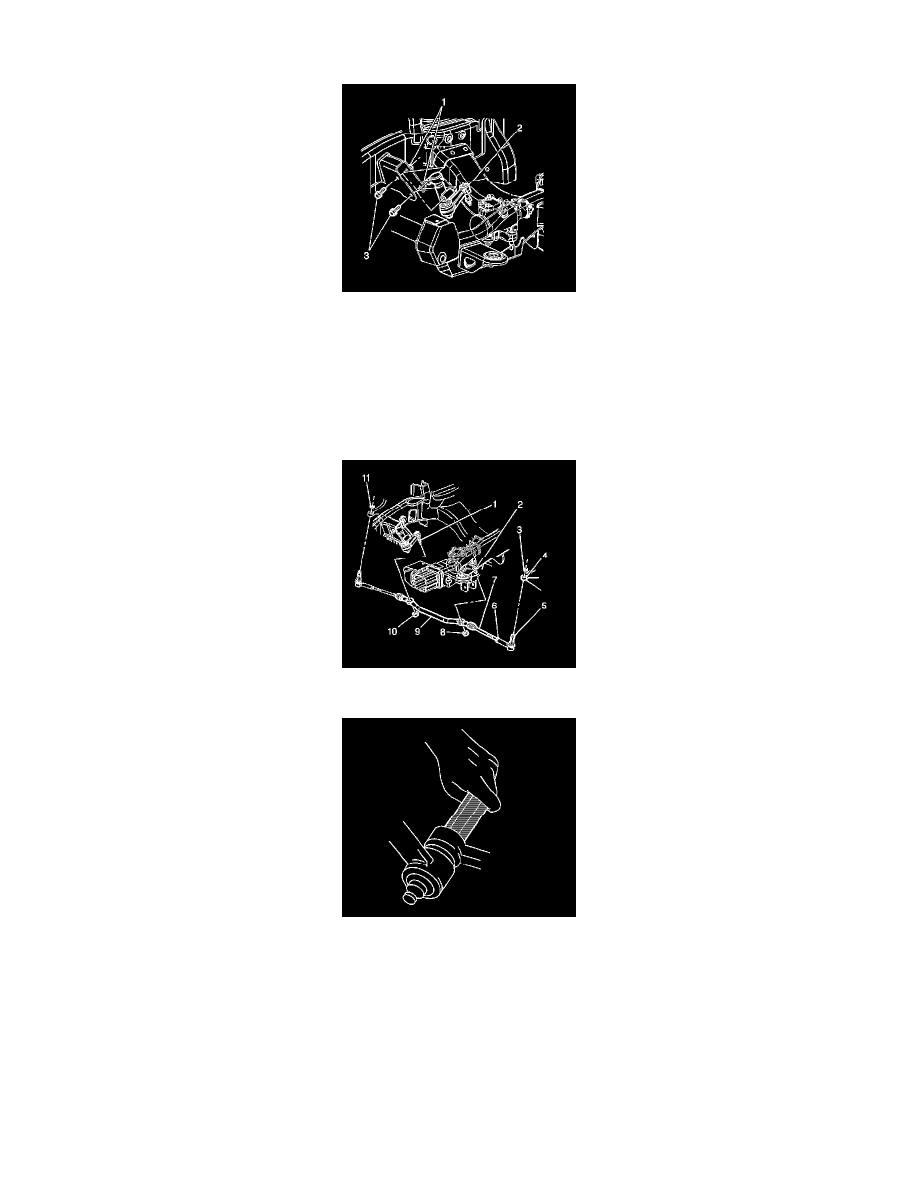
1. Position the idler arm (2) on the frame.
2. Notice:
Refer to Fastener Notice.
Install the frame bolts (3) and the nuts (1) to the idler arm.
Tighten the frame bolts or nuts to 99 Nm (73 ft. lbs.).
3. Install the relay rod (9) to the idler arm ball stud (1). Ensure the seal is on the stud.
4. Use the J 29193 in order to seat the tapers.
Tighten the J 29193 or the J 29194 to 54 Nm (40 ft. lbs.) in order to seat the tapers.
5. Install the new idler arm ball stud prevailing torque nut to the idler arm ball stud.
Tighten the nut to 62 Nm (46 ft. lbs.).
6. Install the engine protection shield, if equipped.
7. Lower the vehicle.
8. Check the wheel alignment. Refer to Measuring Wheel Alignment.