Sierra Denali RWD V8-6.2L (2009)

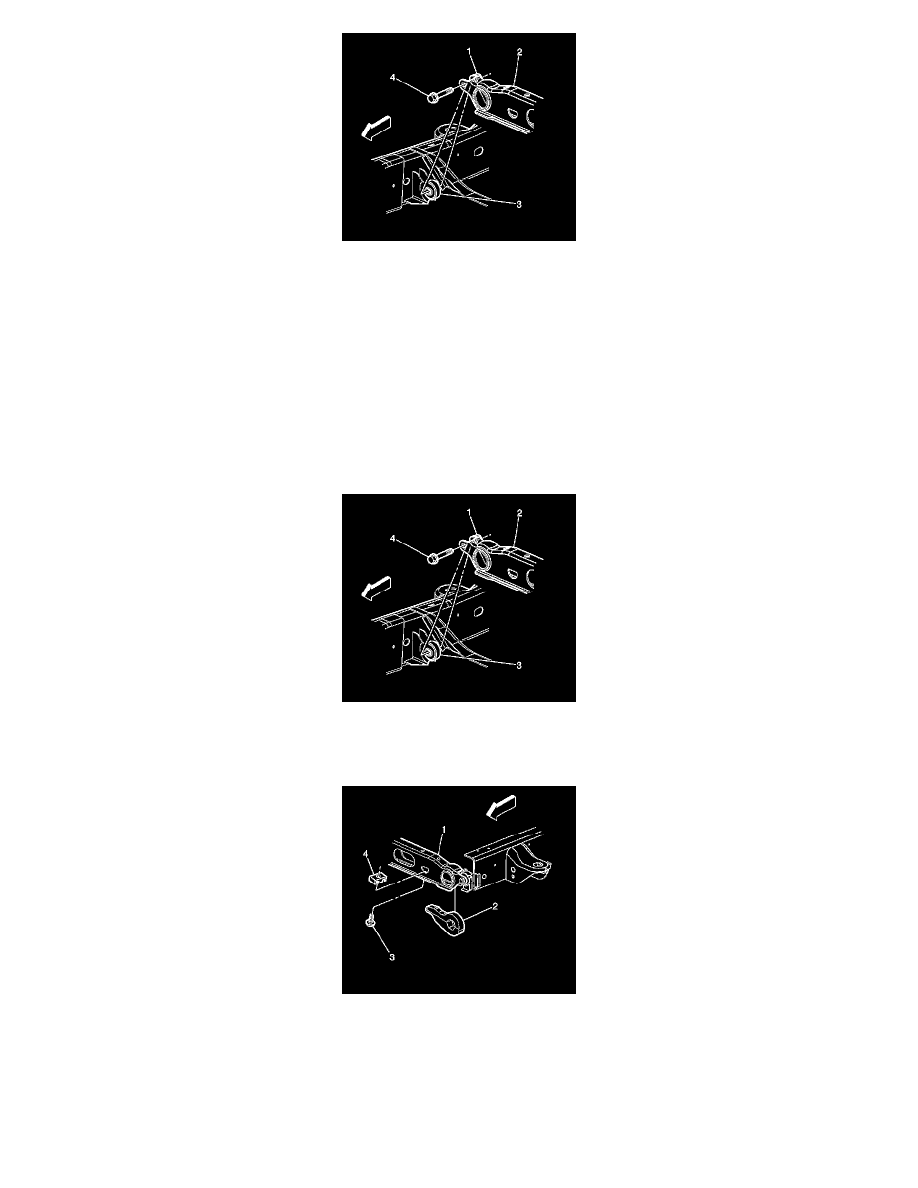
7. Remove the torsion bar crossmember bolt (4) from the weld nut (1).
8. Remove the crossmember (2) from the crossmember mount (3).
9. Remove the torsion bar from the crossmember.
Note
The left and right torsion bars are different and are not interchangeable.
10. Remove the torsion bars from the vehicle.
Installation Procedure
1. Position the torsion bar in the lower control arm.
2. Install the torsion bar in the crossmember (2) on the crossmember mount (3).
Caution: Refer to Fastener Caution (See: Service Precautions/Vehicle Damage Warnings/Fastener Caution) .
3. Install the torsion bar crossmember bolt (4) in the weld nut (1) and tighten to 110 Nm (81 lb ft). .
4. Install the adjustment arm (2) in the crossmember (1).
5. Install the adjuster bolt (3) and the adjuster nut (4).
6. Install the torsion bar into the adjustment arm until the torsion bar is fully seated.
