
Suburban 1/2 Ton 2WD V8-379 6.2L DSL (1986)
Ball Joint: Service and Repair
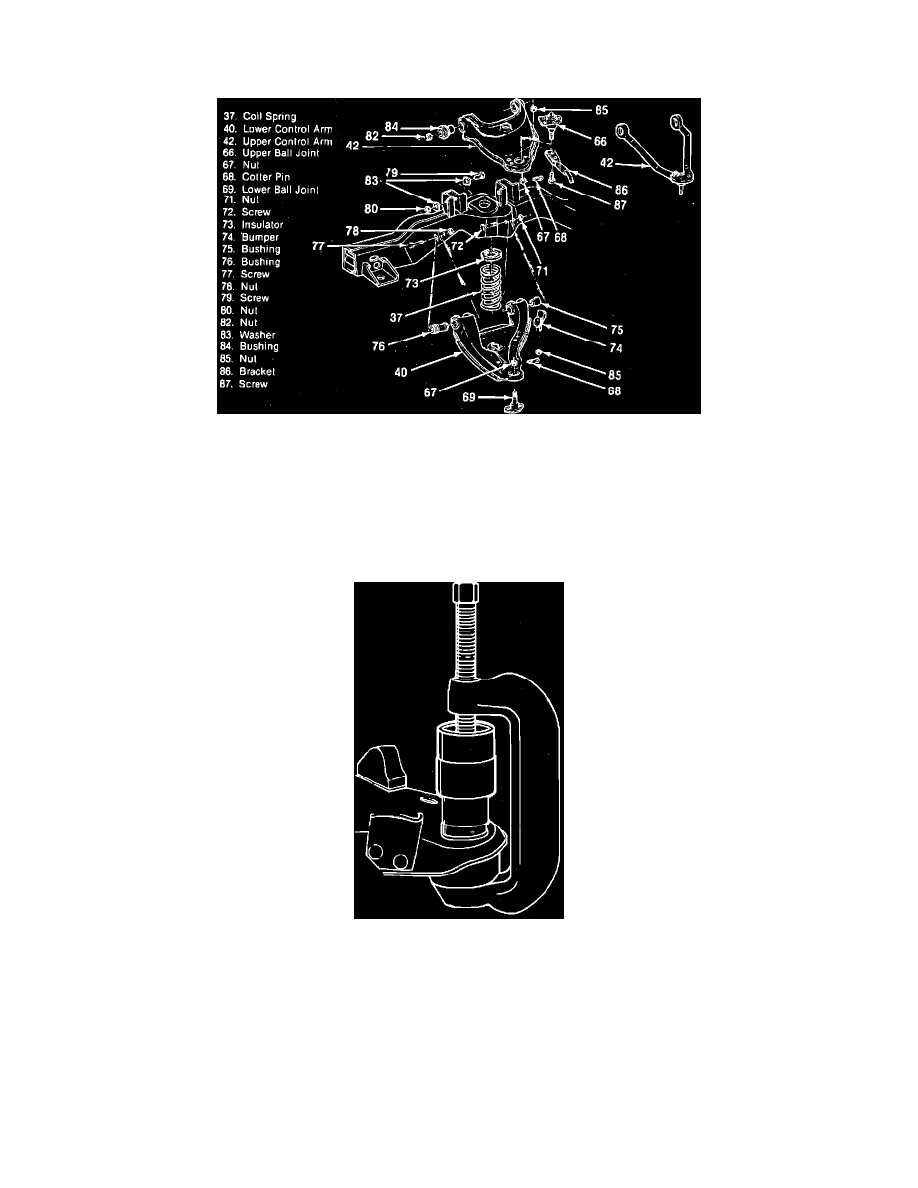
Lower
Fig. 8 Control arms & components
Lower Ball Joint
1.
Raise and support front of vehicle.
2.
Support lower control arm with a suitable jack, then remove wheel and tire.
3.
Remove cotter pin from lower ball stud, then loosen stud nut approximately two turns.
4.
Separate ball joint from steering knuckle using suitable tool, then remove stud nut.
5.
Lift knuckle assembly from ball stud, then position knuckle aside to allow clearance for joint removal.
Fig. 7 Pressing lower ball joint from control arm
6.
Press ball joint from control arm using suitable tool, Fig. 7.
7.
Press new joint into control arm by reversing removal tool.
8.
Install ball joint to steering knuckle.
9.
Install stud nut and tighten to specifications. Install cotter pin. If cotter pin does not align with stud nut, tighten nut an additional amount
until cotter pin can be installed. Never loosen stud nut when installing cotter pin.
10.
Install wheel and tire assembly, then lower vehicle.