
Suburban 1/2 Ton 2WD V8-379 6.2L DSL (1986)
Axle Shaft Assembly: Service and Repair
Axle Assembly
REAR DRIVE AXLE
1.
Raise and support vehicle. Using a jack, support rear axle assembly.
2.
Drain fluid from axle assembly.
3.
Mark driveshaft to flange, then disconnect driveshaft and tie driveshaft to side rail or crossmember.
4.
Tape bearing cups to prevent loss of the rollers.
5.
Remove wheel and brake drum or hub and drum assembly.
6.
Disconnect parking brake cable from lever and brake flange plate.
7.
Disconnect and cap hydraulic brake lines from connectors.
8.
Remove shock absorbers from axle brackets.
9.
Disconnect vent line from vent fitting.
10.
Remove height sensing and brake proportional valve brackets.
11.
Remove nuts and washers from U-bolts.
12.
Carefully remove U-bolts, spring plates and spacers from axle assembly.
13.
Lower axle assembly from vehicle.
14.
Reverse procedure to install.
Axle Housing
REAR DRIVE AXLE HOUSING
1.
Raise and support vehicle, then remove rear wheels.
2.
Remove the two trunnion bearing U-bolts, then split universal joint and position propeller shaft aside.
3.
Remove hub and drum assembly, then disconnect parking brake cable at lever and flange plate.
4.
Disconnect brake hose at axle connector, then the shock absorbers at axle brackets.
5.
Support axle housing with a suitable jack, remove spring plate U-bolts and remove axle housing from vehicle.
6.
Reverse procedure to install.
Axle Shaft
REAR DRIVE AXLE SHAFT
1.
Remove hub cap, then install slide hammer adapter into tapped hole in axle flange.
2.
Attach slide hammer onto adapter, then remove axle shaft from housing.
3.
Install axle shaft, ensuring flange and hub splines align.
4.
Install new gasket, position flange to hub, then install attaching bolts and tighten to specifications.
Bearing & Cup
REAR WHEEL BEARINGS
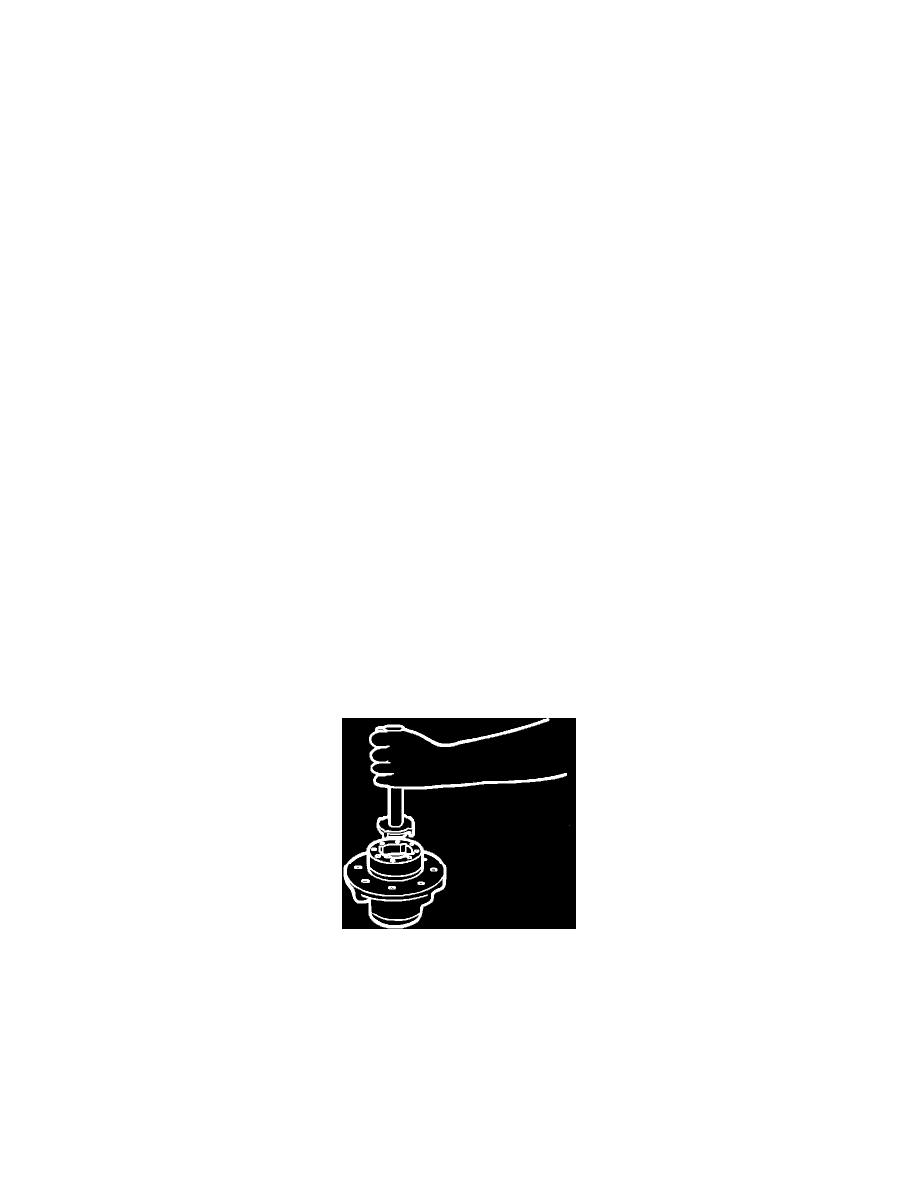
Fig. 7 Removing Outer Bearing & Cup
1.
Using a hammer and suitable drift, drive inner bearing, cup and seal from hub assembly.
2.
Remove outer bearing snap ring using suitable pliers.
3.
Using tools J-24426 and J-8092, Fig. 7, drive outer bearing and cup from hub assembly.
4.
Install new outer bearing into hub assembly.
5.
Install outer bearing cup using tools mentioned in Step 3. Drive cup beyond snap ring groove. Install outer bearing cup with tool J-8092
positioned upside down to prevent chamfer on tool from damaging cup.
6.
Install snap ring into groove using suitable pliers.
7.
Using tool J-24426, drive cup against snap ring.
8.
Install inner bearing cup using tools J-24427 and J-8092. Drive cup into position until it seats against shoulder of hub bore.
9.
Install new oil seal.