
Suburban 3/4 Ton 4WD V8-393 6.5L DSL Turbo (1993)
INSTALL OR CONNECT (Figure 1)
1.
Trim panel to the end gate.
NOTICE:
Refer to "Notice" on page lOA5-1.
2.
Trim panel to end gate screws.
TIGHTEN
*
Trim panel to end gate screws to 1.9 N.m (17 lbs. in.).
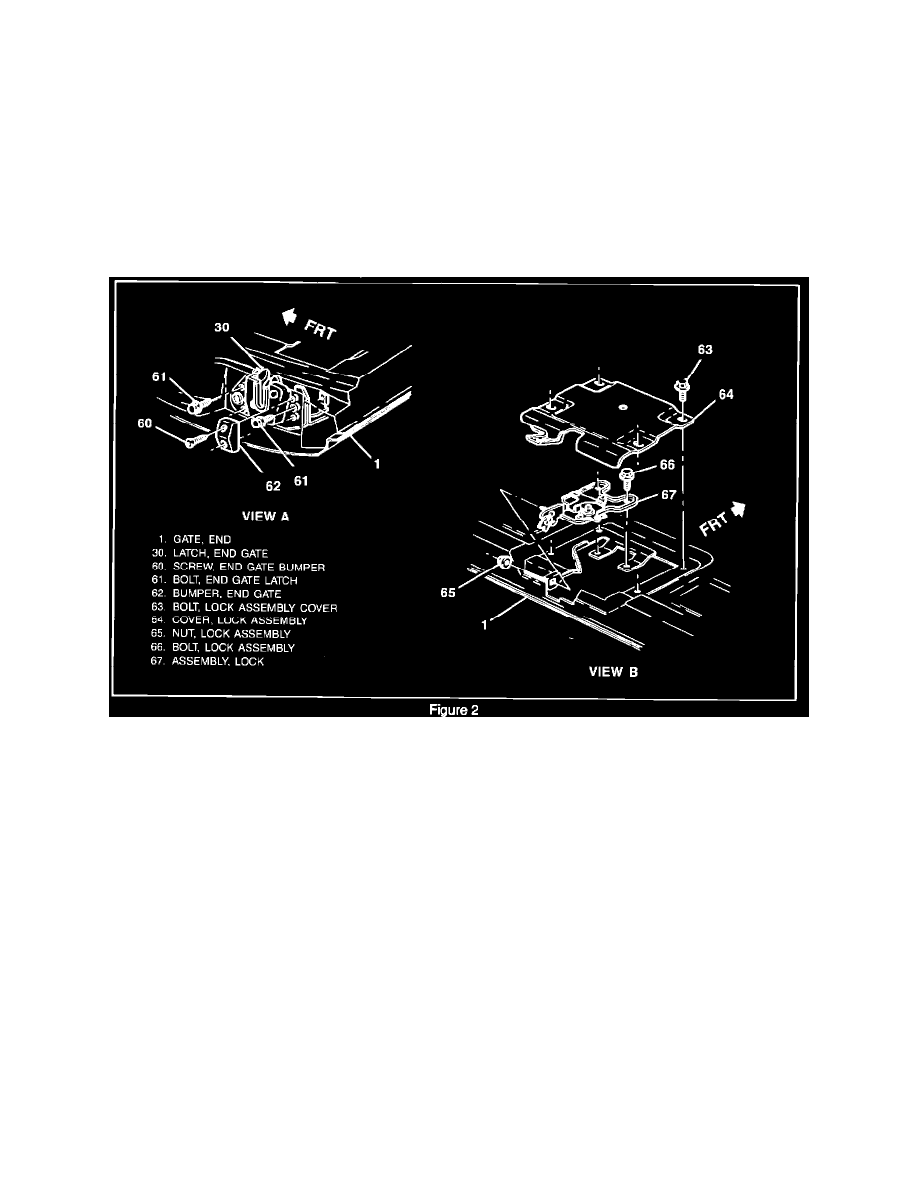
Lock Assembly Replacement
REMOVE OR DISCONNECT (Figure 2)
1.
Trim panel. Refer to "Trim Panel Replacement."
2.
Lock assembly cover to the end gate bolts.
3.
Lock assembly cover.
4.
Lock rods from the lock assembly.
NOTE
Mark the location of the lock assembly on the end gate.
5.
Lock assembly to the end gate bolts.
6.
Lock assembly from the end gate.
INSTALL OR CONNECT (Figure 2)
NOTICE:
For steps 2 and 5, refer to "Notice" on page lOA5-1.
1.
Lock assembly to the end gate.
Align the assembly to the marks on the end gate inner panel.
2.
Lock assembly to the end gate bolts.
TIGHTEN
Lock assembly to the end gate bolts to 15 N.m (11 lbs. ft.).
3.
Lock rods to the lock assembly.
4.
Lock assembly cover.