
Syclone V6-262 4.3L Turbo (1991)
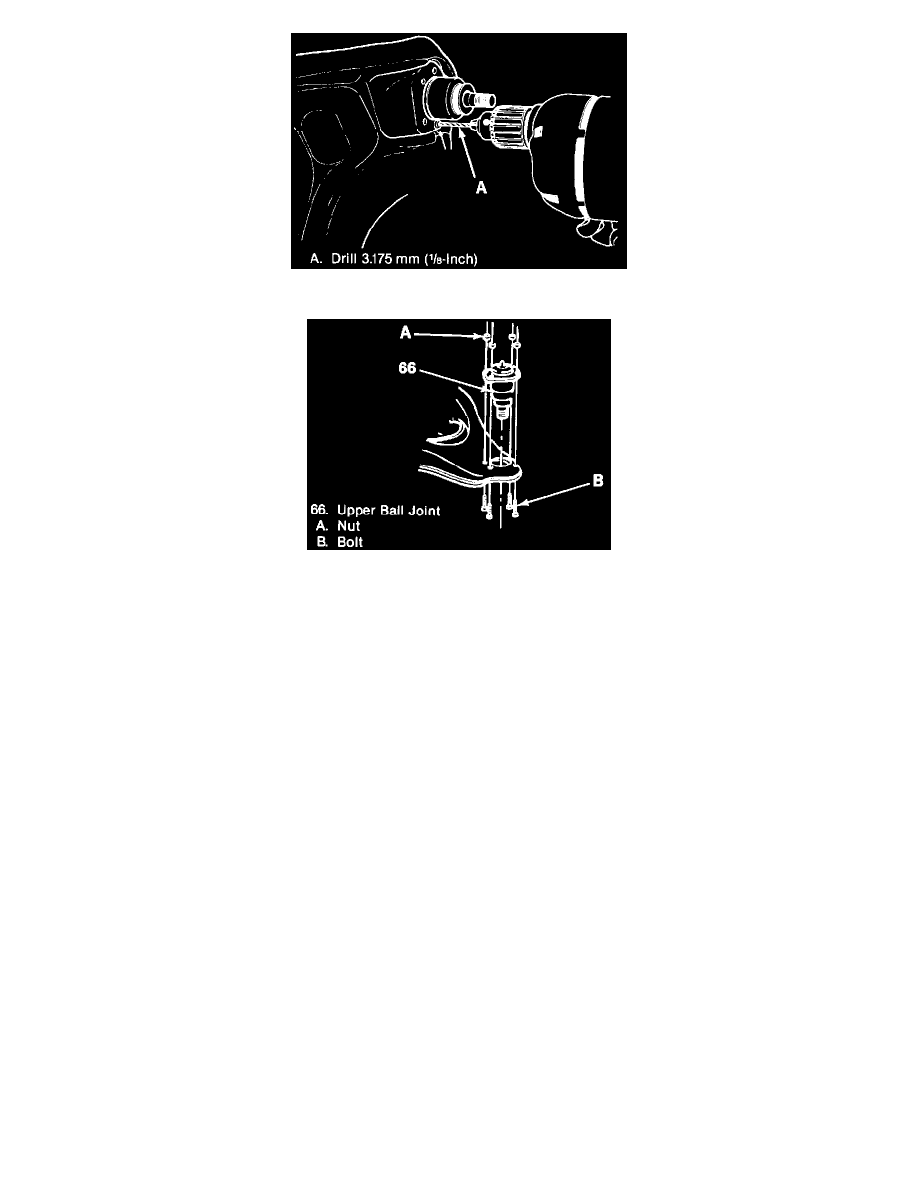
Drilling The Ball Joint Rivets
Installing The Upper Ball Joint
SPECIAL TOOLS REQUIRED (or equivalents)
^
J-23742, Ball joint separator.
REMOVE OR DISCONNECT
1. Raise the vehicle and support the lower control arm with floor stands. Since the weight of the vehicle is used to relieve the spring tension on the
upper control arm, the floor stands must be positioned between the spring seats and the lower control arm ball joints for maximum leverage.
WARNING: Floor jack or stand must remain under the control arm spring seat during removal and installation to retain the spring and
control arm in position. Failure to do so could result in personal injury.
2. Wheel and tire assembly.
3. Caliper and support caliper with a piece of wire to prevent damage to the brake line.
4. Cotter pin (68) and stud nut (67) from the upper ball joint (66).
5. Using J-23742, apply pressure on the tool until the stud breaks loose from control arm.
6. J-23742 and pull the stud away from the knuckle. Support the knuckle assembly so that its weight will not damage the brake hose.
7. Rivets from the upper ball joint.
a. Use a 3.175 mm (118-inch) drill to cut a 6.35 mm (114-inch) deep hole in the center of each rivet.
b. Drill the rivet heads away using a 12.7 mm (112-inch) drill.
c. Punch the rivets out using a small pin punch.
8. Upper ball joint.
INSTALL OR CONNECT
1. New upper ball joint (66) to the upper control arm (42).
CAUTION: When fasteners are removed, always reinstall them at the same location from which they were removed and use the correct torque
value. If a fastener needs to be replaced, use a fastener of the correct size and strength. Failure to do so may result in component/system damage or
malfunction.
2. Position four attaching bolts and nuts and tighten to 23 Nm (17 ft lbs). Take the support away from the knuckle assembly.
3. Upper ball joint to the steering knuckle.
4. Stud nut (67) and tighten to 83 Nm (61 ft lbs). Align the slot in the stud nut with the hole in the stud by tightening the stud nut.