
Syclone V6-262 4.3L Turbo (1991)
Before reassembly, thoroughly clean all parts. Any debris or contamination could cause premature wear.
8.
Slide the revised retainer clamp and boot assembly onto the stub shaft.
NOTE:
Do not clamp the retainer at this time.
9.
Aligning the reference marks, install the inner cage, ball bearings, and the outer cage onto the stub shaft. Install the snap ring.
10.
Apply about half the contents of the enclosed grease to the inside of the CV joint housing, making sure to coat the inner walls. Keep the center
vent hole free from grease.
11.
Align the reference marks on the shaft and CV joint housing and insert the shaft assembly into the housing. Install the snap ring on the CV joint
housing groove. Pack the remaining grease into the CV joint housing.
12.
Apply a very small bead of anaerobic Gasket Maker (P/N 1052842 or 1052943) to the metal jacket mating surface.
13.
By hand, place the CV boot assembly onto the CV joint housing, making sure it is positioned correctly. Place the CV assembly on a vertical press
and press the boot assembly onto the housing.
Important
Apply only enough pressure to seat the housing evenly into the metal jacket. Too much pressure may damage the CV boot assembly.
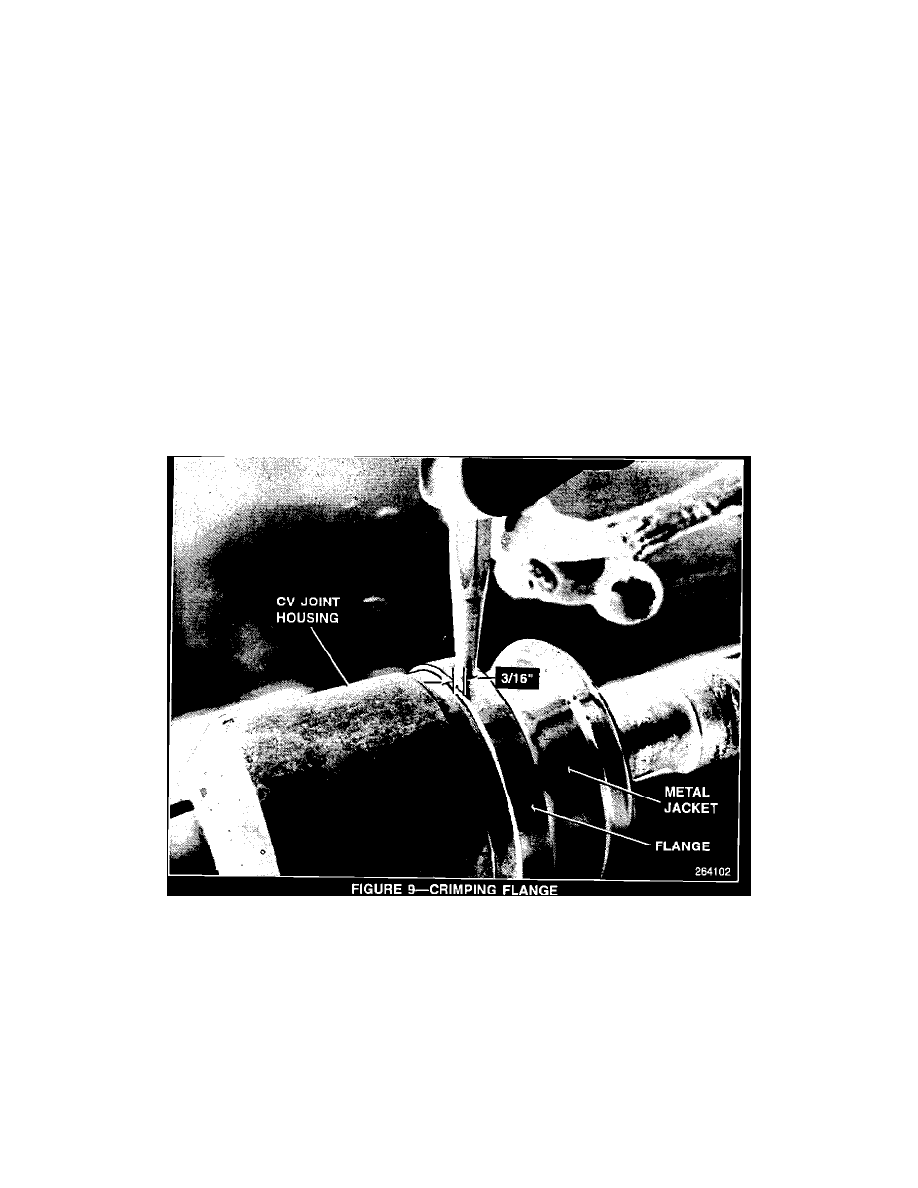
14.
Using a center punch, punch 8 evenly-spaced indentations 3/16" from the edge of the metal jacket. This will allow the flange on the metal jacket to
"crimp" to the CV joint housing (Figure 9).