
Terrain FWD L4-2.4L (2010)
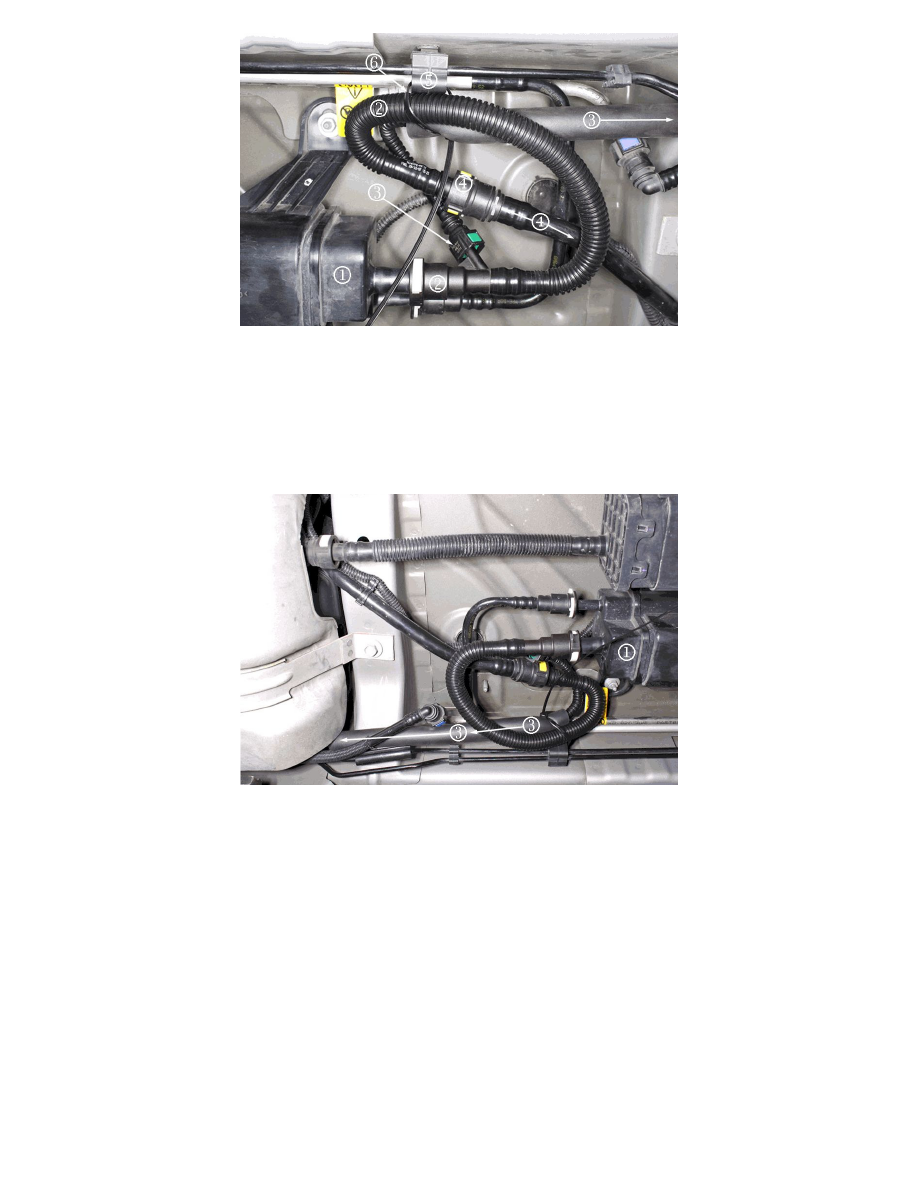
5. Connect the new 16 mm (5/8 in) EVAP jumper hose (larger diameter hose) (2) to the EVAP emissions canister (1).
6. Install the second piece of the new 8 mm (5/16 in) jumper hose (smaller diameter hose) (3) to the 45 degree T-fitting on the new 16 mm (5/8 in)
EVAP jumper hose (2). Ensure that the new 8 mm (5/16 in) jumper hose (3) is installed between the new 16 mm (5/8 in) EVAP jumper hose (2)
and floor pan.
7. Insert the non-connector end of the 16 mm (5/8 in) EVAP jumper hose (larger diameter hose) (2) into the existing EVAP vapor line (4).
8. Secure the new jumper hose assembly with a tie strap (6) through the hole in brake clip (5) on LH underbody rail. Avoid contacting the brake or
fuel line with the tie wrap.
9. Cut off excess tie strap (6).
10. Route the 8 mm (5/16 in) hose (3) on top of the fuel feed line on the left (driver's) side of the fuel tank assembly.
11. Continue routing the 8 mm (5/16 in) hose (3) through the suspension on the front side of the underbody rail and behind the tank and all-wheel
drive unit. Follow the path of the park brake cable. The 8 mm (5/16 in) line should be routed on top of the park brake cable routing.
12. Disconnect the existing EVAP-to-fuel tank vapor line (yellow connector) located on the rear right (passenger side) of vehicle at the fuel tank.
13. Connect the new 8 mm (5/16 in) hose (3) to the fuel tank.