
Typhoon V6-262 4.3L Turbo (1993)
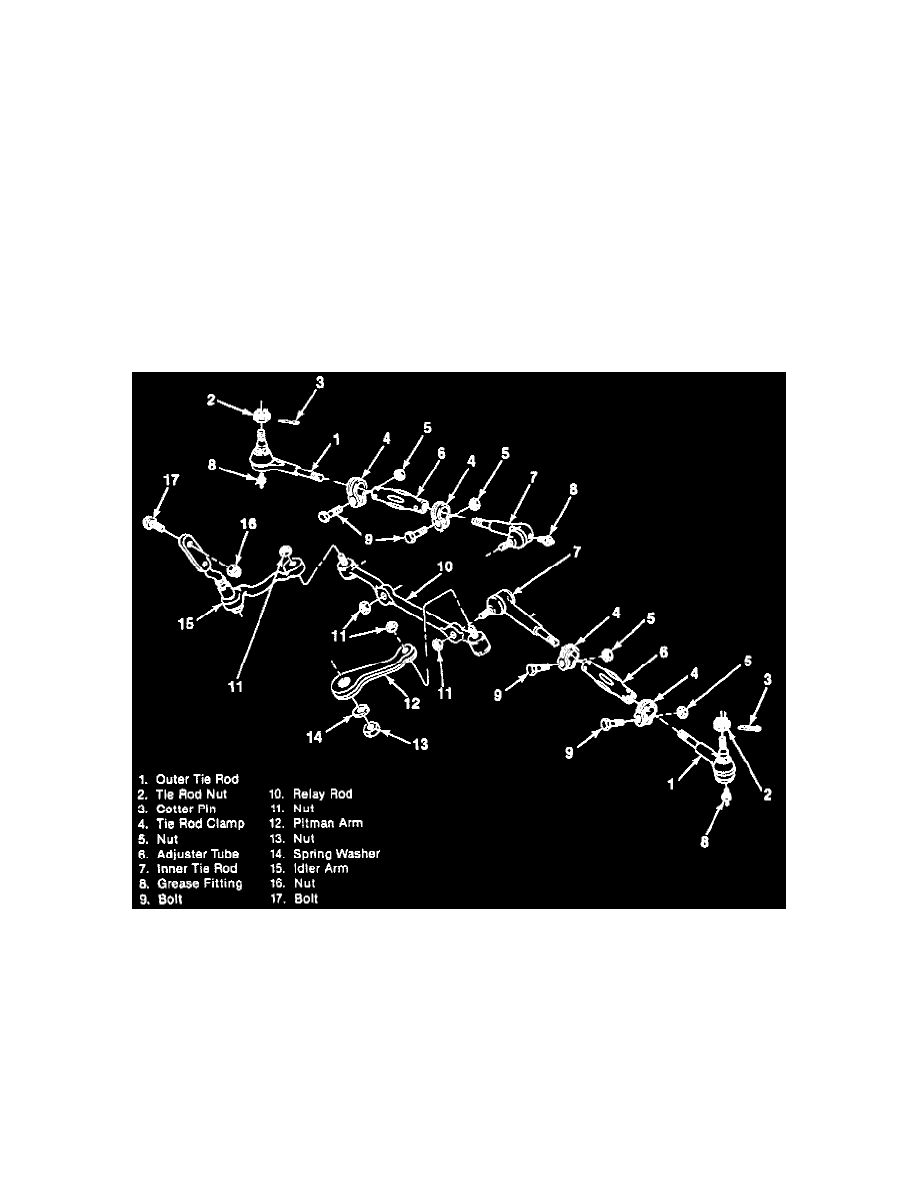
5. Pitman arm ball stud nut (11) and spring washer (14).
6. Pitman arm ball stud (12) from the relay rod (10), using J 24319-01.
7. Two lower steering gear bolts.
^
Loosen (do not remove) upper steering gear bolt.
^
Rotate the steering gear for pitman arm clearance at the frame crossmember and support it with a small block of wood.
8. Pitman arm nut (13) and spring washer (14).
^
Mark the pitman arm and the pitman shaft. This will permit proper alignment at assembly.
NOTICE: Do not hammer on pitman arm, pitman shaft, or puller. Damage to the pitman arm or steering gear may result.
9. Pitman arm (12). Using J 6632-01 or J 29107 (figure 9).
INSPECT
^
Ball stud threads for damage.
^
Ball stud seals for excessive wear.
CLEAN
^
Threads on the ball stud and ball stud nut.
Steering Linkage (2 Wheel Drive)
INSTALL OR CONNECT
TOOLS REQUIRED:
^
J 29193 Steering Linkage Installer (12 mm) J 29194 Steering Linkage Installer (14 mm)
1. Pitman arm (12) on the pitman shalt using J 29194.
^
Line up the marks that were made before removal.
2. Spring washer (14) and nut (13).
TIGHTEN