
V 3500 P/U 4WD V8-379 6.2L DSL (1988)
Push Rod: Service and Repair
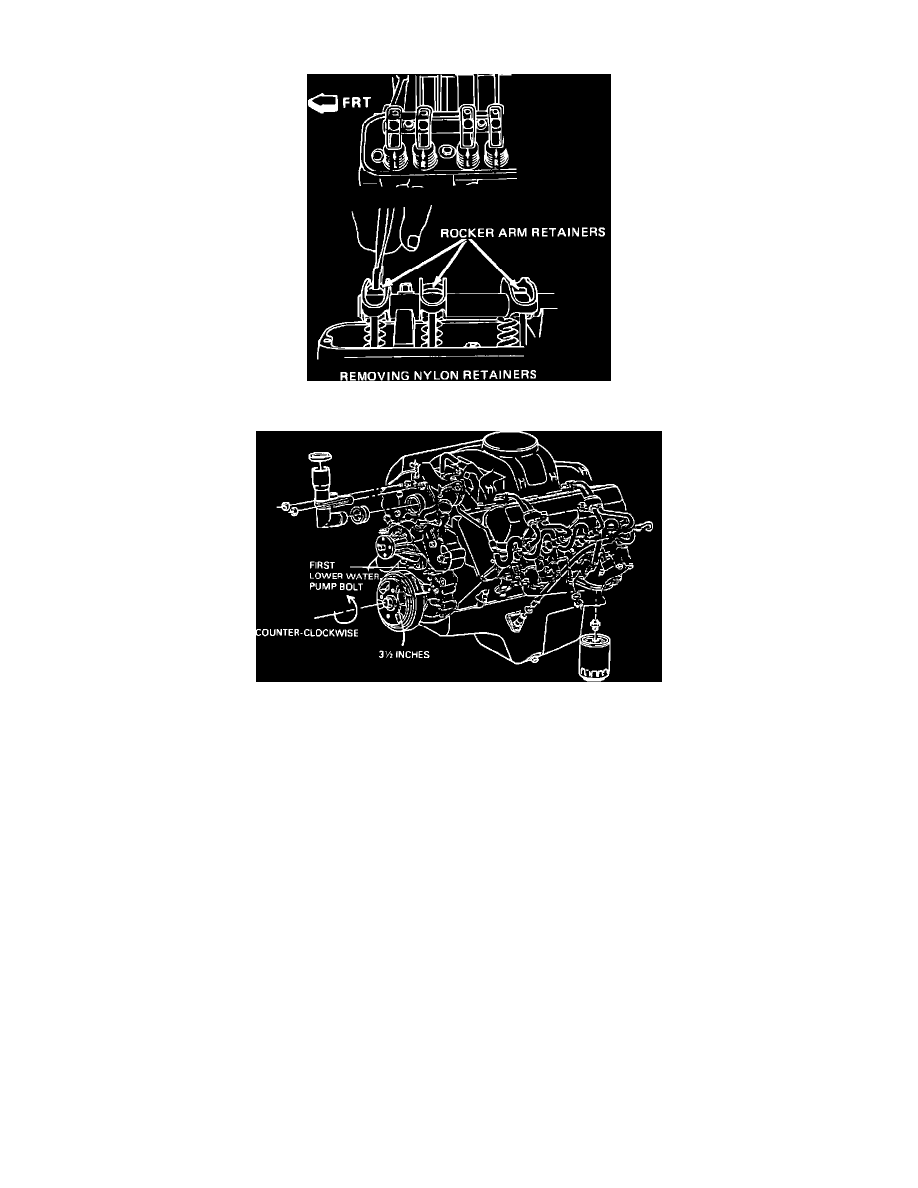
Fig. 9 Rocker arm shaft assembly
Fig. 10 Positioning engine for rocker arm shaft installation
1.
Remove valve cover.
2.
Remove rocker arm and shaft assembly as follows:
a. Insert screwdriver into bore of rocker shaft and break off ends of nylon rocker arm retainers.
b. Remove tops of retainers, Fig. 9, then remove rockers, noting position for installation.
3.
Remove pushrods, noting position for installation. Pushrods are identified with a paint stripe on the on the upper end, and the hardened upper ball
is darker in color than the lower ball. Failure to install pushrods in proper position may result in premature wear or damage.
4.
Reinstall pushrods, if removed.
5.
Install rockers on shaft, centering each rocker over hole in shaft, then install new retainers using suitable drift.
6.
Before installing rocker arm shafts, align TDC mark on engine with mark on engine balancer, then rotate crankshaft 3-1/2 inches
counterclockwise, or to first lower water pump bolt, Fig. 10. This will position engine so that all valves are closed. Tighten rocker arm shaft bolts
to specifications, tighten bolts slowly to allow lifters to bleed down. The rocker arm shaft must be installed with the split in the ring around
the shaft at bottom.