
V 3500 P/U 4WD V8-379 6.2L DSL (1988)
Steering Column: Service and Repair
Steering Column - Removal and Installation
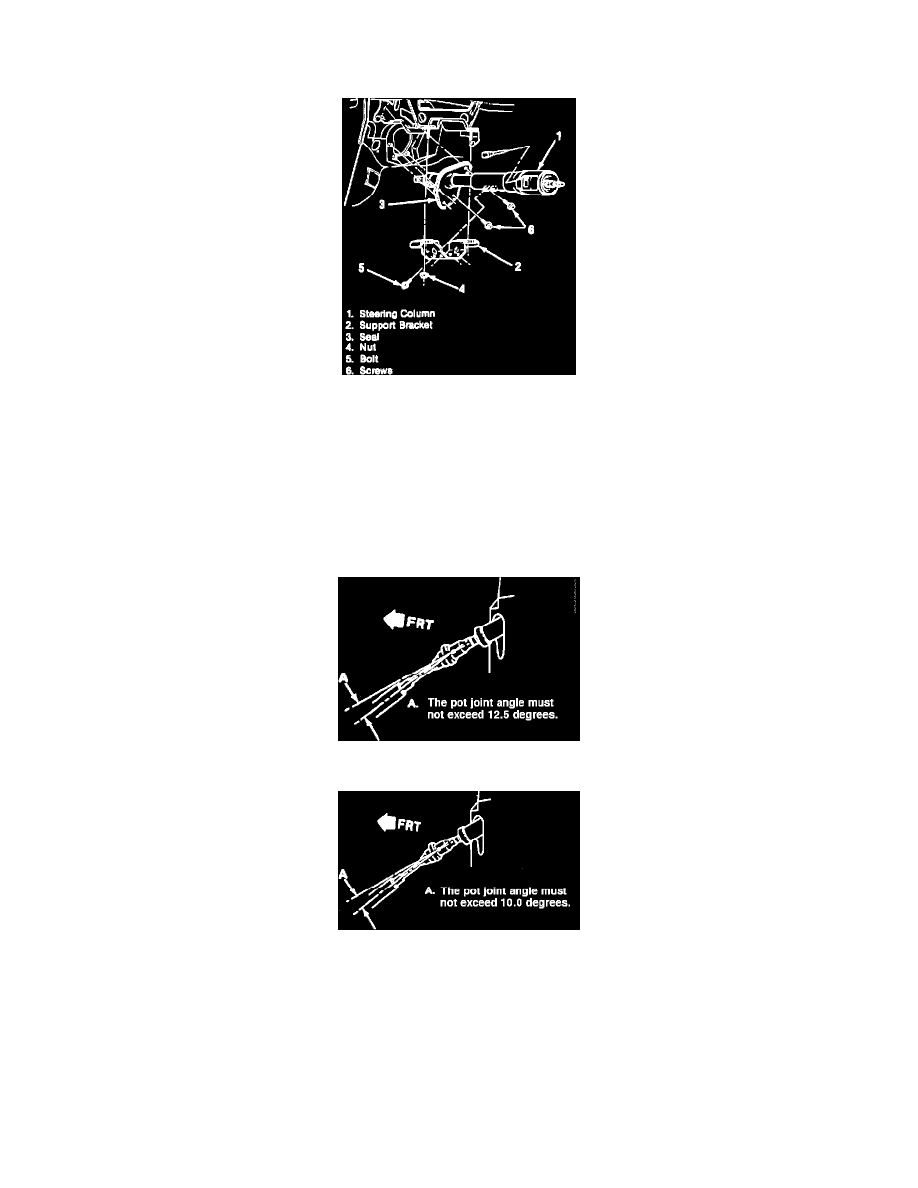
Fig. 3 Steering column removal
Removal
1.
Disconnect battery ground cable.
2.
Disconnect transmission control linkage from column shift tube levers.
3.
Remove upper clamp bolt from steering shaft. Mark location of pot joint on steering shaft. Fig. 3.
4.
Remove column support bracket, nuts and bolts.
5.
Remove column bolts and seal, then steering wheel with suitable steering wheel puller.
6.
Disconnect steering column electrical connectors.
7.
Rotate column so shift lever clears dash opening and remove.
Fig. 4 Pot joint angle
Fig. 5 Pot joint angle
Installation
1.
Lower end of column through dash opening and guide steering shaft into pot joint, lining up marks made at removal.
2.
Loosely attach support bracket, nuts and bolts, finger tighten.
3.
Install pot joint bolt. Bolt must pass through shaft undercut. Tighten to specifications.
4.
Measure pot joint operating angle.
a.
On Bravada & S/T 10-15, angle must not exceed 12.5°. Refer to Fig. 4.
b.
On C, K, R and V Models, angle must not exceed 10°. Refer to Fig. 5.
5.
Install attaching screws through cover and seal to dash panel.
6.
Connect electrical connectors and install steering wheel, then connect transmission linkage and battery ground cable.