
Yukon/Denali 2WD V8-4.8L VIN V (2005)
1. If replacing the HVAC module, transfer the components from the old HVAC module as necessary.
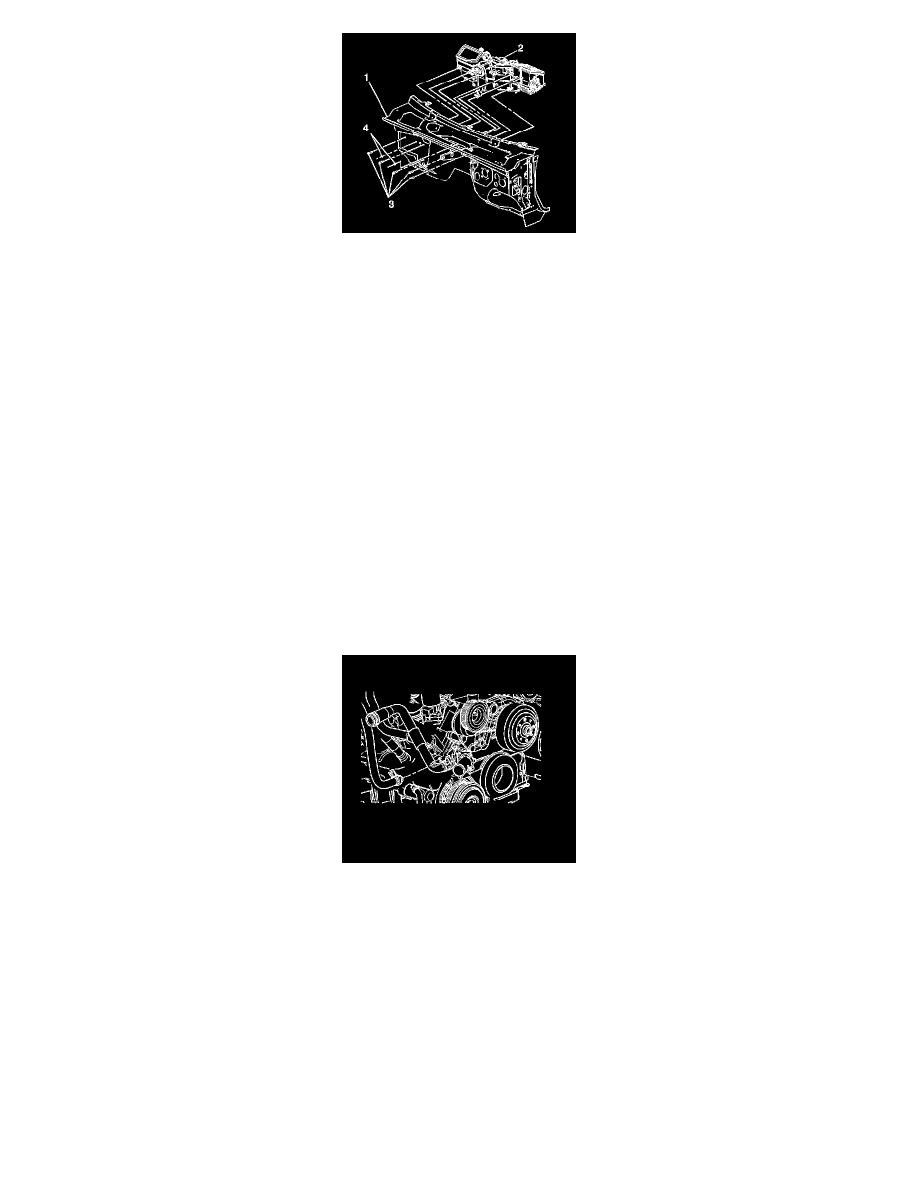
2. Install the HVAC module (2) to the vehicle (1).
Notice: Use the correct fastener in the correct location. Replacement fasteners must be the correct part number for that application. Fasteners
requiring replacement or fasteners requiring the use of thread locking compound or sealant are identified in the service procedure. Do not use paints,
lubricants, or corrosion inhibitors on fasteners or fastener joint surfaces unless specified. These coatings affect fastener torque and joint clamping
force and may damage the fastener. Use the correct tightening sequence and specifications when installing fasteners in order to avoid damage to parts
and systems.
3. Install the nuts (4) to the HVAC module (2).
Tighten
Tighten the nuts to 9 Nm (80 lb in).
4. Install the bolts (4) to the HVAC module (2).
Tighten
Tighten the bolts to 4 Nm (35 lb in).
5. Connect the electrical harnesses and the ground connections.
6. Install the HVAC module drain hose.
7. Install the instrument panel carrier.
8. Install the accumulator.
9. Install the surge tank outlet hose to the heater core.
-
Firmly push the quick connect onto the heater core pipe until you hear an audible click.
10. Install the inlet heater hose to the heater core.
-
Firmly push the quick connect onto the heater core pipe until you hear an audible click.
11. Fill the engine coolant.