Yukon/Denali 4WD V8-4.8L VIN V (2005)

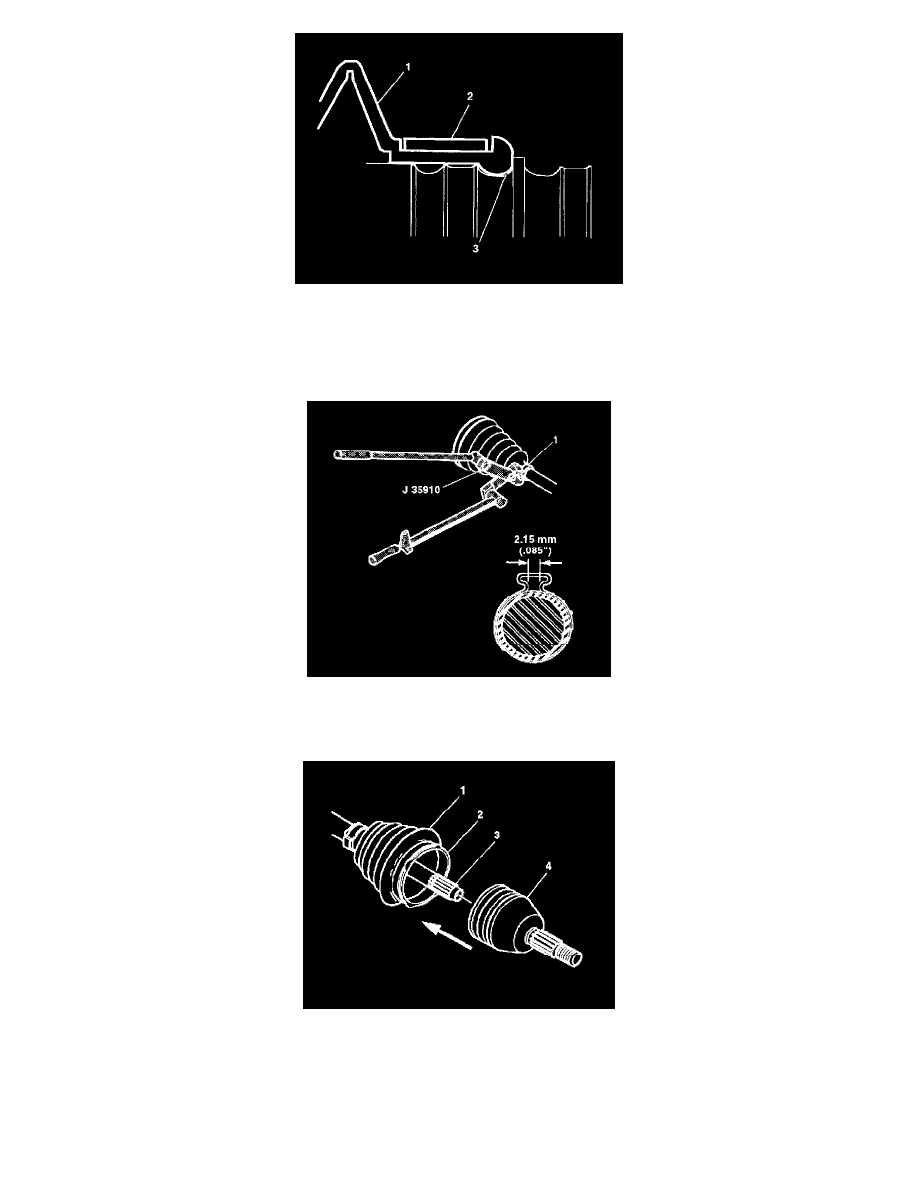
12. Pack the CV joint boot (1) and the CV joint assembly with the grease supplied in the kit. The amount of grease supplied in this kit has been
pre-measured for this application.
13. Place the new small boot clamp (2) onto the CV joint seal (1).
14. Slide the CV joint boot (1) onto the halfshaft bar.
15. Position the small end of the CV joint boot (1) into the joint boot groove (3) on the halfshaft bar.
16. Secure the small boot clamp (1) using J35910 (or equivalent), a breaker bar, and a torque wrench.
^
Tighten the small clamp (1) to 136 Nm (100 ft. lbs.).
17. Check the gap dimension on the clamp ear. Continue tightening until the gap dimension is reached.
18. Pinch the new swage ring (2) slightly by hand to distort it into an oval shape.
19. Slide the distorted swage ring (2) over the large diameter of the boot (1).
Important: Be sure that the retaining ring side of the CV joint inner race faces the halfshaft bar (3) before installation.
Slide the CV joint (4) onto the halfshaft bar (3). The retaining snap ring inside of the inner race engages in the halfshaft bar groove with a click
when the CV joint (4) is in the proper position.
