Yukon/Denali XL 1500 4WD V8-6.0L VIN U (2004)

Hydraulic Control Assembly - Antilock Brakes: Service and Repair
Pre-Charge Pump
Brake Pressure Modulator Valve Pre-Charge Pump Replacement
Removal Procedure
Caution: Refer to Brake Fluid Irritant in Service Precautions.
Notice: Refer to Brake Fluid Effects on Paint and Electrical Components in Service Precautions.
1. Disconnect the negative battery cable. Refer to Battery Negative Cable Disconnect/Connect Procedure in Starting and Charging.
Notice: Refer to Brake Fluid Effects on Paint and Electrical Components in Service Precautions.
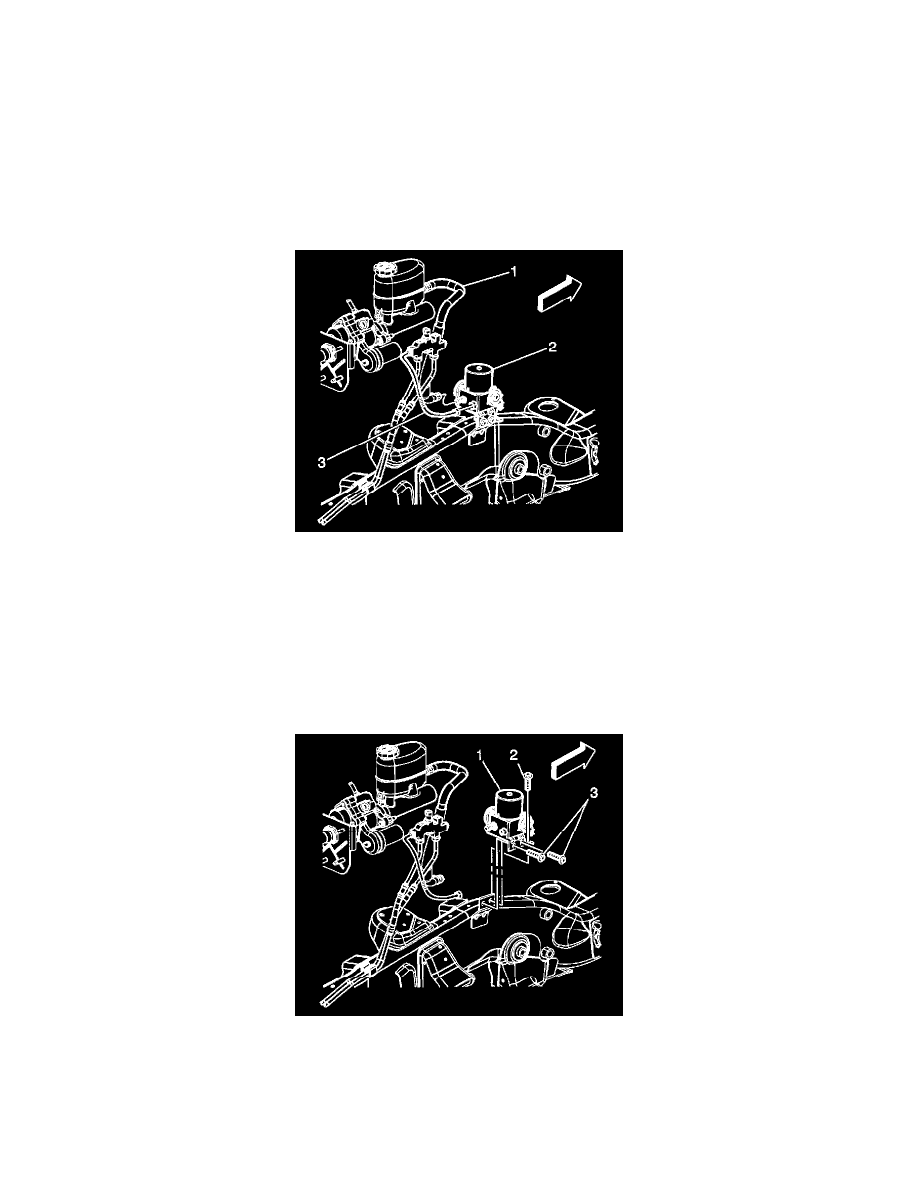
2. Crimp the inlet hose (1) from the master cylinder to the Pre-Charge Pump (PCP) (2) to prevent fluid from leaking out and draining the master
cylinder reservoir.
Important: The area around the pre-charge pump MUST be free from loose dirt to prevent contamination of disassembled ABS components.
3. Remove the inlet hose clamp from the PCP assembly inlet port.
4. Remove the inlet hose (1) from the PCP assembly inlet port.
5. Loosen and remove the brake fluid outlet pipe (3). Cap or plug the brake pipe to prevent contamination and brake fluid lose.
6. Disconnect the PCP electrical connector from the vehicle connector harness.
7. Remove the PCP electrical connector from the mounting bracket.
8. Remove the PCP mounting bracket front bolt (2) and mounting bracket side bolts (3).
9. Remove the PCP assembly (1) from the vehicle.
Installation Procedure
