
Yukon/Denali XL 1500 4WD V8-6.0L VIN U (2004)
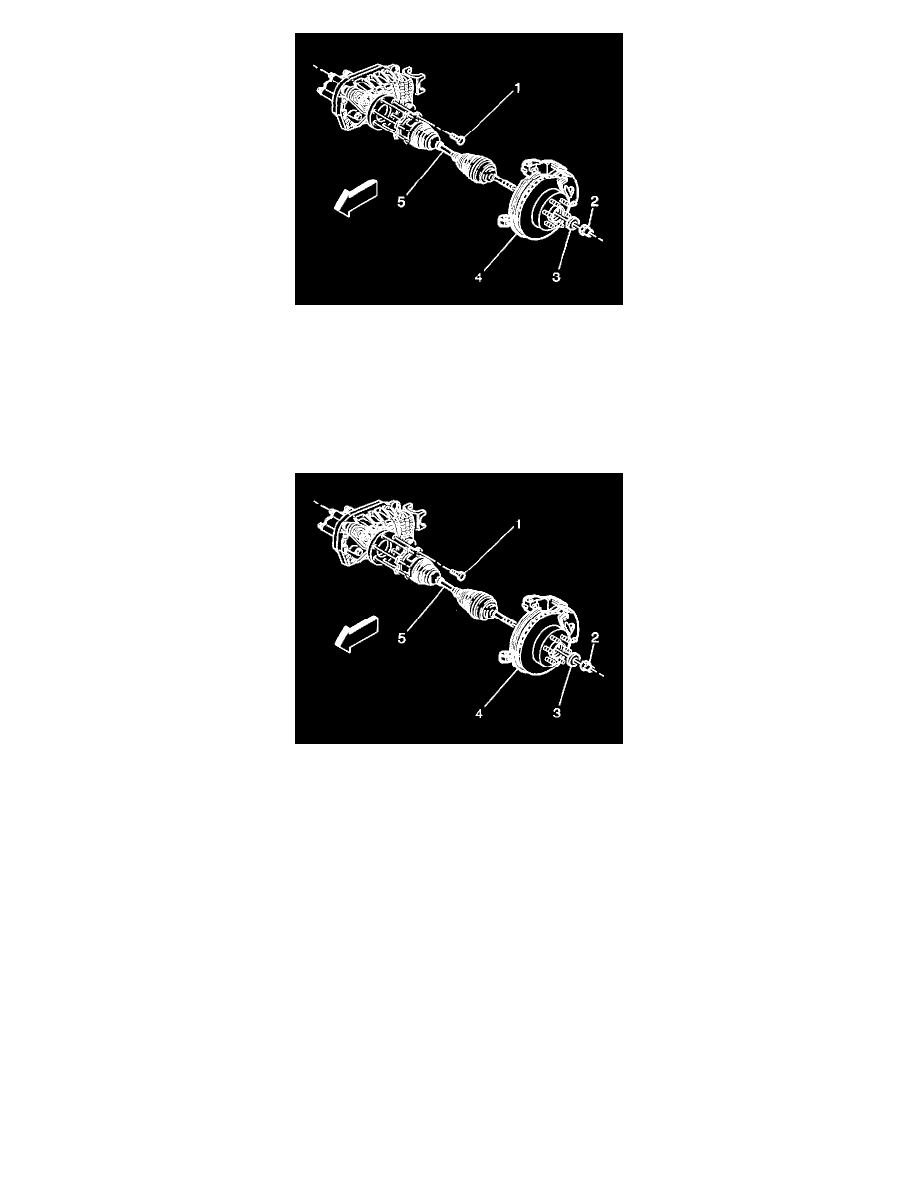
7. Remove the 6 bolts (1) securing the wheel drive shaft inboard flange to the output shaft flange.
8. Remove the drift from the rotor.
9. Remove the stabilizer shaft link from the lower control arm. Refer to Stabilizer Shaft Replacement in Front Suspension.
10. Wrap shop towels around both the inner and the outer wheel drive shaft boots in order to avoid damage to the boots during removal and
installation.
11. Pull the wheel drive shaft through the lower control arm opening.
Installation Procedure
1. Wrap shop towels around both the inner and the outer wheel drive shaft boots in order to avoid damage to the boots during removal and
installation.
Important: Clean the steering knuckle and the wheel drive shaft splines and threads. These areas must be dry and free of grease, dirt, and
contamination.
2. Insert the wheel drive shaft splined shank into the knuckle hub.
Notice: Use only a genuine GM front wheel drive shaft nut. Installation of anything but an OEM front wheel drive shaft nut could cause damage
to the vehicle.
3. Install the washer (3) and the new hub nut (2) to the wheel drive shaft.
Do not tighten the new hub nut at this time.
4. Attach the wheel drive shaft inboard flange to the output shaft flange using the inboard flange bolts (1).