
Yukon V8-393 6.5L DSL Turbo (1993)
Crankshaft Main Bearing Seal: Service and Repair
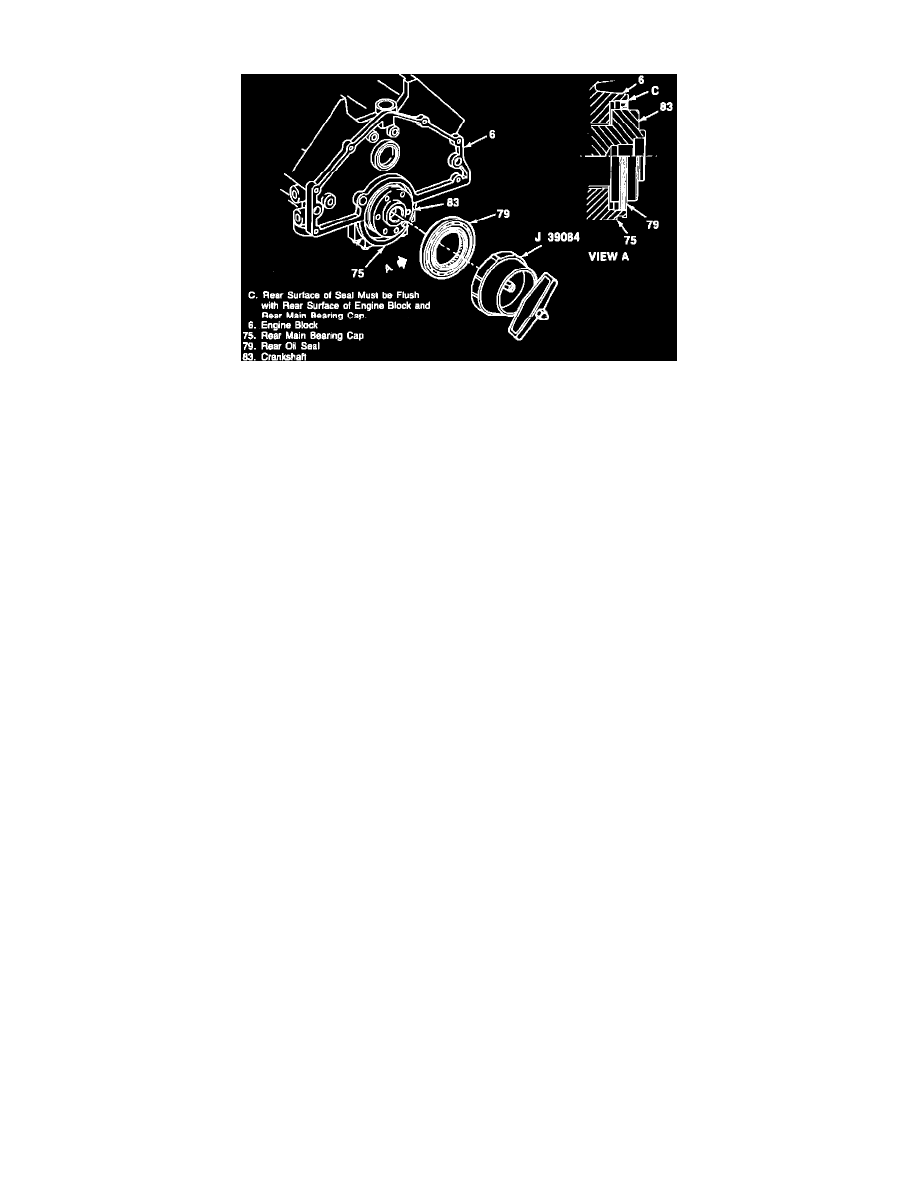
Fig. 20 One Piece Rear Main Oil Seal Installation
SPECIAL TOOL REQUIRED (or equivalent)
-
J-39084, Rear main seal installer.
REMOVE OR DISCONNECT
1. Transmission and flywheel assembly.
2. Carefully remove rear oil seal with an oil seal removal tool.
3. Clean oil seal bore in block thoroughly.
4. Inspect rear portion of crankshaft sealing surface for wear due to rubbing action of seal or dirt build-up. Correct as necessary.
NOTE: Because of rear crankshaft wear or grooving, the service seal will be positioned flush with the rear block face. The position of the new
seal will be controlled by the installation tool J-39084. The reason for the positioning of the seal in a new location is to provide a new surface for
the oil seal to ride on.
INSTALL OR CONNECT
1. Coat crankshaft sealing surface and new seal lip surface with engine oil or grease. Do NOT scratch or nick the sealing edge of the oil seal.
2. Oil seal onto crankshaft with spring cavity towards engine.
3. Using seal installation tool J-39084 or equivalent, drive seal in until it bottoms against engine block and rear main bearing cap, (figure 20).
4. Flywheel and transmission assembly.