
Yukon 4WD V8-5.3L (2008)
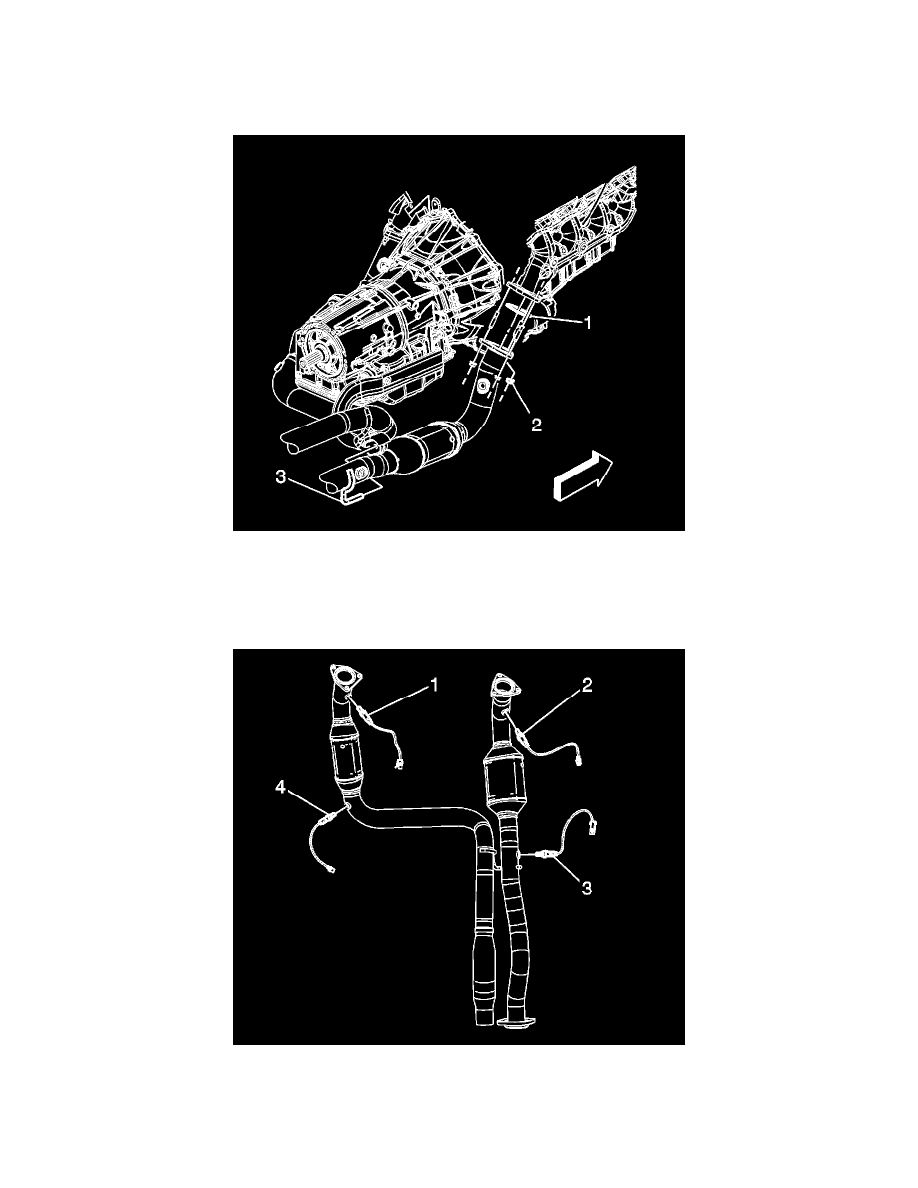
5. Remove the right front connector position assurance (CPA) retainer (5).
6. Disconnect the right front heated oxygen sensor (HO2S) electrical connector from the engine wiring harness electrical connector (1).
7. Remove the right rear CPA retainer (3).
8. Disconnect the engine wiring harness electrical connector (2) from the right rear HO2S electrical connector.
9. Remove the right rear HO2S electrical connector clip from the engine harness clip (4).
10. Remove the catalytic converter to exhaust manifold nuts (2).
11. Separate the catalytic converter from the exhaust manifold studs.
12. Slide the catalytic converter hanger (3) out from the hanger bracket.
13. If replacing the catalytic converter perform the following steps, otherwise proceed to step 4 in the installation procedure.
14. Remove the exhaust seal (1) as required.
15. Remove the HO2S's (2 and 3).
Installation Procedure
Important: A special anti-seize compound is used on the HO2S threads. The compound consists of liquid graphite and glass beads. The