
Yukon Denali 2WD V8-6.0L Hybrid (2010)
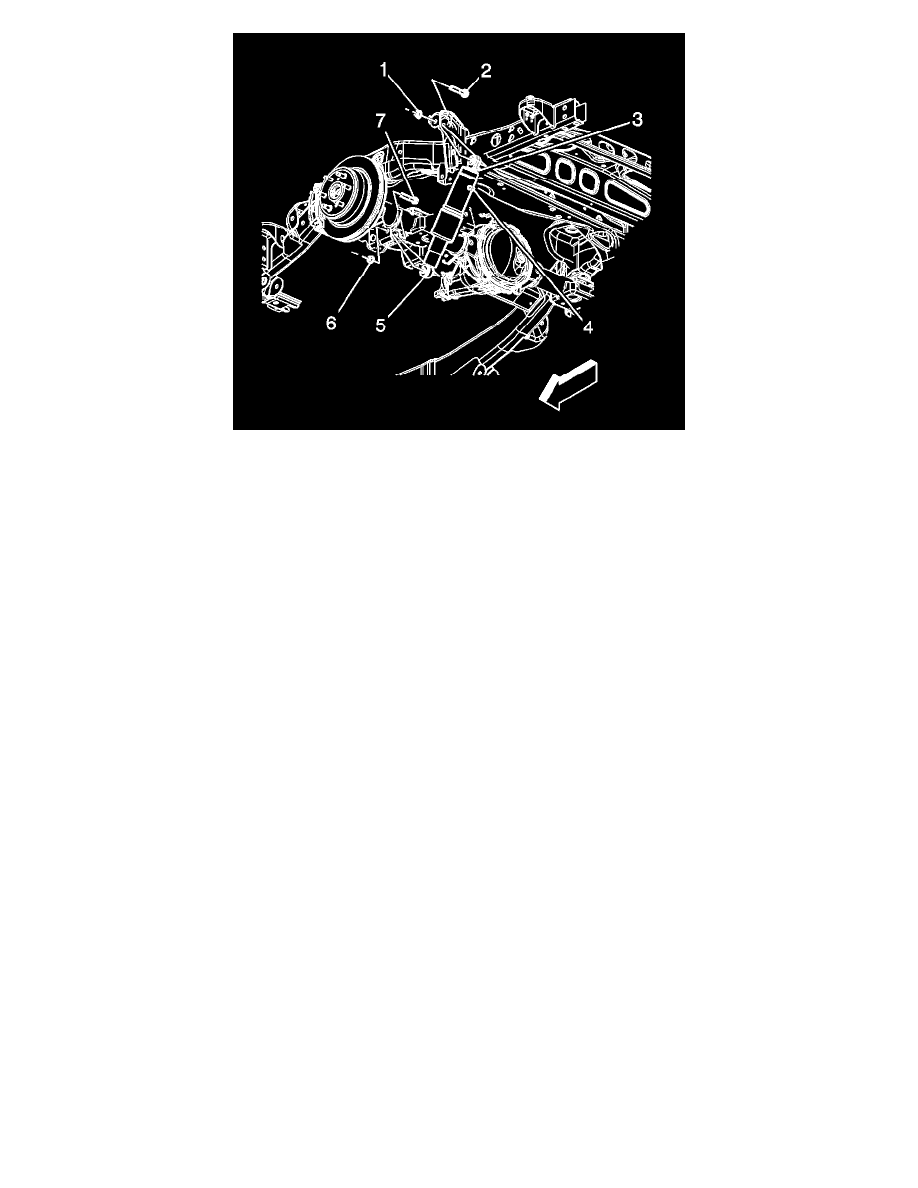
1. Install the shock absorber (5).
2. Install the upper shock absorber nut (1) and the bolt (2).
Caution: Refer to Fastener Caution (See: Service Precautions/Vehicle Damage Warnings/Fastener Caution).
3. Install the lower shock absorber nut (6) and bolt (7).
Tighten the upper and lower shock absorber nuts (1) and (5) to 115 Nm (85 lb ft).
4. Reconnect the electronic suspension control connector, if equipped (3).
5. Reconnect the air line (4), if equipped.
6. Remove the support from the rear axle.
7. Lower the vehicle.
8. If the vehicle is equipped with air leveling, perform the following:
*
Turn the ignition ON, with the engine OFF.
*
Install a scan tool.
*
With the scan tool, operate the air compressor for 30 seconds or until rear of the vehicle begins to rise.
*
Remove the scan tool.
*
Cycle the ignition OFF, then back ON, with the engine ON to allow the air suspension system to regain the desired rear suspension position.
Shock Absorber Replacement (2500)
Shock Absorber Replacement (2500)