
Accord L4-1751cc 1800 EK1 (1982)
Compressor Clutch: Service and Repair
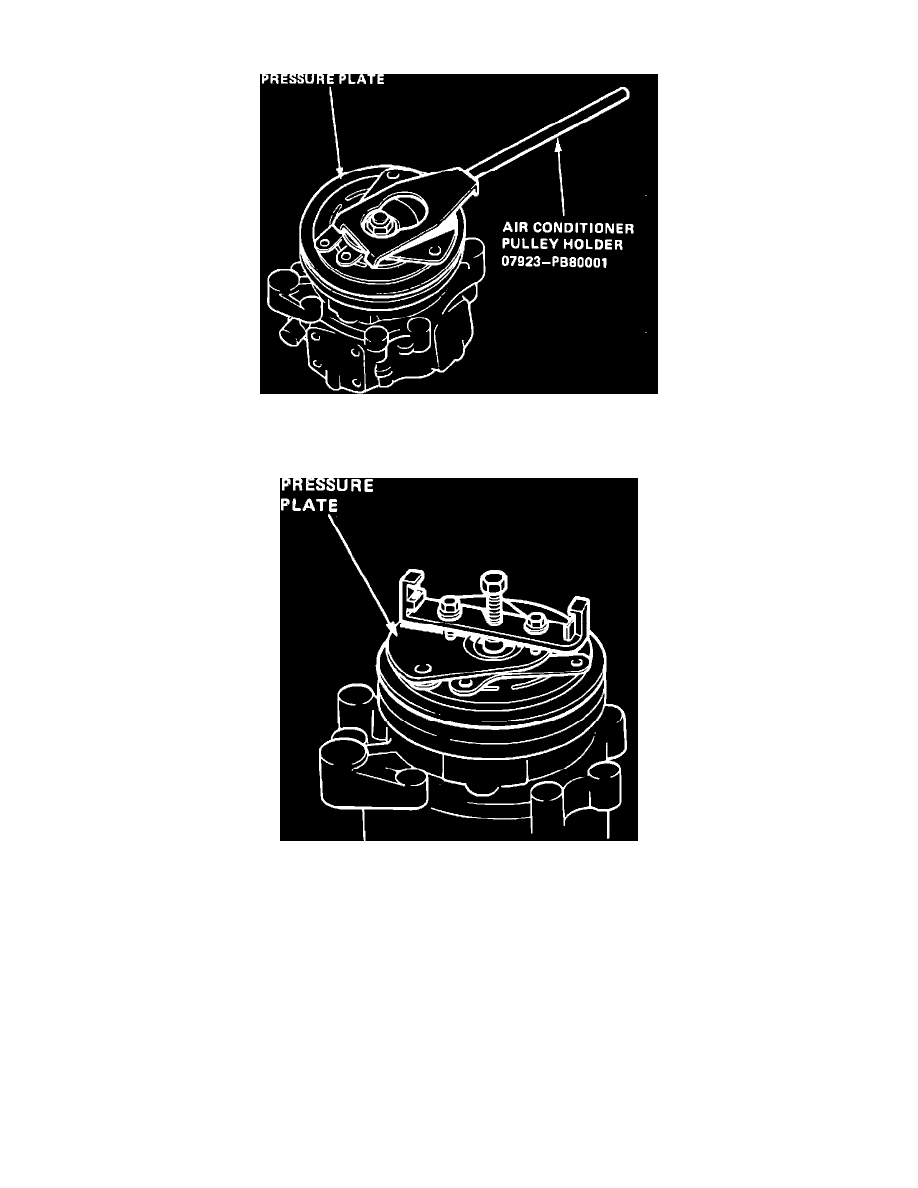
Fig. 1 Center bolt removal
1.
Retain pressure plate using tool No. 07923-PB8000, then remove center bolt, Fig. 1.
Fig. 2 Pressure plate removal
2.
Install clutch remover tool onto pressure plate, then remove pressure plate by screwing in center bolt, Fig. 2.
3.
Clean mating surfaces of pulley and pressure plate in a suitable solvent.
4.
Remove pulley snap ring, then the pulley using a suitable puller.
5.
Remove shims from compressor shaft, then the second snap ring.
6.
Remove clutch coil mounting bolts, then the clutch coil.
7.
Check coil resistance. Coil resistance should be 3 ohms ± .3 ohms at 68° F. If resistance is not as specified, replace coil.
8.
Reverse procedures to assemble, noting the following:
a. Install snap rings with chamfered side facing outward.
b. Torque hub nut to 33 ft. lbs.
c. Measure clearance between pulley and pressure plate. Clearance should be .012-.024 inch. If clearance is not as specified, remove or install
shims as necessary.