
Accord L4-1751cc 1800 EK1 (1982)
EGR Valve: Testing and Inspection
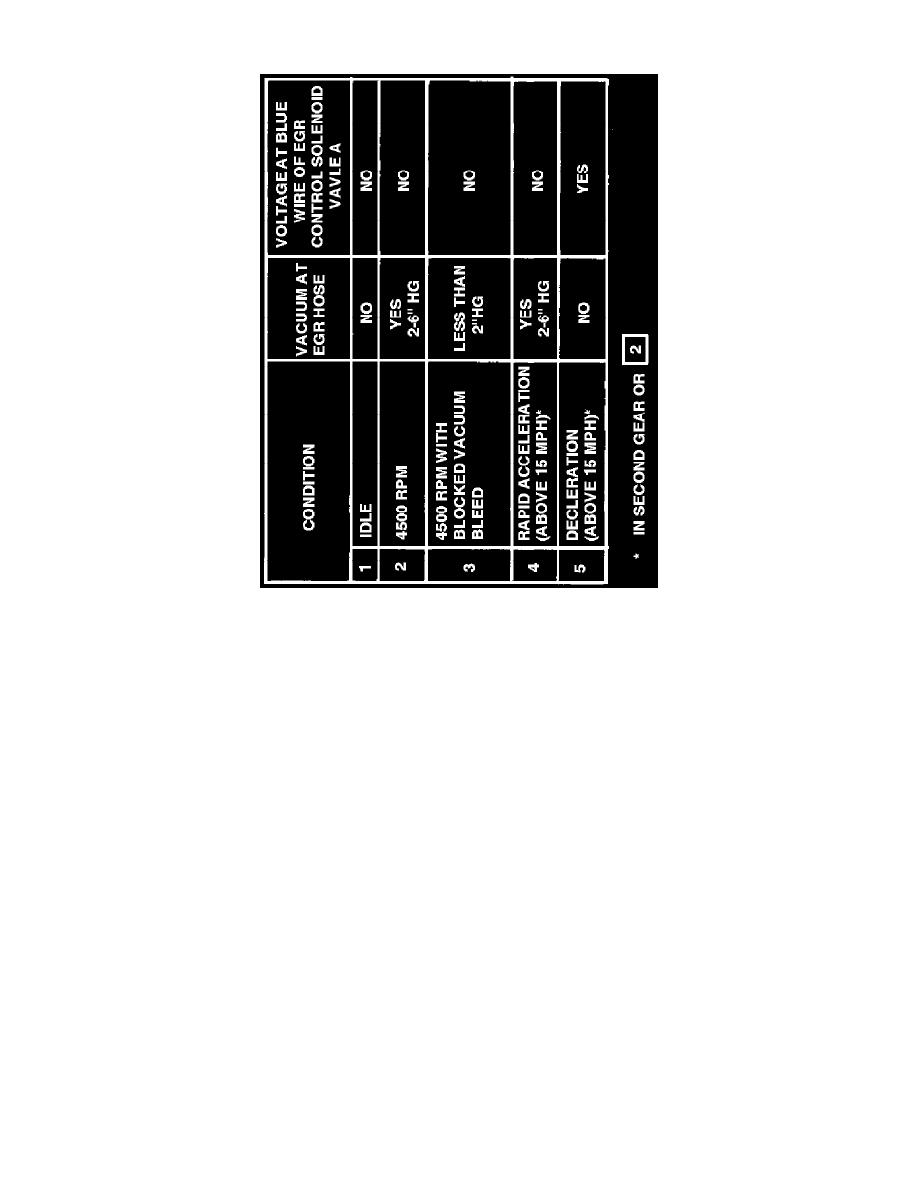
Fig.151 - Vacuum & Voltage Chart
1. Start engine and allow it to idle.
2. Disconnect the vacuum hose from the EGR valve and connect a hand vacuum pump to EGR valve, Fig. 151.
3. Apply 150mm Hg (6 in. Hg) vacuum to EGR valve. Vacuum should remain steady and engine should die. If this occurs the EGR valve is working
properly. Remove hand vacuum pump and reconnect the hose, test is complete.
4. If vacuum does not remain steady and the engine does not die, then replace EGR valve and retest.
5. Should vacuum remain steady but the engine not die, then remove EGR valve and check for blockage, also check manifold for blockage. Clean
and replace as necessary and then repeat test.
NOTE: This completes EGR valve diagnosis except for 1981 Calif. models. For 1981 Accord and Prelude proceed with steps 6-13 and for 1981
Civic proceed with steps 14-28.
6. Check for voltage at EGR control solenoid valve for manual transmission or for automatic transmission.
7. If there is voltage test is complete. Proceed to step 11 for vehicles with automatic transmission.
8. If there is no voltage, disconnect connector from thermosensor and check for continuity with coolant temperature above 149° F.
9. If there is no continuity, replace thermosensor and retest.
10. If there is continuity, check electrical connections.
11. Raise and support front of vehicle, block rear wheels, and apply hand brake.
12. Push voltmeter positive probe into yellow/black wire and connect negative probe to suitable ground.
13. If there is no voltage, check wiring, replace speed sensor as necessary, and retest.
14. If barometer switch has no continuity, jump wires at barometer switch connector.