
Accord L4-1829cc 1.8L SOHC ES, ET FI (1985)
7. Remove the screw in the outside air door diaphragm (leave the diaphragm attached to the air door arm) and the blower mount bolts, then remove
the blower.
8. Remove the left sealing band and disconnect the wire.
9. Remove the three bolts and remove the evaporator.
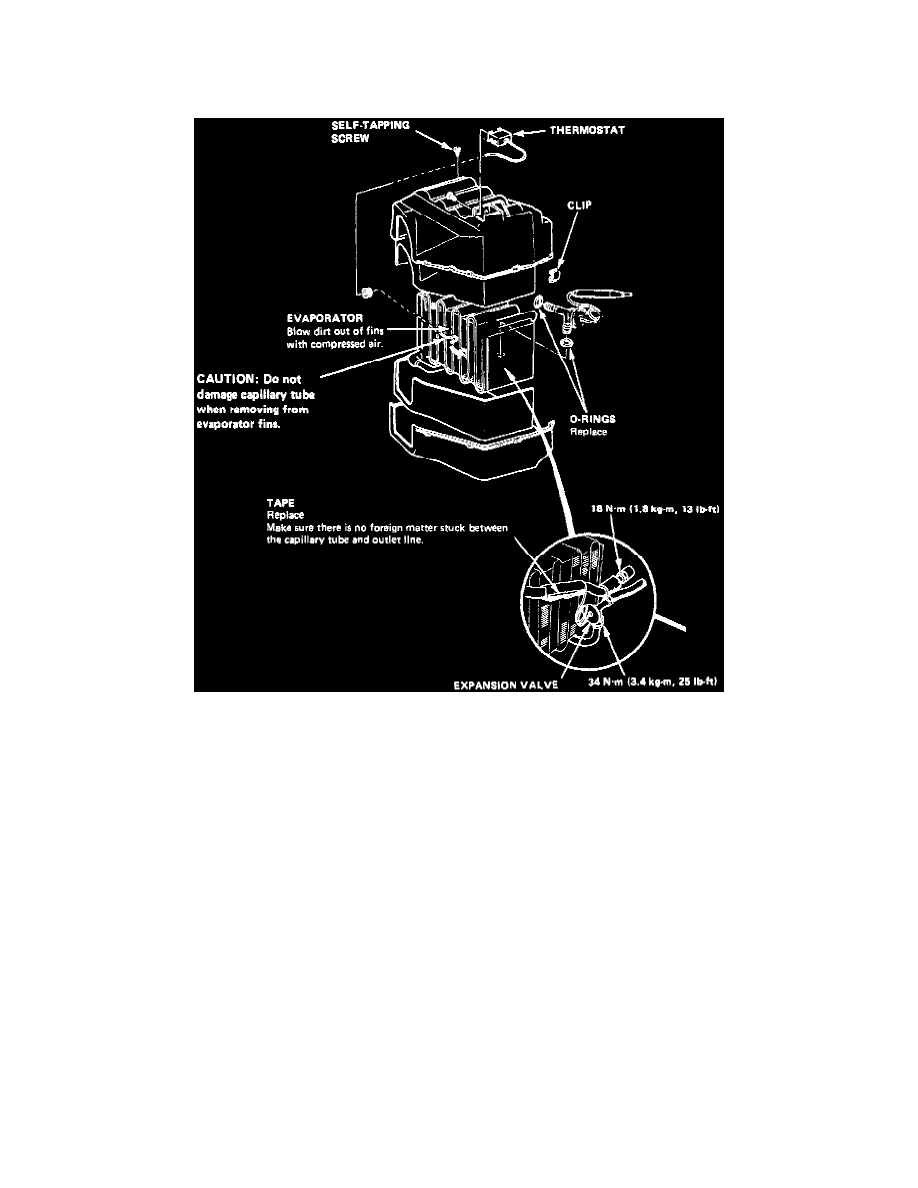
EVAPORATOR HOUSING DISASSEMBLY
1. Remove the self-tapping screw and clip from the housing.
2. Carefully separate the housings as required to obtain access to the capillary tube in the housing.
3. Pull out the capillary tube of the thermostat from the evaporator fins.
4. Separate the housings and remove the evaporator cover.
5. Remove the expansion valve if necessary.
6. Assemble the evaporator in the reverse order of disassembly, and;
-
Install the expansion cover capillary tube against the suction line, and wrap it with tape. Reinstall the thermostat capillary tube in its original
location.
-
Reassemble the upper and lower housings with clips, make sure there are no gaps between them.
EVAPORATOR INSTALLATION
1. Install the evaporator in the reverse order of removal.
-
If a new evaporator, add 30 cc of refrigerant oil to it before charging.
-
Remember to install the left sealing band and tighten the right band securely to prevent air leaking past the joint.
-
Apply sealant to the inside and outside mating surfaces of the receiver line and suction hose grommets.
-
Charge the system.
-
Test performance.