
Accord L4-1955cc 2.0L SOHC 2-bbl (1986)
Timing Belt: Service and Repair
1.
If necessary, loosen alternator and remove alternator drive belt.
2.
Remove valve cover.
3.
Remove upper timing belt cover.
4.
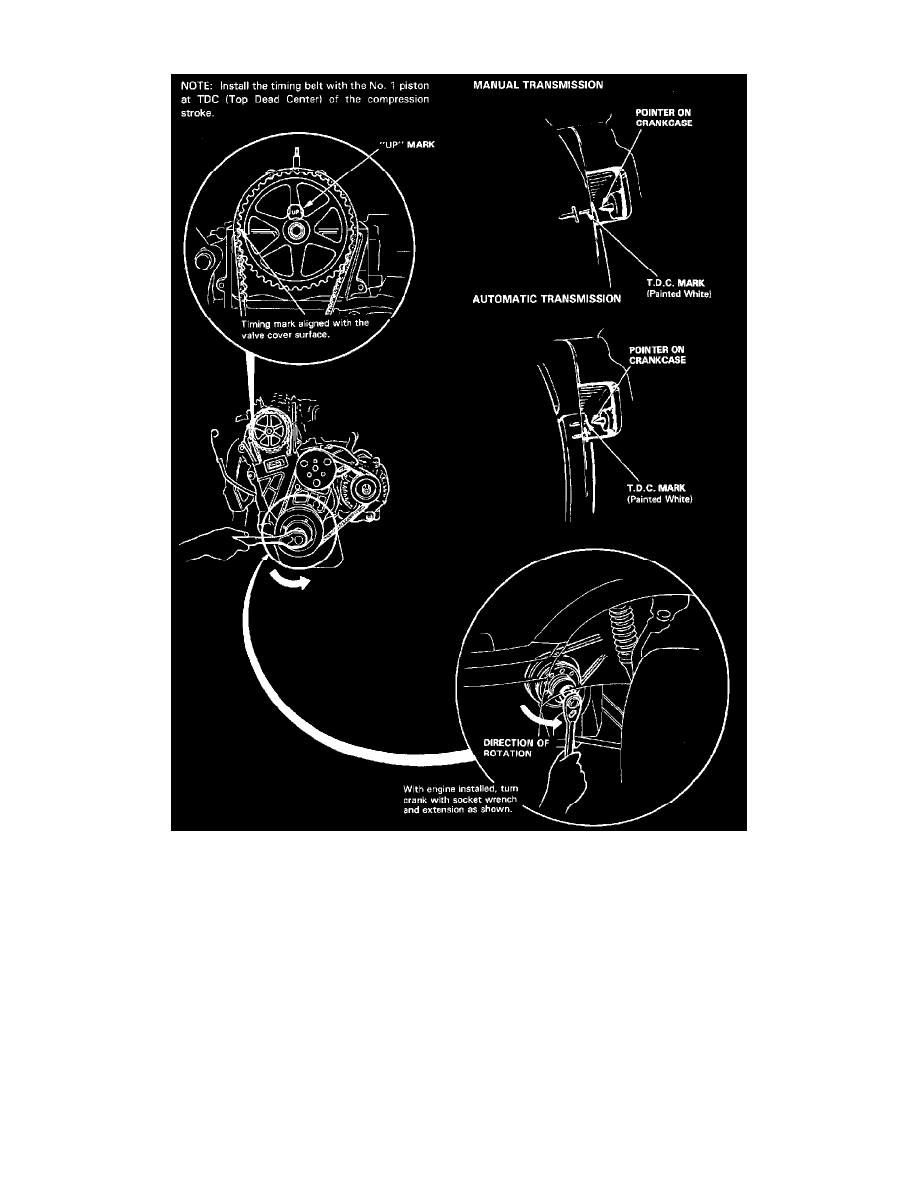
Rotate crankshaft until No. 1 cylinder is at TDC (top dead center) compression stroke, then align camshaft sprocket timing marks as shown.
Crankshaft may be rotated with engine installed in vehicle using a socket wrench inserted through access hole in the front of left fender well.
5.
Working through lower belt cover, loosen belt tensioner adjuster and adjustment bolt. Do not remove adjustment bolt.
6.
Draw the timing belt carefully off the driven or camshaft sprocket.
7.
Remove driven gear from camshaft by loosening attaching bolt. Be careful not to lose the special washer and key.
8.
Remove crankshaft pulley from crankshaft end by loosening the attaching bolt. Be careful not to lose the key. On some models with external
mount water pump pulley, it may be necessary to remove the water pump pulley prior to removing the lower cover.